ARKit Demo: Augmented Reality Movie Making
Augmented reality and virtual reality are becoming mainstream and easily available.
In this article, Toptal Freelance iOS Developer Altaibayar Tseveenbayar showcases a demo app for adding virtual objects to a video feed using ARKit.

Augmented reality and virtual reality are becoming mainstream and easily available.
In this article, Toptal Freelance iOS Developer Altaibayar Tseveenbayar showcases a demo app for adding virtual objects to a video feed using ARKit.

With a master’s degree in AI and 6+ years of professional experience, Altaibayar does full-stack and mobile development with a focus on AR.
PREVIOUSLY AT

AR and VR are becoming mainstream, and all top major high-tech companies are pursuing them: Apple has ARKit, Google has ARCore and Microsoft has their own HoloLens (and then, of course, there is Unity). And with a few applications receiving a lot of public attention, Augmented reality app development is becoming a very desirable skill for mobile developers.
In this article, I’d like to demonstrate a simple, but meaningful, little app that will do more than merely have a rotating cube. Who needs rotating cubes anyway? Let’s make The Matrix.
Introduction to ARKit
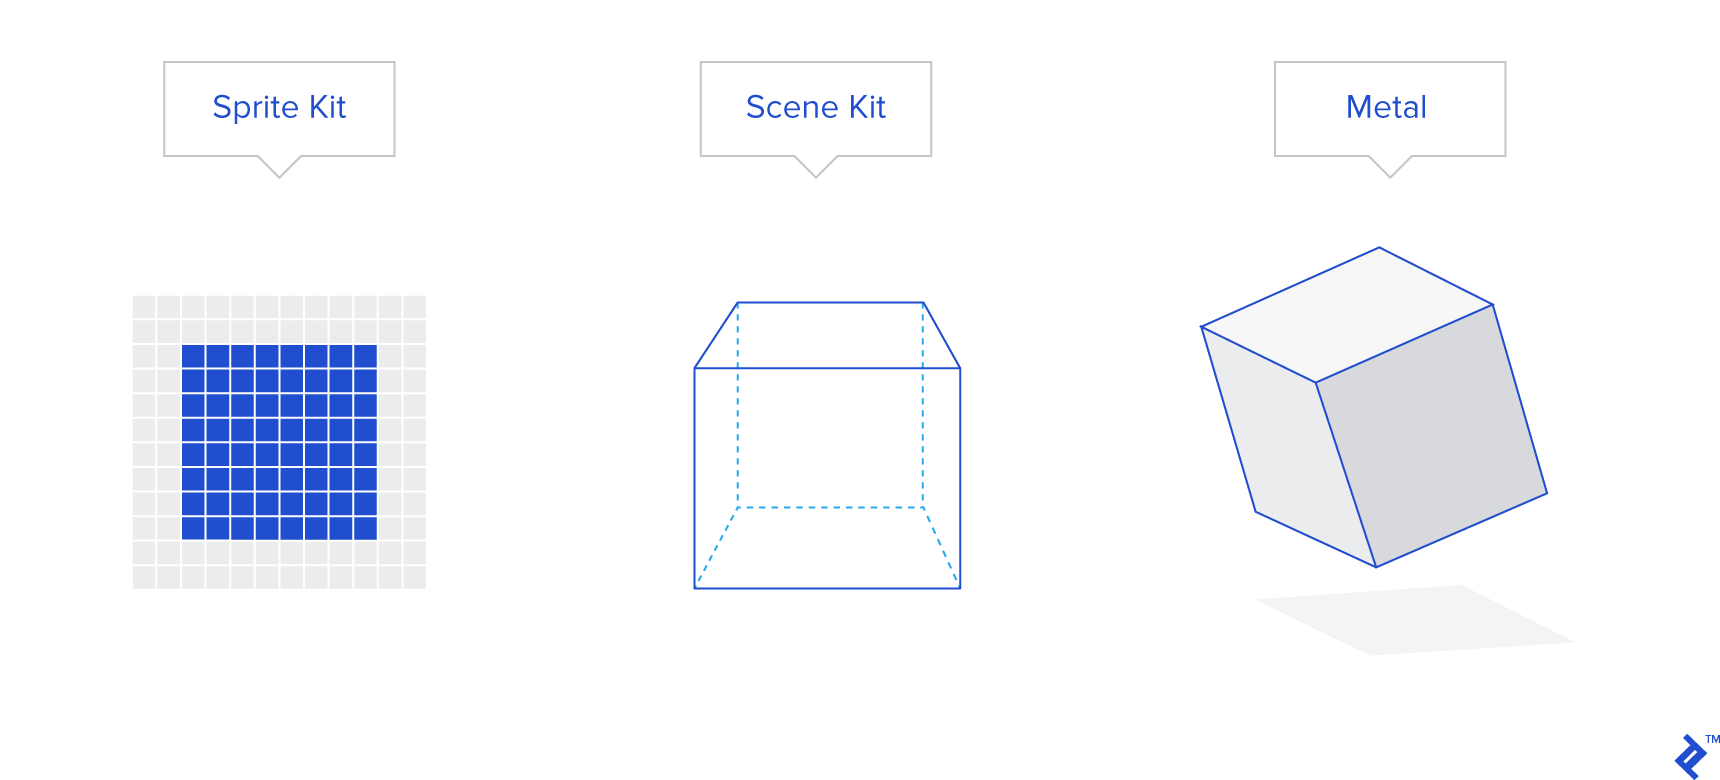
ARKit is an Apple framework for creating AR apps for iOS devices. Several renderers can be used with it: SpriteKit for 2D objects, SceneKit for 3D, and Metal if we want to implement a custom renderer.
For this demo, we’ll be using SceneKit to render and place fully rendered 3D objects (knives).
From ARKit v2, five types of configuration are supported in ARKit:
AROrientationTrackingConfiguration – When you want to track only the orientation of the device (e.g., for a star constellation application). With this configuration, physical movements like side-stepping are not tracked and will not affect the position or the direction of the objects on the scene.
ARWorldTrackingConfiguration – This is probably the most often used configuration for AR since it supports what most of the people would consider augmented reality. Examples include virtual pet or Pokémon hunting applications.
ARFaceTrackingConfiguration – This configuration is currently supported only by iPhone X because it requires a TrueDepth camera (like Face ID). This configuration tracks features on the face and its relative offset from neutral facial expression (e.g., an application where users can try fashion sunglasses before they order it).
ARImageTrackingConfiguration – If you have a set of markers and want to show animals jumping out of the marker, then this configuration is right for you. These don’t have to be card-like markers, but any 2D picture. You could point your camera at the Mona Lisa, and she would turn her head and tell you something. A disadvantage is that you have to say in advance what the physical size of the image marker is.
ARObjectScanningConfiguration – This configuration is the 3D version of ARImageTrackingConfiguration.
In this demo, we’ll be adding knives and bullets to the scene, and we would like to have six degrees of freedom, so the appropriate tool is ARWorldTrackingConfiguration.
The App Concept
Everyone who has seen The Matrix can recall Neo (Keanu Reeves) dodging bullets and stopping them in mid-air. Our application will help us recreate this scene from a live camera feed. Thus, we can create custom videos demonstrating Neo-like powers.
Our app will have 3D models of bullets and knives. It is up to the user how many bullets or knives they want in their movie. If you’d like to spend some time and add other models, the app code is open sourced and it is available on GitHub (https://github.com/altaibayar/toptal_ar_video_maker). While this is not a full AR tutorial, the demo and the source should be a valuable resource if you’re trying to get into AR App development on iOS.
The intended use case scenario is as follows:
- have a friend dress up as Neo (Not strictly necessary for the functioning of the application, but might as well look good while we’re doing this).
- Ask “Neo” to stand some 10 meters (30ish feet) from you.
- Start the application and scan the ground plane.
- Add bullets and knives flying at “Neo.”
- Hold the record button to record the video while “Neo” performs some cool moves dodging or stopping the bullets
- release the record button and save the video to your library.
Building the App
As mentioned before, we want to be able to move freely while recording all 360º of the scene and have the bullets and knives track camera motion appropriately.
For demonstration purposes, we’ll have only two types of virtual objects: knives and shotgun bullets.
Knives are detailed objects and I’ll be using the free model from https://poly.google.com/view/3TnnfzKfHrq (Thanks Andrew).
Shotgun bullets, however, are simple spherical objects and we can simply code them in. We’ll make them metallic and red-hot for variety. Since we’re emulating a shotgun, we’ll also generate them as grouped clusters. To make the clustering make sense without too much hassle, we can use the Gaussian random number generator from the GamplayKit.
GameplayKit is a useful tool that comes in handy whenever you need random noise generation, state machine, AI, or probability-based decision-making.
override init() {
    super.init();

// generate 50 gaussian distributed position around [0, 0, 0]
        let positions = Randomness.gaussian(center: SCNVector3Zero, count: 50);
        for pos in positions {
            let node = SCNNode(geometry: sphereGeometry());
            node.position =  pos;
            self.addChildNode(node);
        }
}

private func sphereGeometry() -> SCNGeometry {
// radius of one projectile sphere is 5mm/0.2inch
        let sphere = SCNSphere(radius: 0.005);
        // sphere is reddish
        sphere.firstMaterial?.diffuse.contents = UIColor.red;
        // reflection on light is gray/silver
        sphere.firstMaterial?.reflective.contents = UIColor.gray;
        // metalness is 0.3
        sphere.firstMaterial?.metalness.contents = 0.3;
        // shading should be realistic
        sphere.firstMaterial?.lightingModel = .physicallyBased;

        return sphere;
}
Similar random offset logic can be used for the knives, but since they don’t behave as clusters, a simple random distribution can be used.
App Architecture
It is beyond the scope of this demo to delve into discussions of which architecture paradigm is the best. There are many articles out there that delve into that topic.
Instead, I’ll just lay out the structure of the project as a guide to finding your way around the linked GitHub project: what the main components are, how they are connected, and why they were chosen.
The application has only three screens:
PermissionViewController – The screen where we ask the user to grant the application access to the required mobile features.
- Camera – Obviously
- Gallery – To save recorded video and microphone input
- Microphone – Permission is required by a library I am using to create the video (by default, sound from microphone would be used as a source of an audio track).
ExportViewController – This screen shows a recorded video and offers the options to share or save the video.
MainViewController – All the magic happens here.
From my experience, it is best to you wrap all necessary ARKit classes like ARSession, ARConfiguration, and all unique types of SCNNode. That way, the code is self-explanatory.
ARSession is inherited into ToptalARSession, and the new session class only has three methods: the class constructor where we set up everything that is required and the resetTracking and pauseTracking methods.
The application recognizes four unique types of SCNNodes:
- KnifeNode – Represents a knife 3D object, and automatically loads a 3D knife as its geometry.
-
BulletsNode – This node represents a set of shotgun shells. Random Gaussian noise, colors, and physical lighting mode are set up automatically.
No special or additional work is required in the classes that use KnifeNode or BulletsNode, and they can be used as templates for customizing the application to add more kinds of 3D objects.
- ReticleNode – Wraps a 3D model which appears in the scene above the floor to show where knives or bullets will be added.
- DirectionalLightNode – This is a node representing a vertical light pointing down.
References and Credits
Knife model: https://poly.google.com/view/3TnnfzKfHrq
Recording from SCNScene: https://github.com/svtek/SceneKitVideoRecorder
Button icons, ARKit demo application: https://developer.apple.com/documentation/arkit/handling_3d_interaction_and_ui_controls_in_augmented_reality
Understanding the basics
What is ARKit?
ARKit is an Apple framework for creating augmented reality apps for iOS devices.
What is SceneKit?
SceneKit is a framework for developing 3D graphics in an Apple environment. It serves as an abstract interface towards lower-level APIs such as renderers.
About the author
With a master’s degree in AI and 6+ years of professional experience, Altaibayar does full-stack and mobile development with a focus on AR.
PREVIOUSLY AT