
Create a Simple CRUD App Using Node.js and JSON Files
When building a small web app or just testing out an API that needs to perform CRUD operations, using a database like Mongo or MySQL can be excessive. In this tutorial, we will learn how to create CRUD operations using only JSON files.

When building a small web app or just testing out an API that needs to perform CRUD operations, using a database like Mongo or MySQL can be excessive. In this tutorial, we will learn how to create CRUD operations using only JSON files.

Uma Victor
Uma is a software developer based in Nigeria who is familiar with a variety of different web technologies and frameworks. He is also keen on finding ways to explain things as simply as possible.
When building a small web app or just testing out an API that needs to perform CRUD operations, using a database like Mongo or MySQL can be excessive. In this tutorial, we will learn how to create CRUD operations using only JSON files.
Goals
In this tutorial, we will learn how to serve and edit data from a JSON file, and how to post and save data to it. All that is needed to follow along with this tutorial is a little knowledge of Node.js development.
Overview
We’ll go straight to creating and setting up our server and all the endpoints we need. We’ll then build all our routes and test the app by creating new accounts and performing CRUD operations.
Prerequisite
A little bit of JavaScript knowledge and familiarity with Node.js will suffice.
Kickstarting Our Project
First, we’ll create a folder named after the project and initialize the package.json file to contain information about our project and all the dependencies we’ll need.
mkdir crud-operation-with-jsonfile
cd crud-operation-with-jsonfile
npm init -y
code .
There are some dependencies that are necessary for building this project, including:
- Express: A Node.js framework for easily performing HTTP requests and creating APIs.
npm install express
- Nodemon: A helpful package that will automatically restart your server once there is any file change.
npm install nodemon
- body-parser: A body parsing middleware used for parsing and processing data from the body sent to our Express server.
npm install body-parser
Setting Up the Server
Now that we have everything we need to start building, we have created an app.js file at the root of our project folder. This is where we’ll begin building our server.
Note: Set app.js as the project entry file in package.json, and configure nodemon to target it and automatically restart the server when there’s a change.
 "main": "app.js",
  "scripts": {
    "start": "nodemon app.js"
  },
In the app.js file, we require Express, body-parser, and Node.js’s built-in file system (fs) module to serve our JSON file.
const express = require("express")
const bodyParser = require("body-parser")
const fs = require('fs');
// create our express app
const app = express()
// middleware
app.use(bodyParser.json())
app.use(bodyParser.urlencoded({ extended: true }));
// route
const routes = require('./routes/Routes')
app.use('/', routes)
//start server
app.listen(3000, ()=>{
    console.log("listeniing at port:3000")
})
There are a few things going on in the app.js file above:
- We created and initialized our Express application.
- We set up body-parser to handle JSON data sent to the Express API we created.
- We imported the file that we use for all our routing operations.
- We started our server and listened for requests on port 3000.
If we try running this app.js file, we will run into an error because we haven’t set up our routes. That is exactly what we’ll do next.
Setting Up Our Routes
We want the first route we create in this application to be the account route. To do this, we create a route folder at the root of the directory, and in this directory, we create a Route.js file. Back in our app.js file above, we can see that we have already imported the route. All our requests will now be prepended with / now that we have created the routes.
In the Route.js file, we require Express and the fs module again and define our Express router. We also make sure to export the router.
// Route.js
const express = require("express")
const router = express.Router();
const fs = require('fs');


module.exports = router;
Account Route
Create a details folder at the root of the application and add an account.json file, which is a JSON file containing user account details.
{
    "1465": {
        "username": "madfinger11",
        "email": "maddy@gmail.com",
        "password": "yddam5342"
    },
    "2646": {
        "username": "yemiakin",
        "email": "emiakiy@gmail.com",
        "password": "iy@g65"
    },
    "3253": {
        "username": "ikechifortune",
        "email": "echifo@gmail.com",
        "password": "ifo#mf23"
    }
}
Now that our JSON data is available, let us begin performing the CRUD operations.
In the same Route folder, we create an account.js file that serves as our account route. This is the route where we perform our CRUD operations. We define our router with the accountRoutes variable, and we export the route.
// account.js
const express = require("express")
const accountRoutes = express.Router();
const fs = require('fs');

module.exports = accountRoutes
For our server to know this route exists, we have to import it into the main Route.js file and use it.
// Route.js file
const express = require("express")
const router = express.Router();
const fs = require('fs');
const accountRoutes = require('./account.js') // import account route
router.use(accountRoutes) // use account route
module.exports = router;
While we perform CRUD operations, we’ll sometimes need to use the file system to read and write data to our JSON file. We can make our code a bit cleaner from the start by declaring util functions at the top of the file with the main purpose of reading and writing from our file system.
For now, all we’ll be doing will take place within the account route.
The two util functions we’ll be reusing are:
- saveAccountData: This function will make use of the writeFileSync method to read our account data in the JSON file.
- getAccountData: This function uses readFileSync to retrieve the account data from the JSON file.
const dataPath = './Details/useraccount.json' // path to our JSON file

// util functions
const saveAccountData = (data) => {
    const stringifyData = JSON.stringify(data)
    fs.writeFileSync(dataPath, stringifyData)
}
const getAccountData = () => {
    const jsonData = fs.readFileSync(dataPath)
    return JSON.parse(jsonData)
}
Create an Account
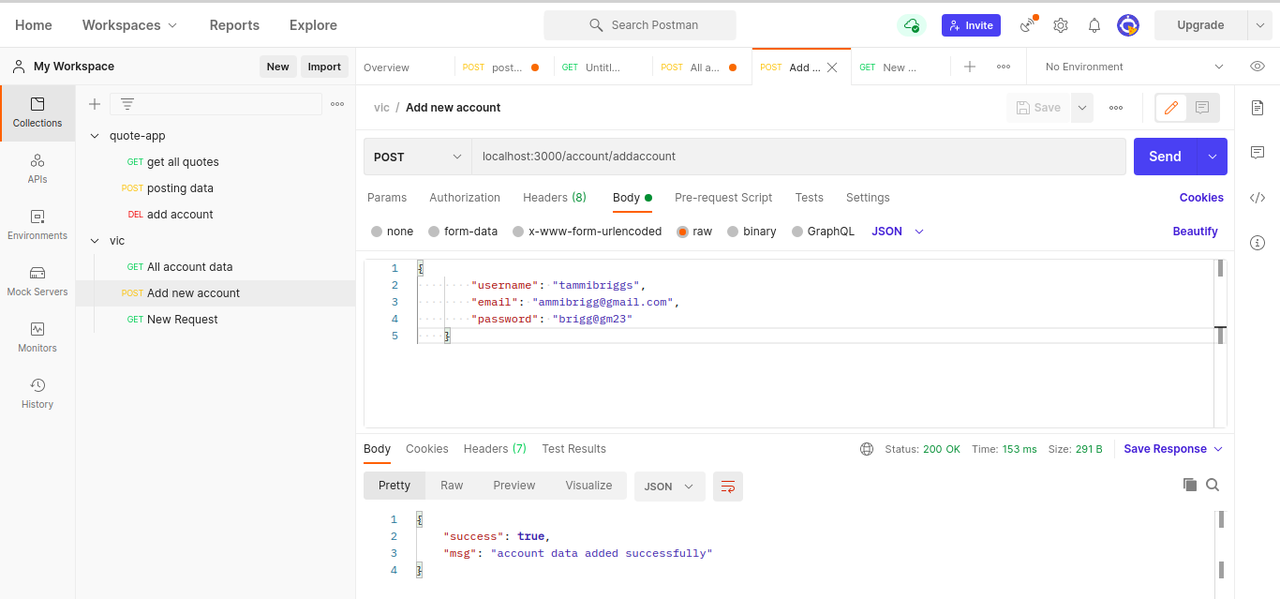
Each account in the JSON database should have a unique ID to easily identify it. We will generate a six-digit number using JavaScript math.random, then assign the six-digit number to a variable newAccountId and set the new ID to whatever we get from our body. Our JSON data is now updated with the latest information on the new account created. We’ll use the saveAccountData util function to write the new data into our JSON file.
Lastly, we’ll send a success message:
accountRoutes.post('/account/addaccount', (req, res) => {

    var existAccounts = getAccountData()
    const newAccountId = Math.floor(100000 + Math.random() * 900000)

    existAccounts[newAccountId] = req.body

    console.log(existAccounts);
    saveAccountData(existAccounts);
    res.send({success: true, msg: 'account added successfully'})
})
Reading Data
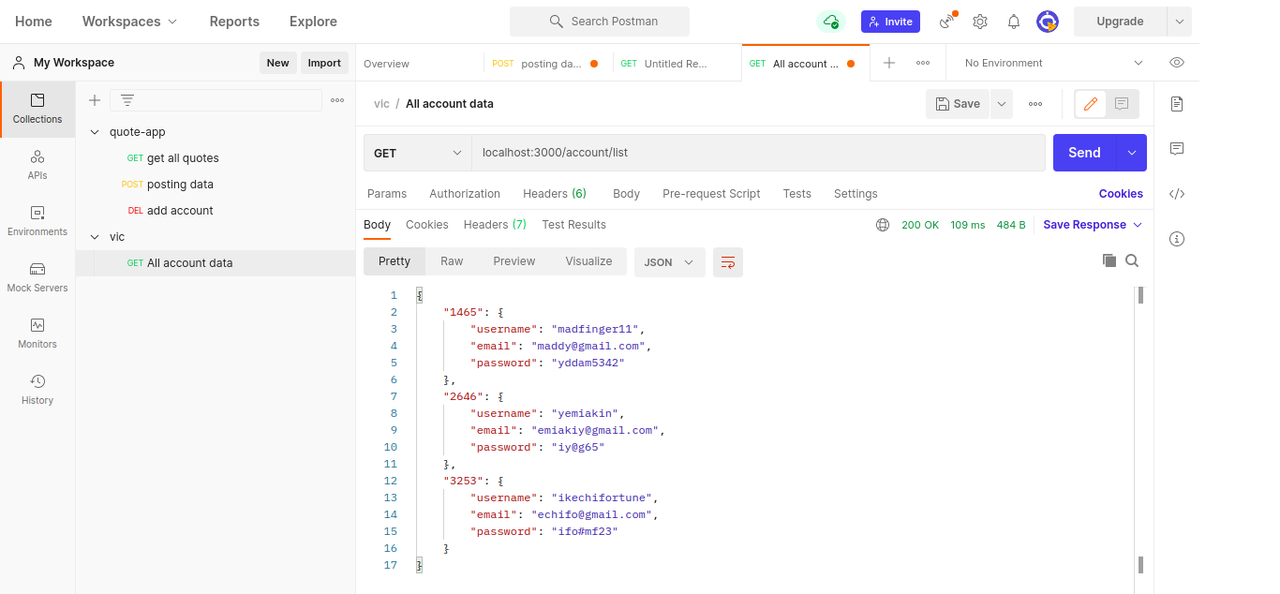
Now that we can create a user, we want to fetch all the available account data from our JSON file and display it. We’ll use the get method to do this.
When we hit the /account/list endpoint, we run the getAccountData util function, store the result in a variable named accounts, and send the JSON data.
// Read - get all accounts from the json file
accountRoutes.get('/account/list', (req, res) => {
  const accounts = getAccountData()
  res.send(accounts)
})
Updating Account Data
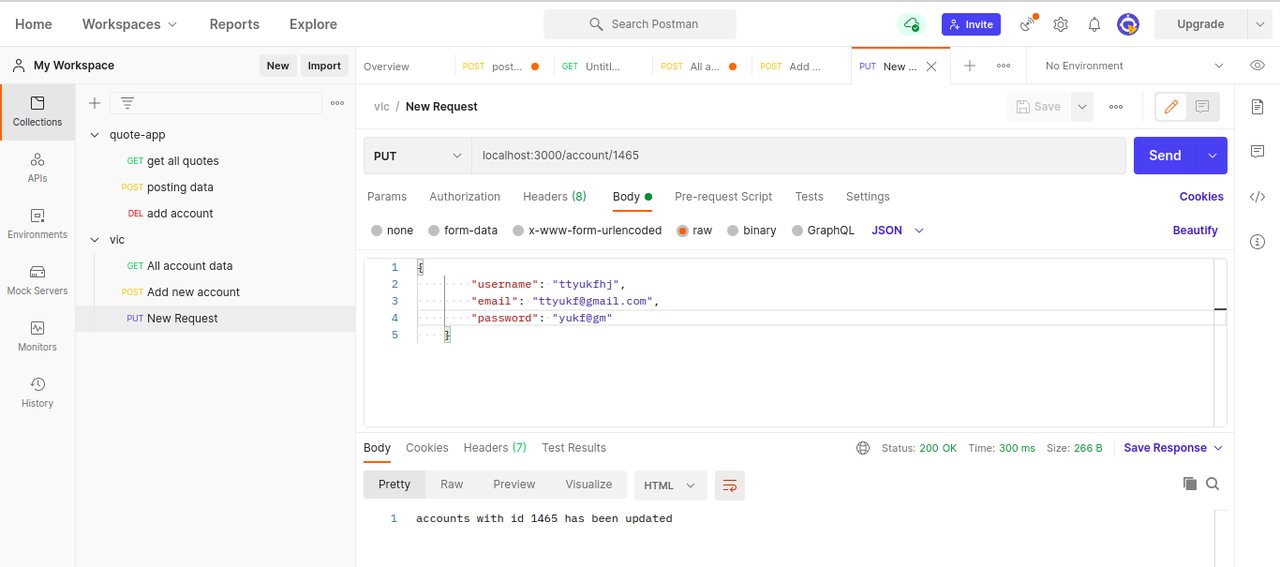
To update a particular piece of account information, we have to set up a dynamic route /account/:id. The /account/list is going to be whatever ID of the property we choose to update in our account data.
When we hit the endpoint, we’ll fetch the account data using the getAccountData util function and store it in the existAccount variable. We’ll get the ID from the route and use it to target the account data we want to change in our list of account data, setting it to whatever new data we send from our body.
We’ll save the updated list of account data using the saveAccountData util function and send a success message saying that the ID has been updated successfully.
// Update - using Put method
accountRoutes.put('/account/:id', (req, res) => {
  var existAccounts = getAccountData()
  fs.readFile(dataPath, 'utf8', (err, data) => {
    const accountId = req.params['id'];
    existAccounts[accountId] = req.body;
    saveAccountData(existAccounts);
    res.send(`accounts with id ${accountId} has been updated`)
  }, true);
});
Delete an Account
In the update method we used above, we targeted the ID we wanted to update. The same thing happens when we want to delete an account.
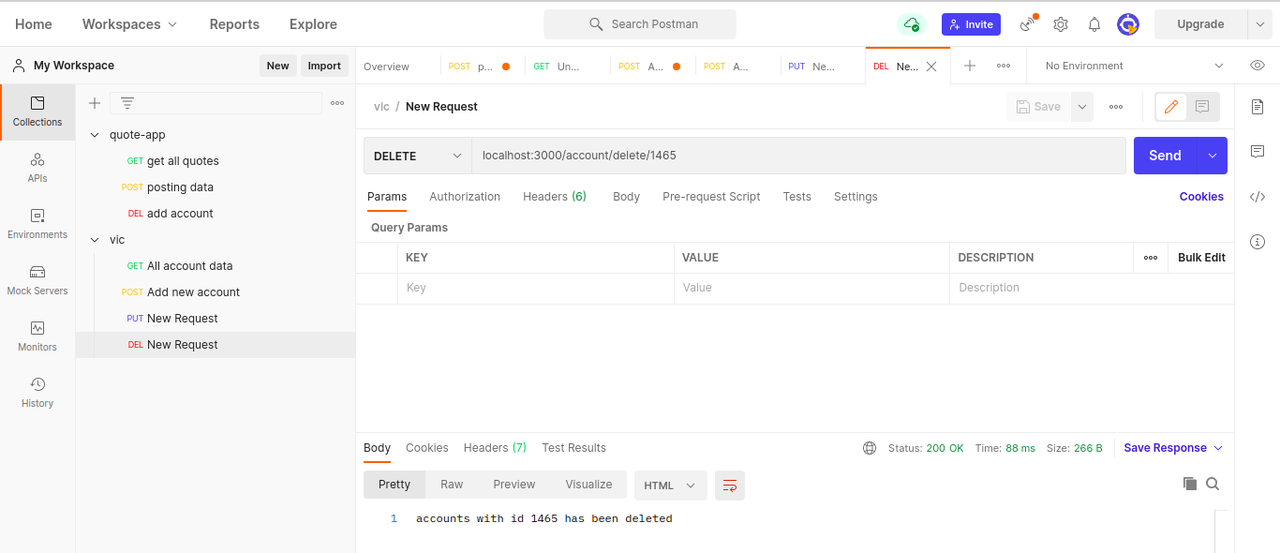
First, we’ll get the list of existing account data, and then we’ll get the ID from our dynamic endpoint route /account/delete/:id using req.params. We’ll target the ID in the account list data we fetched and use the JavaScript delete operator used in deleting properties from an object to delete that particular property with the associated ID. A message regarding the account with that ID being deleted will be sent.
// delete - using delete method
accountRoutes.delete('/account/delete/:id', (req, res) => {
  fs.readFile(dataPath, 'utf8', (err, data) => {
    var existAccounts = getAccountData()
    const userId = req.params['id'];
    delete existAccounts[userId];
    saveAccountData(existAccounts);
    res.send(`accounts with id ${userId} has been deleted`)
  }, true);
})
Testing Our App
We are now all done with the CRUD operations. The next step is to test it in Postman, a platform we can use to verify that our API is working.
To test our READ operation, we’ll open Postman and go to the http://localhost:3000/account/list endpoint, and it will return all the account data:
To test the POST operation, we’ll include the new account info in the request body. When we send the request, we’ll notice that a new account object has been added in our JSON file and a success message has been displayed in Postman.
To test the UPDATE operation, we’ll choose the ID of the account we want to update. The next step is to add the new data object and send the request. The JSON data has now been updated, and we received a success message with the ID of the updated data.
To test the DELETE operation, we’ll set the ID of the account we want to delete. When we navigate to the endpoint /account/delete/:id and send our request, the JSON data will be updated, and our account will no longer exist. We’ll also get a message on Postman stating the ID of the account that was deleted.
Note: Using a JSON file as a database is not a good idea for real-world applications. This tutorial teaches you how to perform a normal operation that a database like Mongo is capable of if you’re working on a little project and don’t want to face the hassle of setting up a native database.
Conclusion
We have come to the end of this tutorial. Hopefully, you have learned how to use a JSON file as a database and perform CRUD operations on it.
The code for this project can be found in this GitHub repo.
FAQs
Q: How do you create a CRUD operation in an API?
To create a CRUD operation in an API, define routes for Create, Read, Update, and Delete operations. Implement corresponding handlers in your controller to manage database interactions, ensuring each route performs the appropriate action. Test your API endpoints to verify correct CRUD functionality.
Q: How do you perform CRUD operations in JSON?
To perform CRUD operations in JSON, manipulate the JSON data using programming methods. Create adds new entries, Read retrieves data, Update modifies existing entries, and Delete removes them. Ensure data is correctly formatted and validated during each operation.
Q: What is the difference between REST API and CRUD API?
The difference between REST API and CRUD API is that REST API is an architectural style for designing networked applications that uses HTTP methods. CRUD API specifically focuses on Create, Read, Update, and Delete operations within a RESTful framework to ensure data management consistency.