
How to Publish Private npm Packages With GitHub Package Registry
While working on a Nuxt-based project recently, I needed to separate some application-level logic into a standalone Nuxt module so it could be managed independently and reused in other applications.

While working on a Nuxt-based project recently, I needed to separate some application-level logic into a standalone Nuxt module so it could be managed independently and reused in other applications.

Samuel Olaegbe
Samuel Olaegbe is a web developer with a focus on backend development with PHP frameworks. He is passionate about fast, performant, and reusable web technologies for frontend development that include Vue.js and React. In his free time, he works on his portfolio website using the JAM (Javascript API’s Markup) stack technology for Vue.js, Gridsome.
While working on a Nuxt-based project recently, I needed to separate some application-level logic into a standalone Nuxt module so it could be managed independently and reused in other applications.
This seemed simple at first, but I needed to make the package private. That requirement changed the direction of the module development and added a few extra steps to the process.
In this article, I’ll discuss the issues I faced while publishing this package to GitHub Package Registry as a private npm package. I’ll also explain how to use a private package in another project. This article does not cover how to create a Nuxt module.
Let’s dive in.
Table of contents
- Private Repositories Equal Private GitHub Packages
- Create a GitHub Personal Access Token
- Authenticating With npm Using GitHub Registry
- Publish Your Package
- Using Your Private Package in Another Project
- Conclusion
Private Repositories Equal Private GitHub Packages
We’ll begin by making the module’s repository private. If your repository is already private, you can skip this step.
A private GitHub repository can be published as a private npm package. So, the first step in making your package private is making sure the package repository itself is private.

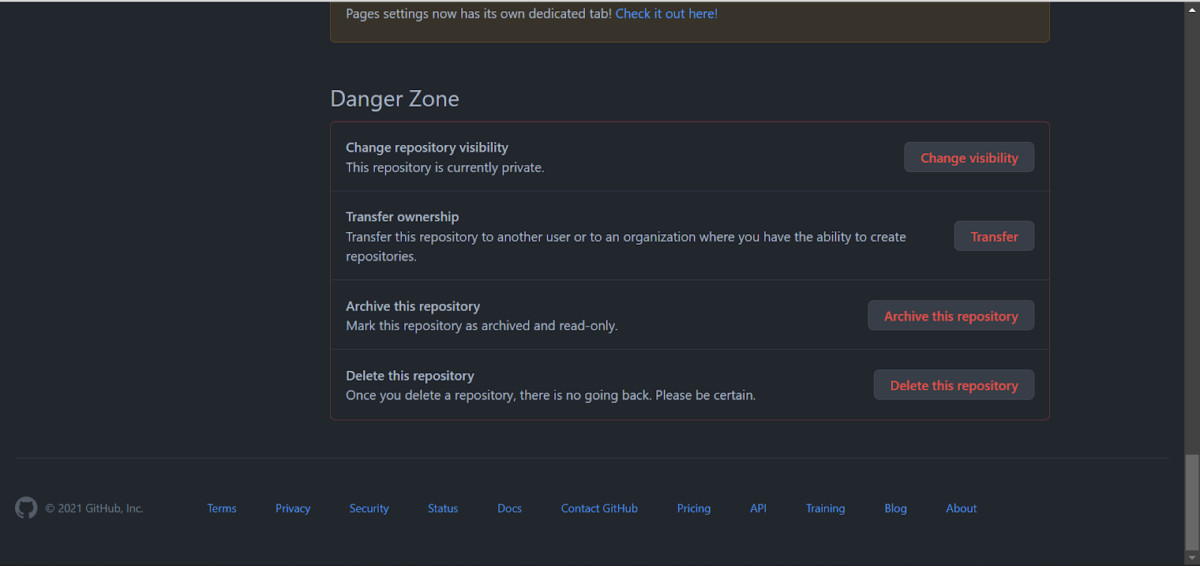
To make your GitHub repository private, click the Settings tab, scroll to the bottom of the page, and click Change repository visibility. Only do this if your repository is not already private.
Create a GitHub Personal Access Token
If you’ve used GitHub recently, you may have seen notices about passwords being replaced by more secure access tokens for certain types of authentication. GitHub personal access tokens, or PATs, are an alternative to using passwords when authenticating with GitHub through the API or command line.
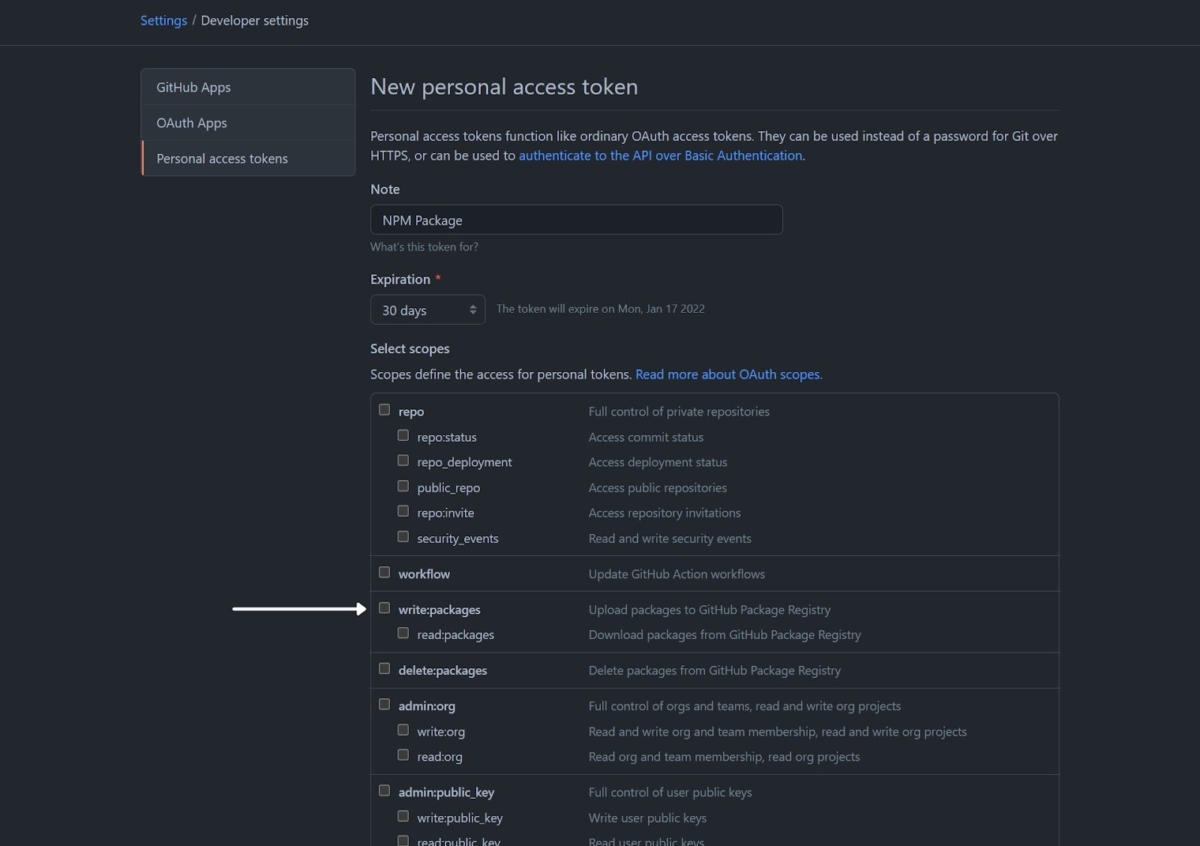
To generate a new token for publishing a private npm package to GitHub Package Registry, go to your GitHub developer settings and select Generate new token:

GitHub developer settings page
We need a token with the write:packages scope. For this tutorial, we’ll keep the default expiration date of 30 days.
GitHub Personal Access Tokens page
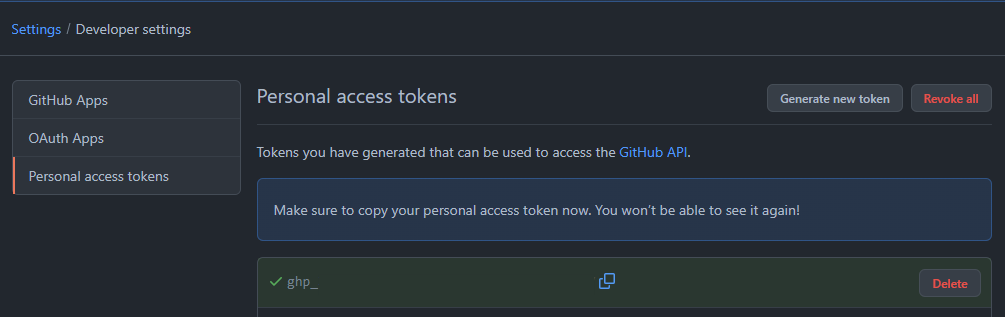
Copy your token and store it somewhere secure, because we’ll use it throughout the rest of this tutorial. If you lose it, GitHub will not show it again. You’ll need to delete the token and create a new one.
Authenticating With npm Using GitHub Registry
To publish private npm packages, you need to authenticate with npm through GitHub Package Registry. There are two ways to do this: using an .npmrc file or authenticating through the command line.
In this tutorial, we’ll use both methods. We’ll use the command line while creating and publishing the package, and we’ll use an .npmrc file when installing the package in another hosted project.
Using the command line authenticates your local development environment with GitHub’s private npm registry, which is sufficient while you are developing the package. However, when deploying a project that uses the private package, you may need an .npmrc file so the production environment can authenticate as well. We’ll go into the details shortly.
Authenticate With the Command Line to Create the Package
To authenticate from the command line, run the command below. It will prompt you for your username, email, and password. Use the personal access token you generated earlier as the password.
In this step, we are authenticating with GitHub Package Registry using our GitHub account details and the token generated in the previous steps.
The --scope flag is a unique identifier for a group of packages, introduced in npm v2. A scope can be attached to a registry, so every package published under that scope uses the same registry by default. Without configuration, a scope assumes the official npm registry. In our case, we want to use GitHub Package Registry, so the command includes a --registry flag pointing to https://npm.pkg.github.com.
npm login --scope=@OWNER --registry=https://npm.pkg.github.com
A scope can be your GitHub username or your GitHub organization’s username. Once your package is published, users can install it with a command like this:
npm install @scope/package

After running the command above, you should see a confirmation message if authentication was successful. For example:
Logged in as goodhands to scope @goodhands on https://npm.pkg.github.com/
Publish Your Package
Now it’s time to publish your private npm package. Before doing that, we’ll go through a few checklist items to make the process as smooth as possible.
This tutorial does not cover creating a Node.js package, so I’ll assume you already have a package ready before continuing.
Checklist 1: Make Sure Your package.json Has the Right Name
While setting up the development environment, we created a scope and attached it to a registry. For your package to publish to the right place, https://npm.pkg.github.com/, you need to use the same scope in your package name:
{
  "name": "@goodhands/private-module",
  "version": "1.0.0",
  "description": "An example package",
  "main": "index.js",
...
Since I used the @goodhands scope to authenticate, I’ll need to add that scope to the package name in my package.json.
Now save your changes, then commit and push them to GitHub.
Checklist 2: Semver
In a regular project, version control may not always require close attention to major, minor, and patch changes as defined by semver.org. However, since we’re publishing a package that other applications will use and rely on, it’s important to follow the right versioning conventions.
One tool I’ve found useful for automating this is standard-version. It automates versioning according to semver standards and generates a CHANGELOG.md file based on Conventional Commits.
To make releases, tagging, and changelog updates faster, I added the standard-version command, along with a mix of Git and npm commands, to a script in my package.json:
"scripts": {
    "release": "standard-version && git push --follow-tags && npm publish"
}
Remember, you need to install standard-version as a devDependency in your project before you can use it in a script. To add standard-version to your project, run the following command in the root of your project:
npm install -D standard-version@latest
Our release script, standard-version && git push --follow-tags && npm publish, will go through the following steps:
The first part, standard-version, will:
- Add all newly edited files.
- Create a tag with the latest version of the project.
- Create a
CHANGELOG.mdfile based on recent commits.
The second part, git push --follow-tags, works like the regular git push command you may already use, but –follow-tags ensures that newly created tags attached to the current commit are also pushed.
The final part, npm publish, publishes the latest version of your package to the registry.
If your package was published successfully, you should see similar output in the logs:
npm notice
npm notice package: @goodhands/private-module@1.0.2
npm notice === Tarball Contents ===
npm notice 38B  index.js
npm notice 744B package.json
npm notice 307B CHANGELOG.md
npm notice === Tarball Details ===
npm notice name:          @goodhands/private-module
npm notice version:       1.0.2
npm notice package size:  690 B
npm notice unpacked size: 1.1 kB
npm notice shasum:        e5432314e2[...]55f01523183
npm notice integrity:     sha512[...]qANw
npm notice total files:   3
npm notice
+ @goodhands/private-module@1.0.2
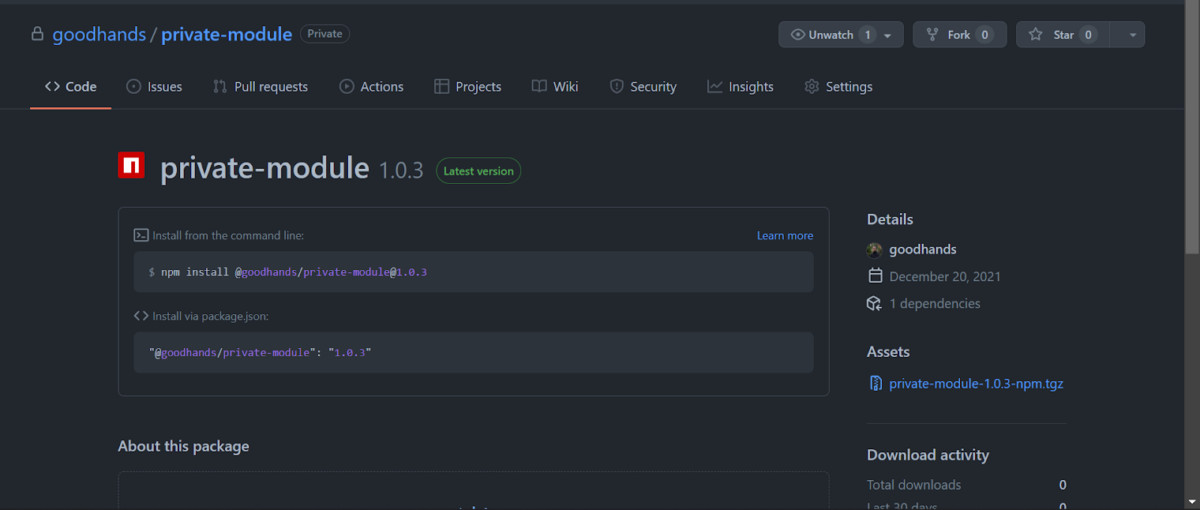
Now, if you visit your package repository on GitHub, you should see the tag you have created, as well as the package link:
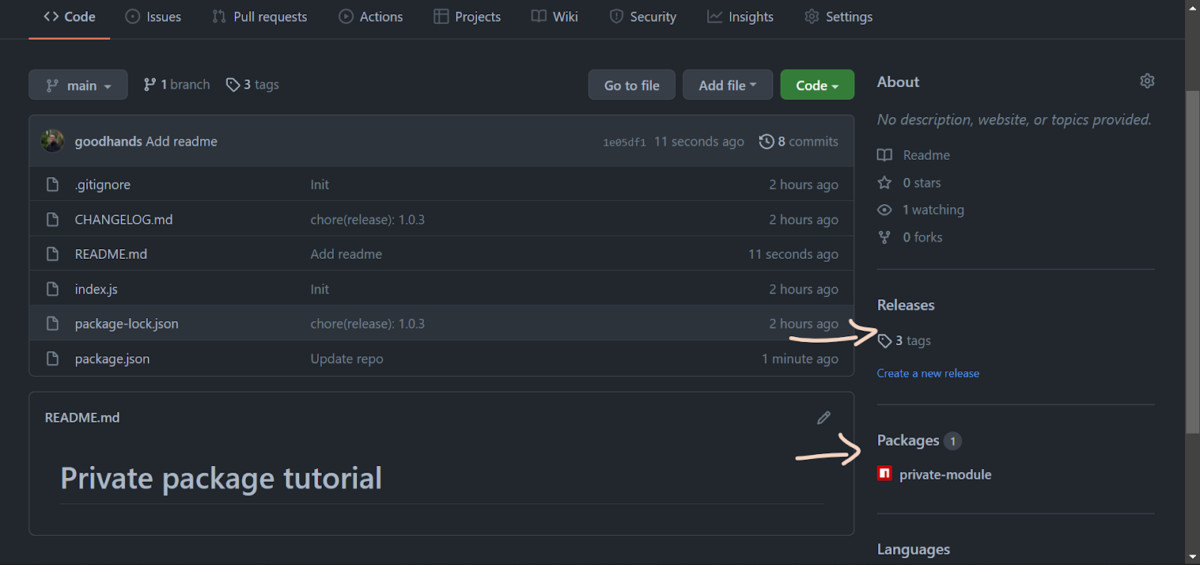
If you click on your package link, you’ll find more details about your package, including the installation command, total downloads, previous versions, etc.
Using Your Private Package in Another Project
To use your package in another project, before installing the package, you need to first create an .npmrc file using the following details:
@goodhands:registry=https://npm.pkg.github.com
//npm.pkg.github.com/:_authToken=${NPM_TOKEN}
Again, @goodhands is the scope attached to GitHub Package Registry, while NPM_TOKEN is the token required to use your package in another project.
In production, NPM_TOKEN should be stored as an environment variable. During development, you can store it in a .bashrc file or a similar shell configuration file, depending on your operating system. This lets you use the same token to authenticate multiple projects without adding an .env file to each one.
Personal Packages vs. Organization Packages
There is little difference between publishing a personal package and publishing an organization package.
For personal private npm packages, you are the only person who can use the package. To use it in another project, you’ll need to replace NPM_TOKEN with the same token you used when creating and publishing the package. You can store this token in a .bashrc file or a similar shell configuration file.
For organization packages, the --scope flag should reference the GitHub organization, and the package repository should also belong to that organization. In this case, developers within the organization who have access to the repository can use the package in another project.
Installing Your Package in an External Project
Just like any other npm package, you can install your private package by running a command that points to the package name and preferred version:
npm install @goodhands/private-module@1.0.3
Hosting on Netlify or Heroku
When a project that uses your private package is hosted on a platform like Netlify or Heroku, you need to add NPM_TOKEN to the environment variables. Use the same token you used to authenticate while creating and publishing the package. Once the token is available in the hosted environment, your project should be able to install and use the private package successfully.
Conclusion
The main thing to remember when creating and publishing a private package with GitHub Package Registry is that you need to provide GitHub’s registry when authenticating with npm.
You also need to make sure your repository is private. Once it is, GitHub requires you to authenticate with a token generated from your developer settings page. This token must have the right package permissions.
If you are creating an organization package, authenticating other developers is more straightforward. Invite them to the GitHub organization and make sure they have access to the repository. From there, they can generate their own token and authenticate with the package registry.
FAQs
Q: How do I use npm packages from GitHub?
You can use npm packages from GitHub Package Registry with the npm install command, similar to packages from the public npm registry. Private packages require authentication and access permissions from the package owner or organization.
Q: What is GitHub package registry?
GitHub Package Registry is GitHub’s package hosting service. It allows developers to publish, manage, and install packages from GitHub, and it integrates with package managers such as npm. It provides a way to keep packages connected to the repositories where the code is developed.
Q: How do I publish a private npm package?
To publish a private npm package with GitHub Package Registry, you need a private repository, a GitHub personal access token with the right package permissions, and npm configured to use GitHub’s registry for your package scope. Once authenticated, you can publish the package with npm publish and install it in other projects using the correct scope and access token.