
Creating a Modern Application: Using Laravel With React.js
I started my web development career as a Python programmer, and my go-to framework was Django. I came across Laravel only a year and a half into my career and started building with it. Eventually, I got better at Laravel and reached a point where I would choose between the frameworks depending on requirements.

I started my web development career as a Python programmer, and my go-to framework was Django. I came across Laravel only a year and a half into my career and started building with it. Eventually, I got better at Laravel and reached a point where I would choose between the frameworks depending on requirements.

Farhan Hasin Chowdhury
Farhan is a passionate full-stack developer and author. He’s a huge fan of the open-source mindset and loves sharing his knowledge with the community.
I started my web development career as a Python programmer, and my go-to framework was Django. I came across Laravel only a year and a half into my career and started building with it. Eventually, I got better at Laravel and reached a point where I would choose between the frameworks depending on requirements.
For example, if I saw that a project had pages that required real-time functionality, I would immediately choose Laravel over Django. Back in the day, Laravel used to come with Vue pre-installed and pre-configured with every new project.
Laravel has come a long way, and the options for creating modern, reactive web applications using the framework are many. There’s Inertia.js, Alpine.js, Livewire, and more. But the framework hasn’t said goodbye to the old ways of doing things. It’s still possible and very straightforward to set up Vue or React with a Laravel project example.
In this article, I’ll walk you through the process of bootstrapping a brand-new Laravel project and integrating React with it so both Laravel developers and React.js developers can proceed with the project safely.
The examples in this article use Laravel 8, but new projects should use the currently supported Laravel 13 version. Always review the latest Laravel documentation before adapting this tutorial for production use.
The article assumes that you have experience working with both Laravel and ReactJS.
Table of Contents
- Bootstrapping a New Project and Installing the Dependencies
- Installing React and Writing Your First Component
- Creating a Counter Component Using React Hooks
- Communicating With the Backend
- Vendor Extraction
- Conclusion
Bootstrapping a New Project and Installing the Dependencies
Let’s start our Laravel and ReactJS process by creating a new Laravel project anywhere on your local computer. You can use whatever method of bootstrapping you may like. I prefer using the Laravel Installer in this case.
laravel new guide-to-laravel-and-react
Once the project is ready, open it in your favorite IDE or text editor. If you look inside the package.json file present in every new Laravel project, you’ll see the following list of packages under the devDependencies section:
- axios - promise-based HTTP client
- laravel-mix - an elegant wrapper over webpack
- lodash - popular functional programming library
- postcss - utility tool for automating routine CSS operations
In this article, you’ll be working with all of these libraries except for Lodash.
Now that you know about all these dependencies, let’s go ahead and install them:
npm install
After the installation finishes, execute the following command to test whether everything’s functional.
npm run dev
If everything works fine, you should see something as follows on your terminal:
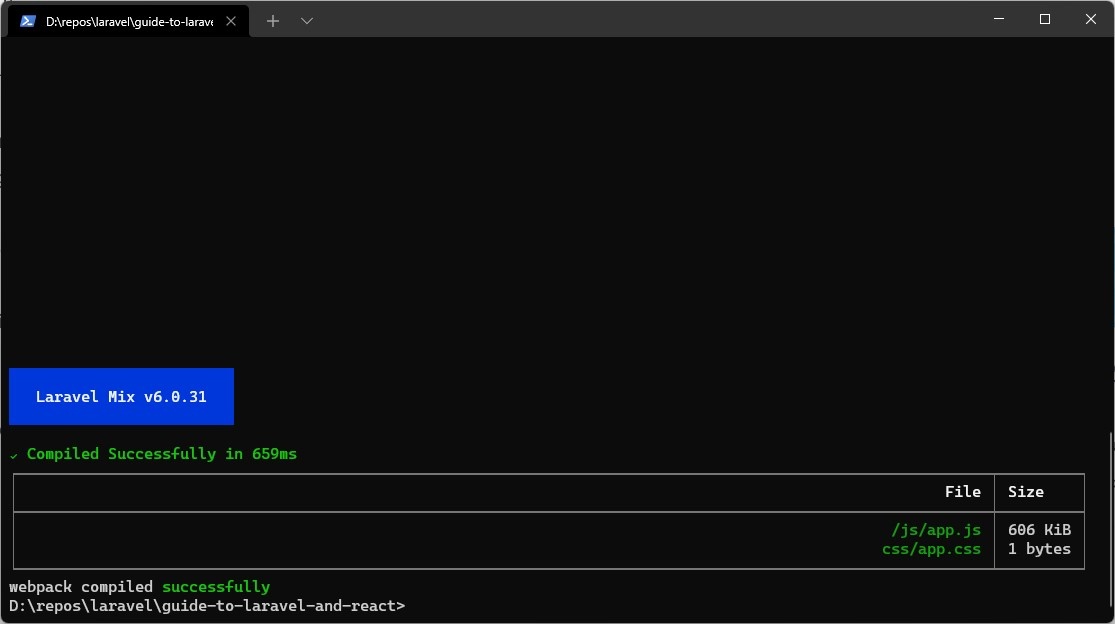
Let me explain what just happened.
When you executed the npm run dev command, Laravel Mix compiled the resources/js/app.js file and the resources/css/app.css file into public/js/app.js and public/css/app.css files.
Installing React and Writing Your First Component
Let’s go ahead and start bringing React into the scene to see the whole process of using Laravel with React. First, you’ll have to install two new JavaScript libraries. They are the react and react-dom libraries. To do so, execute the following command:
npm install --save-dev react react-dom
It will install the libraries as development dependencies. The reason for installing them as development dependencies is that you’ll compile all your JavaScript code into a single file and attach that to your Blade templates.
Create a new file resources/js/components/HelloReact.js and put the following content in there:
// resources/js/components/HelloReact.js

import React from 'react';
import ReactDOM from 'react-dom';

export default function HelloReact() {
    return (
        <h1>Hello React!</h1>
    );
}

if (document.getElementById('hello-react')) {
    ReactDOM.render(<HelloReact />, document.getElementById('hello-react'));
}
It’s a functional React component that mounts on any element with the id “hello-react” and prints “Hello React!” on the page. To make this usable throughout your entire application, you’ll have to include this in your JavaScript code bundle. To do so, open the resoureces/js/app.js file and update its code as follows:
// resoureces/js/app.js

require('./bootstrap');

// React Components
require('./components/HelloReact')
And that’s it for this part about React and Laravel. Requiring the React component in this file will include it in the application’s JavaScript code bundle. Before you can use this updated code in your blade templates, you’ll have to recompile it.
Previously, you were writing only vanilla JavaScript in your code, but now you’re writing React-related code. You’ll need to update the Laravel Mix configuration so it can properly compile the React component. To do so, open the webpack.mix.js file from the project root and update its code as follows:
// webpack.mix.js

const mix = require('laravel-mix');

mix.js('resources/js/app.js', 'public/js')
    .react()
    .postCss('resources/css/app.css', 'public/css', [
        //
    ]);
By default, the configuration file doesn’t call the react() function. Calling this function will tell Laravel Mix to install the babel-preset-react plugin required for compiling React components.
After updating the Laravel Mix configuration, execute the npm run dev command once again. Keep in mind that the compilation will not happen this time. Instead, Laravel Mix will realize some libraries are missing and install them. So run the npm run dev command again, and this time the execution should succeed.
Now that the component is ready to use, you’ll have to prepare a blade template. Open the resources/views/welcome.blade.php file and update its content as follows:
<!DOCTYPE html>
<html lang="en">
<head>
    <meta charset="UTF-8">
    <meta name="viewport" content="width=device-width, initial-scale=1.0">
    <meta http-equiv="X-UA-Compatible" content="ie=edge">
    <title>Laravel React</title>

    <script src="{{ asset('js/app.js') }}" defer></script>
</head>
<body>
    <div id="hello-react"></div>
</body>
</html>
Another essential aspect of the React with Laravel process is to defer script execution, or place it just before the body tag ends. Also, regarding Laravel React, make sure to match the element ID with the ID you wrote in the React component’s render() function.
Now start the development server by executing php artisan serve, then visit http://localhost:8000 using your favorite browser. You should see something as follows:

If you see nothing on the screen, check the browser console for any errors. If you find something, resolve it and try again. Let’s move on to the next pare of Laravel ReactJS: creating a counter component using React hooks.
Creating a Counter Component Using React Hooks
Let’s write a counter component using the state hook. Create a file resources/js/Counter.js and put the following content in it:
// resources/js/components/Counter.js

import React, { useState } from "react";
import ReactDOM from 'react-dom';

export default function Counter() {
  // Set the initial count state to zero, 0
  const [count, setCount] = useState(0);

  // Create handleIncrement event handler
  const handleIncrement = () => {
    setCount(prevCount => prevCount + 1);
  };

  // Create handleDecrement event handler
  const handleDecrement = () => {
    setCount(prevCount => prevCount - 1);
  };
  return (
    <div>
        <button onClick={handleDecrement}>-</button>
        <span> {count} </span>
        <button onClick={handleIncrement}>+</button>
    </div>
  );
}

if (document.getElementById('counter')) {
    ReactDOM.render(<Counter />, document.getElementById('counter'));
}

if (document.getElementById('counter')) {
    ReactDOM.render(<Counter />, document.getElementById('counter'));
}
Open the resources/js/app.js file and require it as you did in the previous one. Instead of executing the npm run dev command, again and again, you can execute the npm run watch command, which keeps an eye on your files and compiles them automatically on change.
Finally, open the resources/views/welcome.blade.php file one more time and update its content as follows:
<!DOCTYPE html>
<html lang="en">
<head>
    <meta charset="UTF-8">
    <meta name="viewport" content="width=device-width, initial-scale=1.0">
    <meta http-equiv="X-UA-Compatible" content="ie=edge">
    <title>Laravel React</title>

    <script src="{{ asset('js/app.js') }}" defer></script>
</head>
<body>
    <div id="hello-react"></div>
    <div id="counter"></div>
</body>
</html>
Refresh the page if it’s still open in your browser, and you should see something as follows:
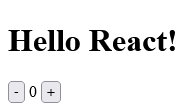
Try hitting the increment and decrement buttons, and you will see the number change. Anything you can do in a regular React component, you can do here. Even if you want to write class components, go ahead.
Communicating With the Backend
So far in this Laravel React tutorial, you’ve only worked in the frontend. In this section, I’ll show you how to communicate with the Laravel backend tutorial from your React components.
To do so, open the routes/web.php file and update its content as follows:
<?php

// routes/web.php

use Illuminate\Http\Request;
use Illuminate\Support\Facades\Route;

Route::get('/', function () {
    return view('welcome');
});

Route::post('count', function (Request $request) {
    return response()->json([
        'message' => $request->message,
    ]);
});
I won’t overcomplicate things by introducing databases and stuff. This simple route receives a string named message from the frontend and returns it.
Open the resources/js/Counter.js file and update its content as follows:
// resources/js/Counter.js

import axios from "axios";
import React, { useState } from "react";
import ReactDOM from 'react-dom';

export default function Counter() {
  // Set the initial count state to zero, 0
  const [count, setCount] = useState(0);

  // Create handleIncrement event handler
  const handleIncrement = () => {
    setCount(prevCount => prevCount + 1);
    notifyServer();
  };

  // Create handleDecrement event handler
  const handleDecrement = () => {
    setCount(prevCount => prevCount - 1);
    notifyServer();
  };

  // Notifies the server about the change
  const notifyServer = () => {
      axios.post('/count', {
          message: 'Counter Updated!',
      })
  }

  return (
    <div>
        <button onClick={handleDecrement}>-</button>
        <span> {count} </span>
        <button onClick={handleIncrement}>+</button>
    </div>
  );
}

if (document.getElementById('counter')) {
    ReactDOM.render(<Counter />, document.getElementById('counter'));
}
The notifyServer() function sends a POST request to the /count endpoint with a message. Make sure to call it inside both the handleDecrement() and handleIncrement() functions. Recompile the assets and refresh the page. Now, before pressing the increment or decrement buttons, open the network tab in your browser. Now press the increment or the decrement button, and a POST request will show up as follows:

As you can see, the Laravel ReactJS server has received the request and responded with the message. You can send any request to the server this way. The Axios library also handles the CSRF token by sending the XSRF-TOKEN cookie with every request, so you should be able to connect to any of the web routes.
You can also use API routes here, but then, you’ll have to implement a stateless authentication system. In my opinion, if you’re using React components in blade templates, use web routes. It’ll give you much less hassle and let you do almost anything that the API routes allow.
Vendor Extraction
The last topic that I would like to discuss in this article is vendor extraction. One downside of bundling your application-centric JavaScript code with the React library is that it makes long-term caching difficult. A single change in your code can force the browser to re-download vendor libraries, such as React, even when those libraries have not changed.
One way to solve this issue is by extracting the vendor library code into a separate file. To do so, open the webpack.mix.js file and update its code as follows:
// webpack.mix.js

const mix = require('laravel-mix');

mix.js('resources/js/app.js', 'public/js')
    .react()
    .extract(['react'])
    .postCss('resources/css/app.css', 'public/css', [
        //
    ]);
The extract() function extracts any vendor libraries from the array and produces three separate JavaScript files. They are as follows:
- public/js/manifest.js: The Webpack manifest runtime
- public/js/vendor.js: Your vendor libraries
- public/js/app.js: Your application code
Open the resources/views/welcome.blade.php file and update its content as follows:
<!DOCTYPE html>
<html lang="en">
<head>
    <meta charset="UTF-8">
    <meta name="viewport" content="width=device-width, initial-scale=1.0">
    <meta http-equiv="X-UA-Compatible" content="ie=edge">
    <title>Laravel React</title>
</head>
<body>
    <div id="hello-react"></div>
    <div id="counter"></div>

    <script src="{{ asset('js/manifest.js') }}"></script>
    <script src="{{ asset('js/vendor.js') }}"></script>
    <script src="{{ asset('js/app.js') }}"></script>
</body>
</html>
Instead of deferring code execution, I’ve moved the scripts to the bottom of the file. Also, make sure to load the files in this exact order. If there are multiple application-centric JavaScript files, they should come after the vendor script. The manifest will always be the first one. Reload your browser, and you should see no change in results whatsoever.
Conclusion
I would like to thank you for the time you’ve spent reading this article using Laravel with ReactJS. I hope you’ve enjoyed it and have learned some valuable stuff from this ReactJS Laravel article. If you’re confused about any part of this article, feel free to browse the reference repository.
I would also suggest you read through the official Laravel docs on Compiling Assets (Mix) to learn about concepts such as cache busting, environment variables, and more. As you can see, using Laravel and React can be highly beneficial. And don’t forget, it’s not about Laravel versus React, but about how to use them together.
FAQs
Q: Can I use ReactJS with Laravel?
Laravel doesn’t require you to use any specific JavaScript framework. As long as you’ve configured Laravel Mix properly, any framework should work.
Q: What are React and Laravel?
React is an open-source JavaScript library for the frontend developed by Facebook, and Laravel is a full-stack PHP framework following the MVC pattern.
Q: How does ReactJS integrate with Laravel?
The integration is pretty seamless. All you have to do is call the react() function in the Laravel Mix configuration and put your components within the correct directory.