Building Modern Web Applications with AngularJS and Play Framework
Building robust web applications is often a lot about choosing the right tools. Doing so with a combination of tools that ensure both a modern, flexible front-end, and a solid, reliable back-end is something everybody wants. This article demonstrates exactly that trick by combining AngularJS and Play Framework to build a simple blog application.

Building robust web applications is often a lot about choosing the right tools. Doing so with a combination of tools that ensure both a modern, flexible front-end, and a solid, reliable back-end is something everybody wants. This article demonstrates exactly that trick by combining AngularJS and Play Framework to build a simple blog application.

Denys (MSc) is a seasoned software scalability engineer, project manager, and entrepreneur with 12+ years of experience. Java is his focus.
PREVIOUSLY AT

Choosing the right tool for the right purpose goes a long way, especially when it comes to building modern web applications. A lot of us are familiar with AngularJS and how easy it makes developing robust web application front-ends. Although many will argue against the use of this popular web framework, it certainly has plenty to offer and can be an appropriate choice for a wide array of needs. On the other hand, the components that you use on the back-end will dictate a lot about the web application’s performance, as they have influence on the overall user experience. Play is a high velocity web framework for Java and Scala. It is based on a lightweight, stateless, web-friendly architecture and follows MVC patterns and principles similar to Rails and Django.
In this article, we will take a look at how we can use AngularJS and Play to build a simple blog application with a basic authentication mechanism and the ability to make posts and comments. AngularJS development, with some Twitter Bootstrap goodies, will allow us to power a single-page application experience on top of a Play based REST API back-end.
Web Applications - Getting Started
AngularJS Application Skeleton
AngularJS and Play apps will reside in client and server directories accordingly. For now, we shall create the “client” directory.
mkdir -p blogapp/client
To create an AngularJS application skeleton, we will use Yeoman - an amazing scaffolding tool. Installing Yeoman is easy. Using it to scaffold a simple skeletal AngularJS application is probably even easier:
cd blogapp/client
yo angular
Running the second command will be followed by a few options that you need to pick from. For this project, we do not need “Sass (with Compass)”. We will need Boostrap along with the following AngularJS plugins:
- angular-animate.js
- angular-cookies.js
- angular-resource.js
- angular-route.js
- angular-sanitize.js
- angular-touch.js
At this point, once you finalize your selections, you will start seeing NPM and Bower output on your terminal. When the downloads are complete and the packages have been installed, you will have an AngularJS application skeleton ready to be used.
Play Framework Application Skeleton
The official way of creating a new Play application involves the use of the tool Typesafe Activator. Before you can use it, you have to download and install it on your computer. If you are on Mac OS and use Homebrew, you can install this tool with a single line of command:
brew install typesafe-activator
Creating a Play application from command line is super easy:
cd blogapp/
activator new server play-java
cd server/
Importing to an IDE
To import the application in an IDE such as Eclipse or IntelliJ, you need to “eclipsify” or “idealize” your application. To do that, run the following command:
activator
Once you see a new prompt, type either “eclipse” or “idea” and hit enter to prepare the application code for Eclipse or IntelliJ, respectively.
For brevity, we will only cover the process of importing the project to IntelliJ in this article. The process of importing it to Eclipse should be equally simple. To import the project to IntelliJ, start by activating the “Project from existing sources…” option found under “File -> New”. Next, select your build.sbt file and click “OK”. Upon clicking “OK” again on the next dialog, IntelliJ should start importing your Play application as an SBT project.
Typesafe Activator also comes with a graphical user interface, which you can use to create this skeletal application code.
Now that we have imported our Play application into IntelliJ, we should also import our AngularJS application into the workspace. We can import it either as a separate project or as a module to the existing project where Play application resides.
Here, we will import the Angular application as a module. Under the “File” menu, we will select the option “New -> Module From Existing Sources…”. From the dialog, we will choose the “client” directory and click on “OK”. On the next two screens, click on “Next” and “Finish”, respectively.
Spawning Local Servers
At this point, it should be possible to start the AngularJS application as a Grunt task from the IDE. Expand your client folder and right click on Gruntfile.js. In the pop-up menu select “Show Grunt Tasks”. A panel labelled “Grunt” will appear with a list of tasks:
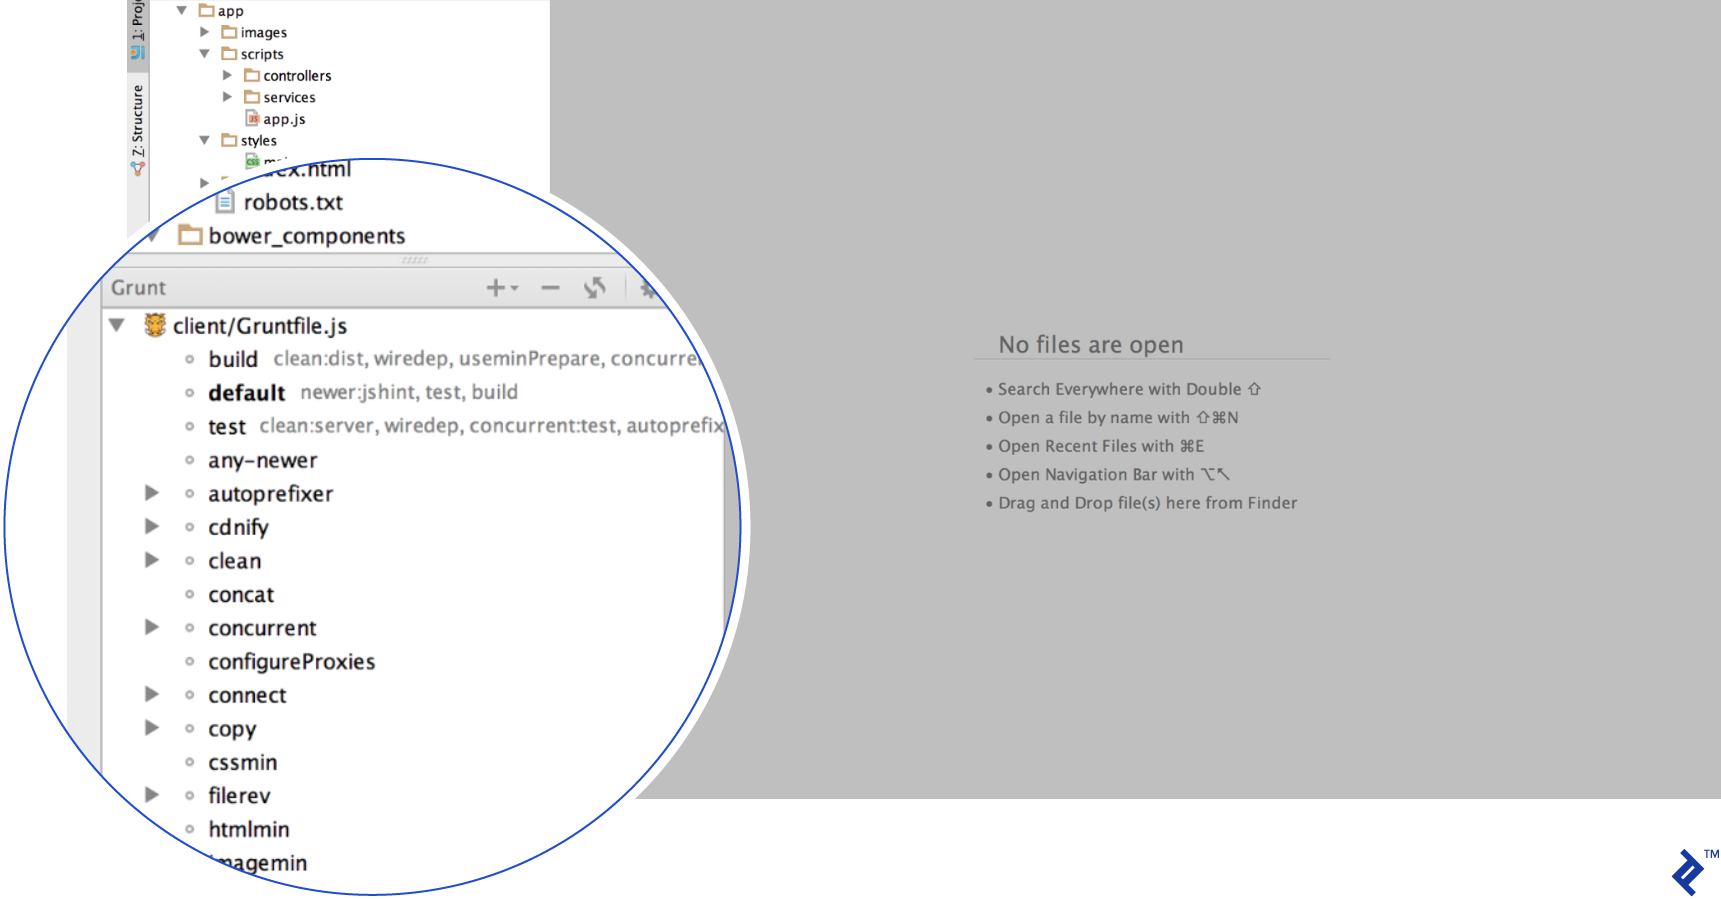
To start serving the application, double click on “serve”. This should immediately open your default web browser and point it to a localhost address. You should see a stub AngularJS page with Yeoman’s logo on it.
Next, we need to launch our back-end application server. Before we can proceed, we must address a couple of issues:
- By default, both the AngularJS application (bootstrapped by Yeoman) and the Play application tries to run on port 9000.
- In production, both applications will likely be run under one domain, and we will probably use Nginx to route the requests accordingly. But in development mode, when we change the port number of one of these applications, web browsers will treat them as if they are running on different domains.
To work around both of these issues, all we need to do is use a Grunt proxy so that all AJAX requests to the Play application are proxied. With this, in essence both of these application servers will be available at the same apparent port number.
Let us first change the port number of the Play application server to 9090. To do this, open the “Run/Debug Configurations” window by clicking on “Run -> Edit Configurations”. Next, change the port number in the field “Url To Open”. Click on “OK” to approve this change and close the window. Clicking on the “Run” button should start the dependency resolution process - logs of this process will start appearing.
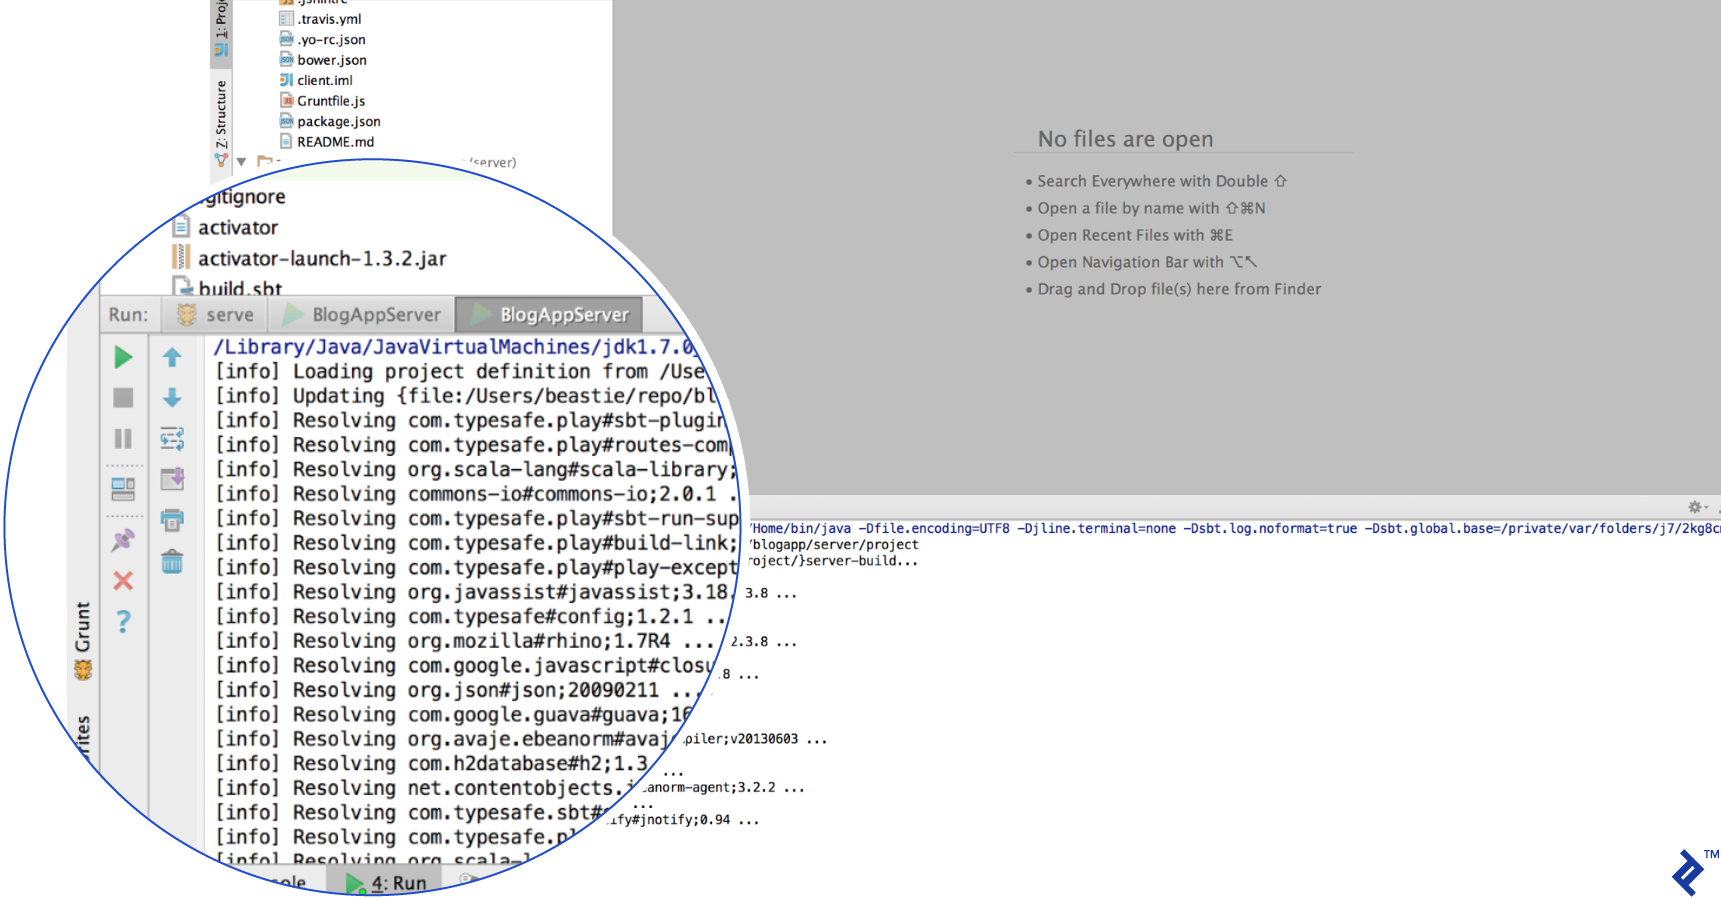
Once it is done, you can navigate to http://localhost:9090 on your web browser, and in a few seconds you should be able to see your Play application. To configure a Grunt proxy, we first need to install a small Node.js package using NPM:
cd blogapp/client
npm install grunt-connect-proxy --save-dev
Next we need to tweak our Gruntfile.js. In that file, locate the “connect” task, and insert the “proxies” key/value after it:
 proxies: [
   {
     context: '/app', // the context of the data service
     host: 'localhost', // wherever the data service is running
     port: 9090, // the port that the data service is running on
     changeOrigin: true
   }
 ],
Grunt will now proxy all requests to “/app/*” to the back-end Play application. This will save us from having to whitelist every call to the back-end. Furthermore, we also need to tweak our livereload behavior:
livereload: {
 options: {
   open: true,

   middleware: function (connect) {
     var middlewares = [];

     // Setup the proxy
     middlewares.push(require('grunt-connect-proxy/lib/utils').proxyRequest);

     // Serve static files
     middlewares.push(connect.static('.tmp'));
     middlewares.push(connect().use(
       '/bower_components',
       connect.static('./bower_components')
     ));
     middlewares.push(connect().use(
       '/app/styles',
       connect.static('./app/styles')
     ));
     middlewares.push(connect.static(appConfig.app));

     return middlewares;
   }
 }
},
Finally, we need to add a new dependency “’configureProxies:server” to the “serve” task:
grunt.registerTask('serve', 'Compile then start a connect web server', function (target) {
 if (target === 'dist') {
   return grunt.task.run(['build', 'connect:dist:keepalive']);
 }

 grunt.task.run([
   'clean:server',
   'wiredep',
   'concurrent:server',
   'autoprefixer:server',
   'configureProxies:server',
   'connect:livereload',
   'watch'
 ]);
});
Upon restarting Grunt, you should notice the following lines in your logs indicating that the proxy is running:
Running "autoprefixer:server" (autoprefixer) task
File .tmp/styles/main.css created.

Running "configureProxies:server" (configureProxies) task

Running "connect:livereload" (connect) task
Started connect web server on http://localhost:9000
Creating a Sign-up Form
We will begin by creating a sign-up form for our blog application. This will also allow us to verify that everything is working as it should. We can use Yeoman to create a Sign-up controller and view in AngularJS:
yo angular:controller signup
yo angular:view signup
Next we should update routing of our application to reference this newly created view, and remove the redundant auto-generated “about” controller and view. From within the file “app/scripts/app.js”, remove references to “app/scripts/controllers/about.js” and “app/views/about.html”, leaving it with:
.config(function ($routeProvider) {
 $routeProvider
   .when('/', {
     templateUrl: 'views/main.html',
     controller: 'MainCtrl'
   })
   .when('/signup', {
     templateUrl: 'views/signup.html',
     controller: 'SignupCtrl'
   })
   .otherwise({
     redirectTo: '/'
   });
Similarly, update the “app/index.html” file to remove the redundant links, and add a link to the signup page:
<div class="collapse navbar-collapse" id="js-navbar-collapse">
   <ul class="nav navbar-nav">
     <li class="active"><a href="#/">Home</a></li>
     <li><a ng-href="#/signup">Signup</a></li>
   </ul>
 </div>
</div>
Also, remove the script tag for “about.js”:
<!-- build:js({.tmp,app}) scripts/scripts.js -->
       <script src="scripts/app.js"></script>
       <script src="scripts/controllers/main.js"></script>
       <script src="scripts/controllers/signup.js"></script>
<!-- endbuild -->
</body>
</html>
Next, add a form to our “signup.html” file:
<form name="signupForm" ng-submit="signup()" novalidate>
 <div>
   <label for="email">Email</label>
   <input name="email" class="form-control" type="email" id="email" placeholder="Email"
          ng-model="email">
   </div>
 <div>
   <label for="password">Password</label>
   <input name="password" class="form-control" type="password" id="password"
          placeholder="Password" ng-model="password">

 </div>
 <button type="submit" class="btn btn-primary">Sign up!</button>
</form>
We need to make the form be processed by the Angular controller. It is worth noting that we do not need to specifically add the “ng-controller” attribute in our views, as our routing logic in “app.js” fires up a controller automatically before our view is loaded. All we have to do to wire this form up is have a proper “signup” function defined in $scope. This should be done in the “signup.js” file:
angular.module('clientApp')
   .controller('SignupCtrl', function ($scope, $http, $log) {
     $scope.signup = function() {
       var payload = {
         email : $scope.email,
         password : $scope.password
       };

       $http.post('app/signup', payload)
           .success(function(data) {
             $log.debug(data);
           });
     };
   });
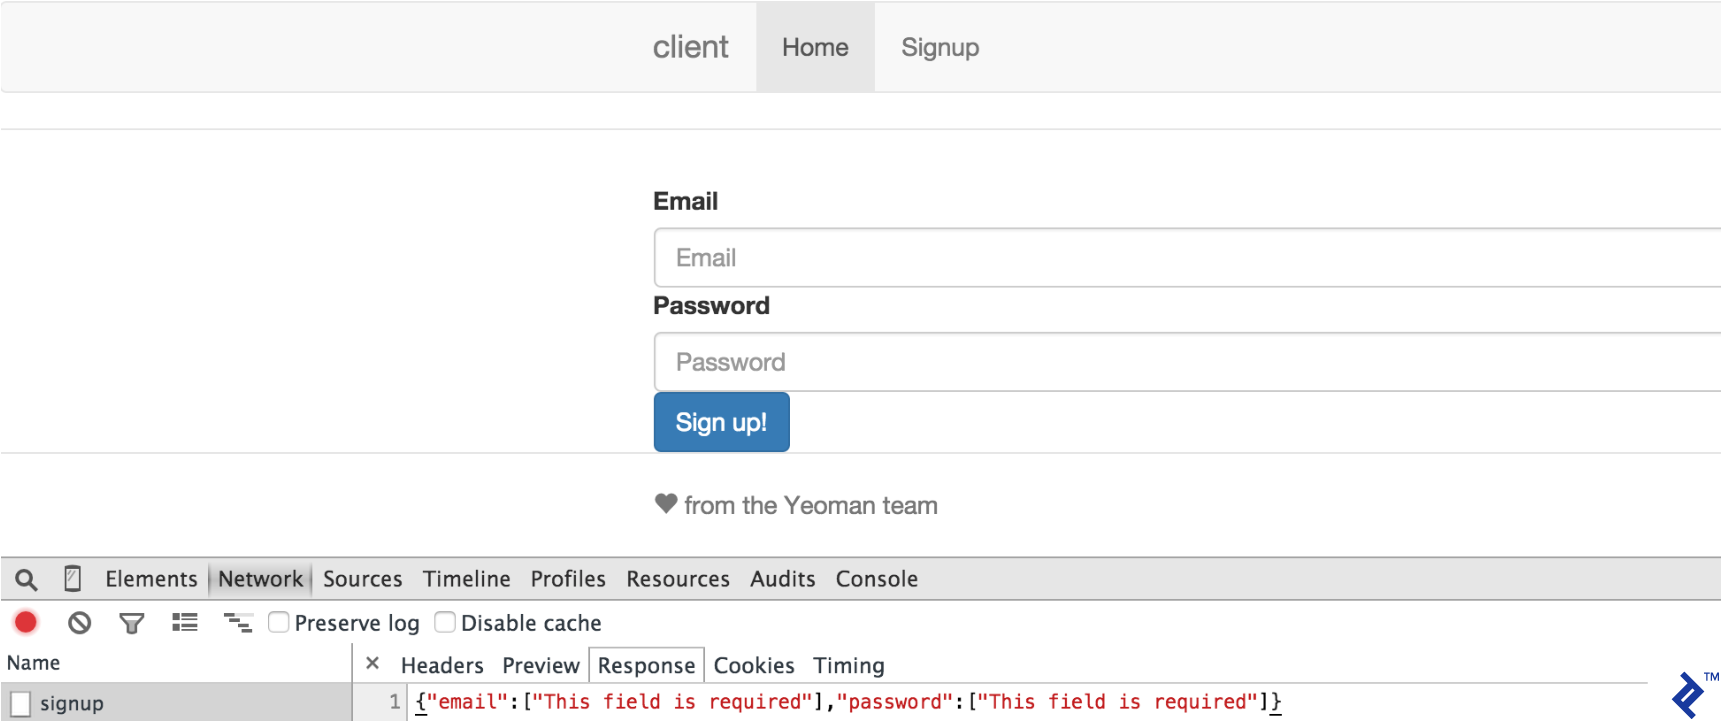
Now let us open Chrome developer console, switch to the “Network” tab, and try to submit the signup form.
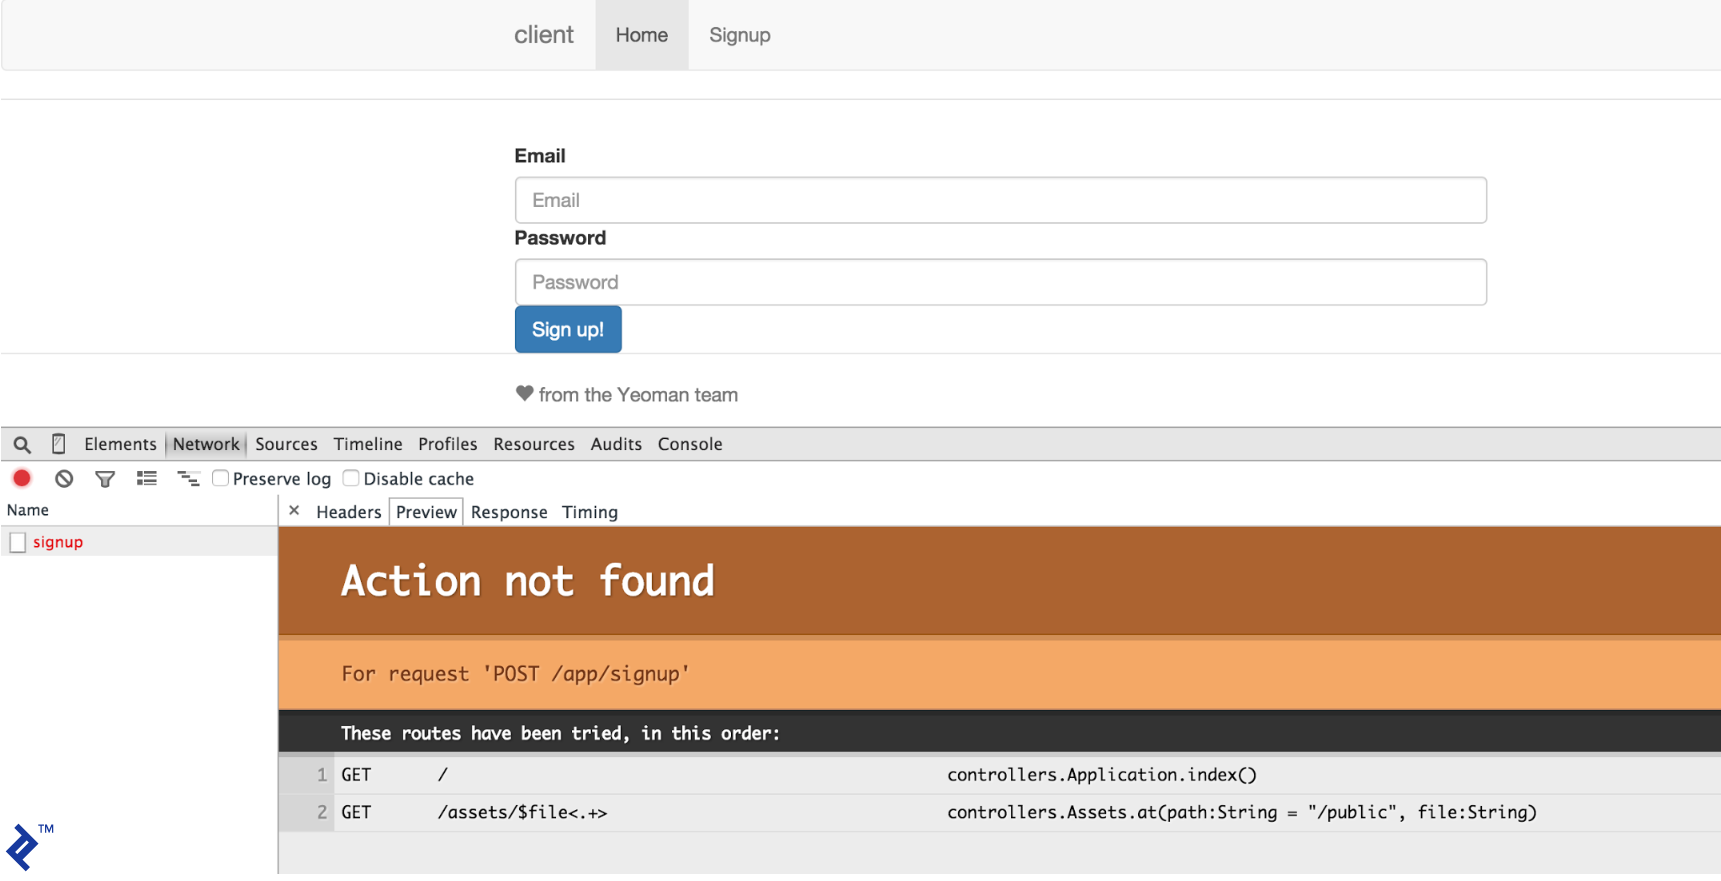
We’ll see that the Play back-end naturally replies with an “Action not found” error page. This is expected as it has not been implemented yet. But what it also means is that our Grunt proxy setup is working correctly!
Next, we are going to add an “Action” which is essentially a method in the Play application controller. In the class “Application” in “app/controllers” package, add a new method “signup”:
public static Result signup() {
 return ok("Success!");
}
Now open the file “conf/routes” and add the following line:
POST /app/signup controllers.Application.signup
Finally, we return to our web browser, http://localhost:9000/#/signup. Clicking on the “Submit” button this time should yield something different:

You should be seeing the hardcoded value returned, the one we wrote in the signup method. If that is the case, we are ready to move on as our development environment is ready and is working for both the Angular and Play applications.
Defining Ebean Models in Play
Before defining models, let us first pick a datastore. In this article, we will use H2 in-memory database. To enable that, find and uncomment the following lines in the file “application.conf”:
db.default.driver=org.h2.Driver
db.default.url="jdbc:h2:mem:play"
db.default.user=sa
db.default.password=""
...
ebean.default="models.*"
And add the following line:
applyEvolutions.default=true
Our blog domain model is rather simple. First of all, we have users that may create posts and then each post can be commented on by any signed in user. Let’s create our Ebean Models.
User
// User.java

@Entity
public class User extends Model {

 @Id
 public Long id;

 @Column(length = 255, unique = true, nullable = false)
 @Constraints.MaxLength(255)
 @Constraints.Required
 @Constraints.Email
 public String email;

 @Column(length = 64, nullable = false)
 private byte[] shaPassword;

 @OneToMany(cascade = CascadeType.ALL)
 @JsonIgnore
 public List<BlogPost> posts;

 public void setPassword(String password) {
   this.shaPassword = getSha512(password);
 }

 public void setEmail(String email) {
   this.email = email.toLowerCase();
 }

 public static final Finder<Long, User> find = new Finder<Long, User>(
     Long.class, User.class);

 public static User findByEmailAndPassword(String email, String password) {
   return find
       .where()
       .eq("email", email.toLowerCase())
       .eq("shaPassword", getSha512(password))
       .findUnique();
 }

 public static User findByEmail(String email) {
   return find
       .where()
       .eq("email", email.toLowerCase())
       .findUnique();
 }

 public static byte[] getSha512(String value) {
   try {
     return MessageDigest.getInstance("SHA-512").digest(value.getBytes("UTF-8"));
   }
   catch (NoSuchAlgorithmException e) {
     throw new RuntimeException(e);
   }
   catch (UnsupportedEncodingException e) {
     throw new RuntimeException(e);
   }
 }
}
BlogPost
// BlogPost.java

@Entity
public class BlogPost extends Model {

 @Id
 public Long id;

 @Column(length = 255, nullable = false)
 @Constraints.MaxLength(255)
 @Constraints.Required
 public String subject;

 @Column(columnDefinition = "TEXT")
 @Constraints.Required
 public String content;

 @ManyToOne
 public User user;

 public Long commentCount;

 @OneToMany(cascade = CascadeType.ALL)
 public List<PostComment> comments;

 public static final Finder<Long, BlogPost> find = new Finder<Long, BlogPost>(
     Long.class, BlogPost.class);

 public static List<BlogPost> findBlogPostsByUser(final User user) {
   return find
       .where()
       .eq("user", user)
       .findList();
 }

 public static BlogPost findBlogPostById(final Long id) {
   return find
       .where()
       .eq("id", id)
       .findUnique();
 }

}
PostComment
// PostComment.java

@Entity
public class PostComment extends Model {

 @Id
 public Long id;

 @ManyToOne
 @JsonIgnore
 public BlogPost blogPost;

 @ManyToOne
 public User user;

 @Column(columnDefinition = "TEXT")
 public String content;

 public static final Finder<Long, PostComment> find = new Finder<Long, PostComment>(
     Long.class, PostComment.class);

 public static List<PostComment> findAllCommentsByPost(final BlogPost blogPost) {
   return find
       .where()
       .eq("post", blogPost)
       .findList();
 }

 public static List<PostComment> findAllCommentsByUser(final User user) {
   return find
       .where()
       .eq("user", user)
       .findList();
 }

}
Real Signup Action
Now let’s create our first real action, allowing the users to sign up:
// Application.java

public static Result signup() {
 Form<SignUp> signUpForm = Form.form(SignUp.class).bindFromRequest();

 if ( signUpForm.hasErrors()) {
   return badRequest(signUpForm.errorsAsJson());
 }
 SignUp newUser =  signUpForm.get();
 User existingUser = User.findByEmail(newUser.email);
 if(existingUser != null) {
   return badRequest(buildJsonResponse("error", "User exists"));
 } else {
   User user = new User();
   user.setEmail(newUser.email);
   user.setPassword(newUser.password);
   user.save();
   session().clear();
   session("username", newUser.email);

   return ok(buildJsonResponse("success", "User created successfully"));
 }
}

public static class UserForm {
 @Constraints.Required
 @Constraints.Email
 public String email;
}

public static class SignUp extends UserForm {
 @Constraints.Required
 @Constraints.MinLength(6)
 public String password;
}

private static ObjectNode buildJsonResponse(String type, String message) {
  ObjectNode wrapper = Json.newObject();
  ObjectNode msg = Json.newObject();
  msg.put("message", message);
  wrapper.put(type, msg);
  return wrapper;
}
Note that the authentication used in this app is very basic, and is not recommended for production use.
The interesting part is that we are using Play forms to handle signup forms. We set a couple constrains on our SignUp form class. Validation will be done for us automatically without need for explicit validation logic.
If we get back to our AngularJS application in the web browser and click on “Submit” again, we will see that the server now responds with an appropriate error - that these fields are required.
Handling Server Errors in AngularJS
So we are getting an error from server, but the application user has no idea what’s going on. The least we can do is to display the error to our user. Ideally, we would need to understand what kind of error we’re getting and display a user-friendly message. Let’s create a simple alert service that will help us display the error.
First, we need to generate a service template with Yeoman:
yo angular:service alerts
Next, add this code to “alerts.js”:
angular.module('clientApp')
   .factory('alertService', function($timeout) {

     var ALERT_TIMEOUT = 5000;

     function add(type, msg, timeout) {

       if (timeout) {
         $timeout(function(){
           closeAlert(this);
         }, timeout);
       } else {
         $timeout(function(){
           closeAlert(this);
         }, ALERT_TIMEOUT);
       }

       return alerts.push({
         type: type,
         msg: msg,
         close: function() {
           return closeAlert(this);
         }
       });
     }

     function closeAlert(alert) {
       return closeAlertIdx(alerts.indexOf(alert));
     }

     function closeAlertIdx(index) {
       return alerts.splice(index, 1);
     }

     function clear(){
       alerts = [];
     }

     function get() {
       return alerts;
     }

     var service = {
           add: add,
           closeAlert: closeAlert,
           closeAlertIdx: closeAlertIdx,
           clear: clear,
           get: get
         },
         alerts = [];

     return service;
   }
);
Now, let’s create a separate controller responsible for alerts:
yo angular:controller alerts
angular.module('clientApp')
 .controller('AlertsCtrl', function ($scope, alertService) {
     $scope.alerts = alertService.get();
 });
Now we need to actually show nice Bootstrap error messages. The easiest way is to use Angular UI. We can use Bower to install it:
bower install angular-bootstrap --save
In your “app.js” append Angular UI module:
angular
   .module('clientApp', [
     'ngAnimate',
     'ngCookies',
     'ngResource',
     'ngRoute',
     'ngSanitize',
     'ngTouch',
     'ui.bootstrap'
   ])
Let’s add alert directive to our “index.html” file:
<div class="container">
 <div ng-controller="AlertsCtrl">
   <alert ng-repeat="alert in alerts" type="{{alert.type}}" close="alert.close()">{{ alert.msg }}</alert>
 </div>
 <div ng-view=""></div>
</div>
Finally, we need to update SignUp controller:
angular.module('clientApp')
   .controller('SignupCtrl', function ($scope, $http, $log, alertService, $location, userService) {

     $scope.signup = function() {
       var payload = {
         email : $scope.email,
         password : $scope.password
       };

       $http.post('app/signup', payload)
           .error(function(data, status) {
             if(status === 400) {
               angular.forEach(data, function(value, key) {
                 if(key === 'email' || key === 'password') {
                   alertService.add('danger', key + ' : ' + value);
                 } else {
                   alertService.add('danger', value.message);
                 }
               });
             }
             if(status === 500) {
               alertService.add('danger', 'Internal server error!');
             }
           })

     };
   });
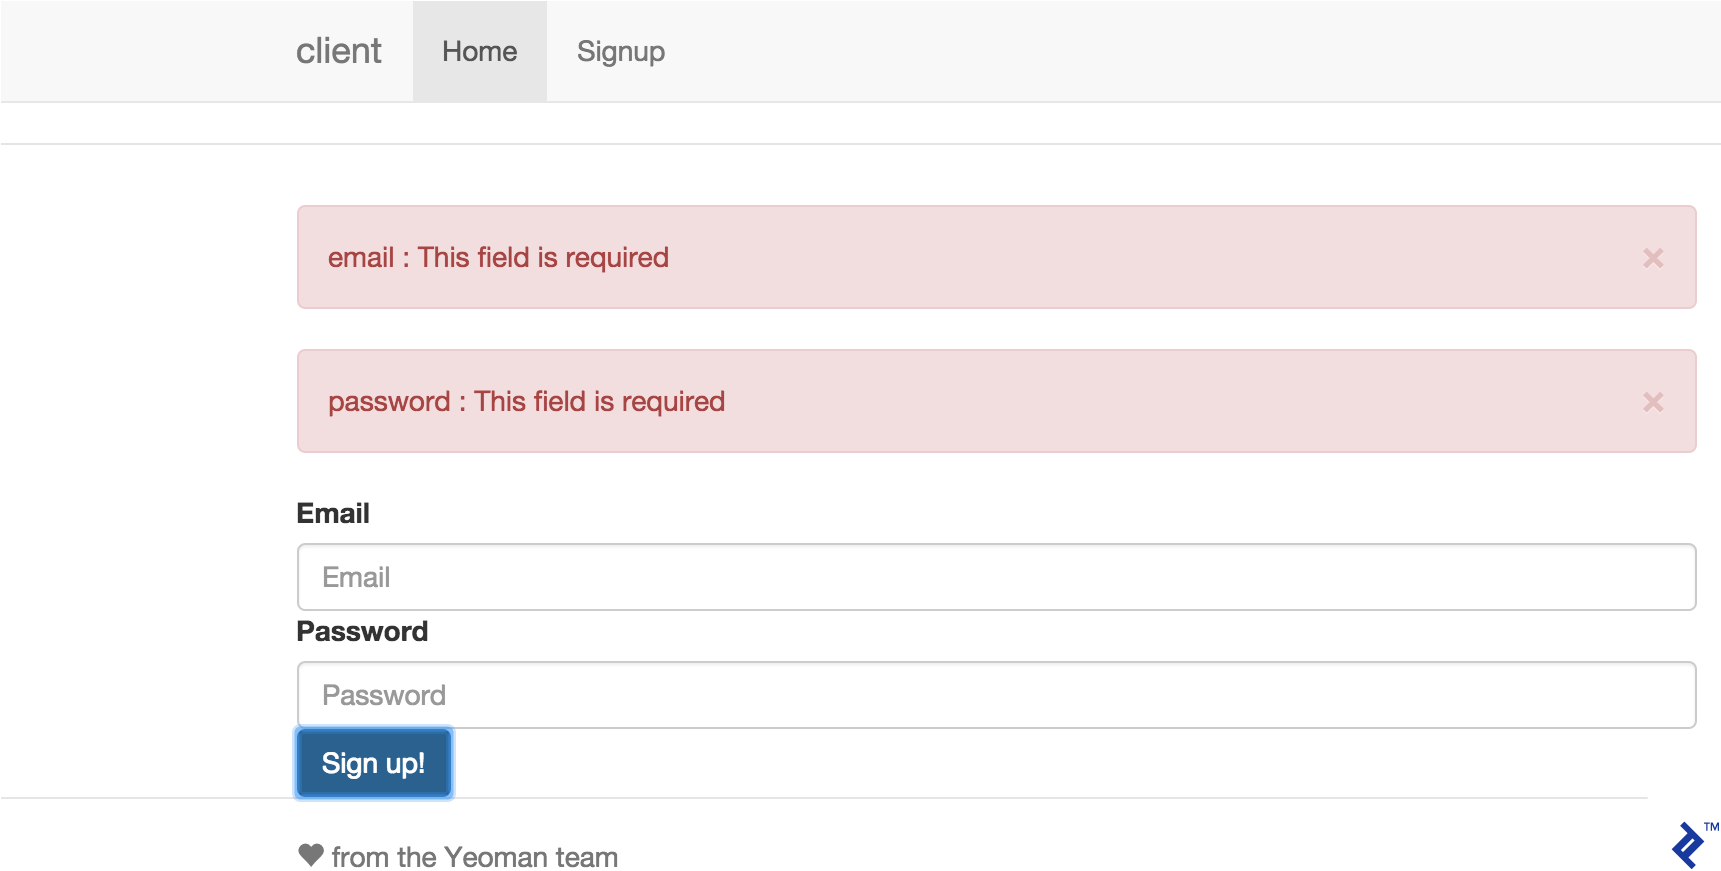
Now if we send the empty form again we will see errors displayed above the form:
Now that errors are handled, we need to do something when user signup is successful. We can redirect the user to a dashboard page where he can add posts. But first, we must create it:
yo angular:view dashboard
yo angular:controller dashboard
Modify “signup.js” controller signup method so that on success it redirects the user:
angular.module('clientApp')
   .controller('SignupCtrl', function ($scope, $http, $log, alertService, $location) {
// ..
.success(function(data) {
 if(data.hasOwnProperty('success')) {
   $location.path('/dashboard');
 }
});
Add a new route in “apps.js”:
.when('/dashboard', {
 templateUrl: 'views/dashboard.html',
 controller: 'DashboardCtrl'
})
We also need to track if the user is logged in. Let us create a separate service for that:
yo angular:service user
// user.js

angular.module('clientApp')
   .factory('userService', function() {
     var username = '';

     return {
       username : username
     };
   });
And also modify the signup controller to set the user to one who just registered:
.success(function(data) {
 if(data.hasOwnProperty('success')) {
   userService.username = $scope.email;
   $location.path('/dashboard');;
 }
});
Before we add the main functionality of adding posts, let’s take care of some other important features such as ability to login and logout, displaying user information on the dashboard, and also adding authentication support in the back-end.
Basic Authentication
Let’s jump over to our Play application and implement the login and logout actions. Add theses lines to “Application.java”:
public static Result login() {
 Form<Login> loginForm = Form.form(Login.class).bindFromRequest();
 if (loginForm.hasErrors()) {
   return badRequest(loginForm.errorsAsJson());
 }
 Login loggingInUser = loginForm.get();
 User user = User.findByEmailAndPassword(loggingInUser.email, loggingInUser.password);
 if(user == null) {
   return badRequest(buildJsonResponse("error", "Incorrect email or password"));
 } else {
   session().clear();
   session("username", loggingInUser.email);

   ObjectNode wrapper = Json.newObject();
   ObjectNode msg = Json.newObject();
   msg.put("message", "Logged in successfully");
   msg.put("user", loggingInUser.email);
   wrapper.put("success", msg);
   return ok(wrapper);
 }
}


public static Result logout() {
 session().clear();
 return ok(buildJsonResponse("success", "Logged out successfully"));
}

public static Result isAuthenticated() {
 if(session().get("username") == null) {
   return unauthorized();
 } else {
   ObjectNode wrapper = Json.newObject();
   ObjectNode msg = Json.newObject();
   msg.put("message", "User is logged in already");
   msg.put("user", session().get("username"));
   wrapper.put("success", msg);
   return ok(wrapper);
 }
}

public static class Login extends UserForm {
 @Constraints.Required
 public String password;
}
Next let’s add the ability to allow particular back-end calls only to authenticated users. Create “Secured.java” with the following code:
public class Secured extends Security.Authenticator {

 @Override
 public String getUsername(Context ctx) {
   return ctx.session().get("username");
 }

 @Override
 public Result onUnauthorized(Context ctx) {
   return unauthorized();
 }
}
We will use this class later to protect new actions. Next, we should tweak our AngularJS application main menu so that it displays the username and logout links. For that, we need to create controller:
yo angular:controller menu
// menu.js

angular.module('clientApp')
   .controller('MenuCtrl', function ($scope, $http, userService, $location) {
     $scope.user = userService;

     $scope.logout = function() {
       $http.get('/app/logout')
           .success(function(data) {
             if(data.hasOwnProperty('success')) {
               userService.username = '';
               $location.path('/login');
             }
           });
     };

     $scope.$watch('user.username', function (newVal) {
       if(newVal === '') {
         $scope.isLoggedIn = false;
       } else {
         $scope.username = newVal;
         $scope.isLoggedIn = true;
       }
     });
   });
We also need a view and a controller for the login page:
yo angular:controller login
yo angular:view login
<!-- login.html -->

<form name="loginForm" ng-submit="login()" novalidate>
 <div>
   <label for="email">Email</label>
   <input name="email" class="form-control" type="email" id="email" placeholder="Email"
          ng-model="email">
 </div>
 <div>
   <label for="password">Password</label>
   <input name="password" class="form-control" type="password" id="password"
          placeholder="Password" ng-model="password">

 </div>
 <button type="submit" class="btn btn-primary">Log in</button>
</form>
// login.js

angular.module('clientApp')
   .controller('LoginCtrl', function ($scope, userService, $location, $log, $http, alertService) {

     $scope.isAuthenticated = function() {
       if(userService.username) {
         $log.debug(userService.username);
         $location.path('/dashboard');
       } else {
         $http.get('/app/isauthenticated')
             .error(function() {
               $location.path('/login');
             })
             .success(function(data) {
               if(data.hasOwnProperty('success')) {
                 userService.username = data.success.user;
                 $location.path('/dashboard');
               }
             });
       }
     };

     $scope.isAuthenticated();

     $scope.login = function() {

       var payload = {
         email : this.email,
         password : this.password
       };

       $http.post('/app/login', payload)
           .error(function(data, status){
             if(status === 400) {
               angular.forEach(data, function(value, key) {
                 if(key === 'email' || key === 'password') {
                   alertService.add('danger', key + ' : ' + value);
                 } else {
                   alertService.add('danger', value.message);
                 }
               });
             } else if(status === 401) {
               alertService.add('danger', 'Invalid login or password!');
             } else if(status === 500) {
               alertService.add('danger', 'Internal server error!');
             } else {
               alertService.add('danger', data);
             }
           })
           .success(function(data){
             $log.debug(data);
             if(data.hasOwnProperty('success')) {
               userService.username = data.success.user;
               $location.path('/dashboard');
             }
           });
     };
   });
Next we tweak the menu so that it can display user data:
<!-- index.html -->

<div class="collapse navbar-collapse" id="js-navbar-collapse" ng-controller="MenuCtrl">
 <ul class="nav navbar-nav pull-right" ng-hide="isLoggedIn">
   <li><a ng-href="/#/signup">Sign up!</a></li>
   <li><a ng-href="/#/login">Login</a></li>
 </ul>
 <div class="btn-group pull-right acc-button" ng-show="isLoggedIn">
   <button type="button" class="btn btn-default">{{ username }}</button>
   <button type="button" class="btn btn-default dropdown-toggle" data-toggle="dropdown"
           aria-expanded="false">
     <span class="caret"></span>
     <span class="sr-only">Toggle Dropdown</span>
   </button>
   <ul class="dropdown-menu" role="menu">
     <li><a ng-href="/#/dashboard">Dashboard</a></li>
     <li class="divider"></li>
     <li><a href="#" ng-click="logout()">Logout</a></li>
   </ul>
 </div>
</div>
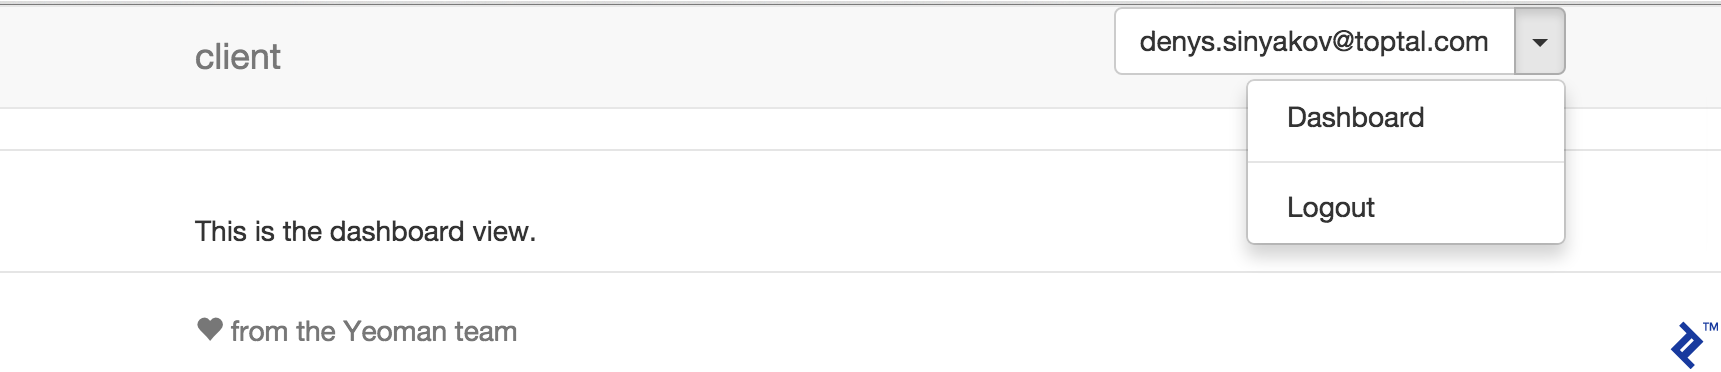
Now if you log in into the application, you should be able to see the following screen:
Adding Posts
Now that we have basic signup and authentication mechanisms in place, we can get down to implementing the posting functionality. Let’s add a new view and controller for adding posts.
yo angular:view addpost
<!-- addpost.html -->

<form name="postForm" ng-submit="post()" novalidate>
 <div>
   <label for="subject">Subject</label>
   <input name="subject" class="form-control" type="subject" id="subject" placeholder="Subject"
          ng-model="subject">
 </div>
 <div>
   <label for="content">Post</label>
   <textarea name="content" class="form-control" id="content" placeholder="Content"
             ng-model="content"></textarea>
 </div>

 <button type="submit" class="btn btn-primary">Submit post</button>
</form>
yo angular:controller addpost
// addpost.js

angular.module('clientApp')
 .controller('AddpostCtrl', function ($scope, $http, alertService, $location) {

   $scope.post = function() {
     var payload = {
       subject : $scope.subject,
       content: $scope.content
     };
     $http.post('/app/post', payload)
         .error(function(data, status) {
           if(status === 400) {
             angular.forEach(data, function(value, key) {
               if(key === 'subject' || key === 'content') {
                 alertService.add('danger', key + ' : ' + value);
               } else {
                 alertService.add('danger', value.message);
               }
             });
           } else if(status === 401) {
             $location.path('/login');
           } else if(status === 500) {
             alertService.add('danger', 'Internal server error!');
           } else {
             alertService.add('danger', data);
           }
         })
         .success(function(data) {
           $scope.subject = '';
           $scope.content = '';
           alertService.add('success', data.success.message);
         });
   };
 });
Then we update “app.js” to include:
.when('/addpost', {
 templateUrl: 'views/addpost.html',
 controller: 'AddpostCtrl'
})
Next, we modify “index.html” to add a link for our “addpost” view on the dashboard menu:
<ul class="dropdown-menu" role="menu">
  <li><a ng-href="/#/dashboard">Dashboard</a></li>
  <li><a ng-href="/#/addpost">Add post</a></li>
  <li class="divider"></li>
  <li><a href="#" ng-click="logout()">Logout</a></li>
</ul>
Now on the Play application side, let’s create a new controller Post with addPost method:
// Post.java

public class Post extends Controller {

public static Result addPost() {
 Form<PostForm> postForm = Form.form(PostForm.class).bindFromRequest();

 if (postForm.hasErrors()) {
   return badRequest(postForm.errorsAsJson());
 } else {
   BlogPost newBlogPost = new BlogPost();
   newBlogPost.commentCount = 0L;
   newBlogPost.subject = postForm.get().subject;
   newBlogPost.content = postForm.get().content;
   newBlogPost.user = getUser();
   newBlogPost.save();
 }
 return ok(Application.buildJsonResponse("success", "Post added successfully"));
}


private static User getUser() {
 return User.findByEmail(session().get("username"));
}

 public static class PostForm {

   @Constraints.Required
   @Constraints.MaxLength(255)
   public String subject;

   @Constraints.Required
   public String content;

 }
}
Add a new entry to the routes file to be able to handle newly added methods in routing:
POST /app/post controllers.Post.addPost
At this point, you should be able to add new posts.

Displaying Posts
Adding posts have little value, if we can’t display them. What we want to do is list all posts on the main page. We begin by adding a new method in our application controller:
// Application.java

public static Result getPosts() {
 return ok(Json.toJson(BlogPost.find.findList()));
}
And registering it in our routes file:
GET /app/posts controllers.Application.getPosts
Next, in our AngularJS application we modify our main controller:
// main.js

angular.module('clientApp')
   .controller('MainCtrl', function ($scope, $http) {
     $scope.getPosts = function() {
       $http.get('app/posts')
           .success(function(data) {
             $scope.posts = data;
           });
     };

     $scope.getPosts();

   });
Finally, remove everything from “main.html” and add this:
<div class="panel panel-default" ng-repeat="post in posts">
 <div class="panel-body">
   <h4>{{ post.subject }}</h4>
   <p>
     {{ post.content }}
   </p>
 </div>

 <div class="panel-footer">Post by: {{ post.user.email }} | <a
     ng-href="/#/viewpost/{{ post.id }}">Comments
   <span class="badge">{{ post.commentCount }}</span></a></div>
</div>
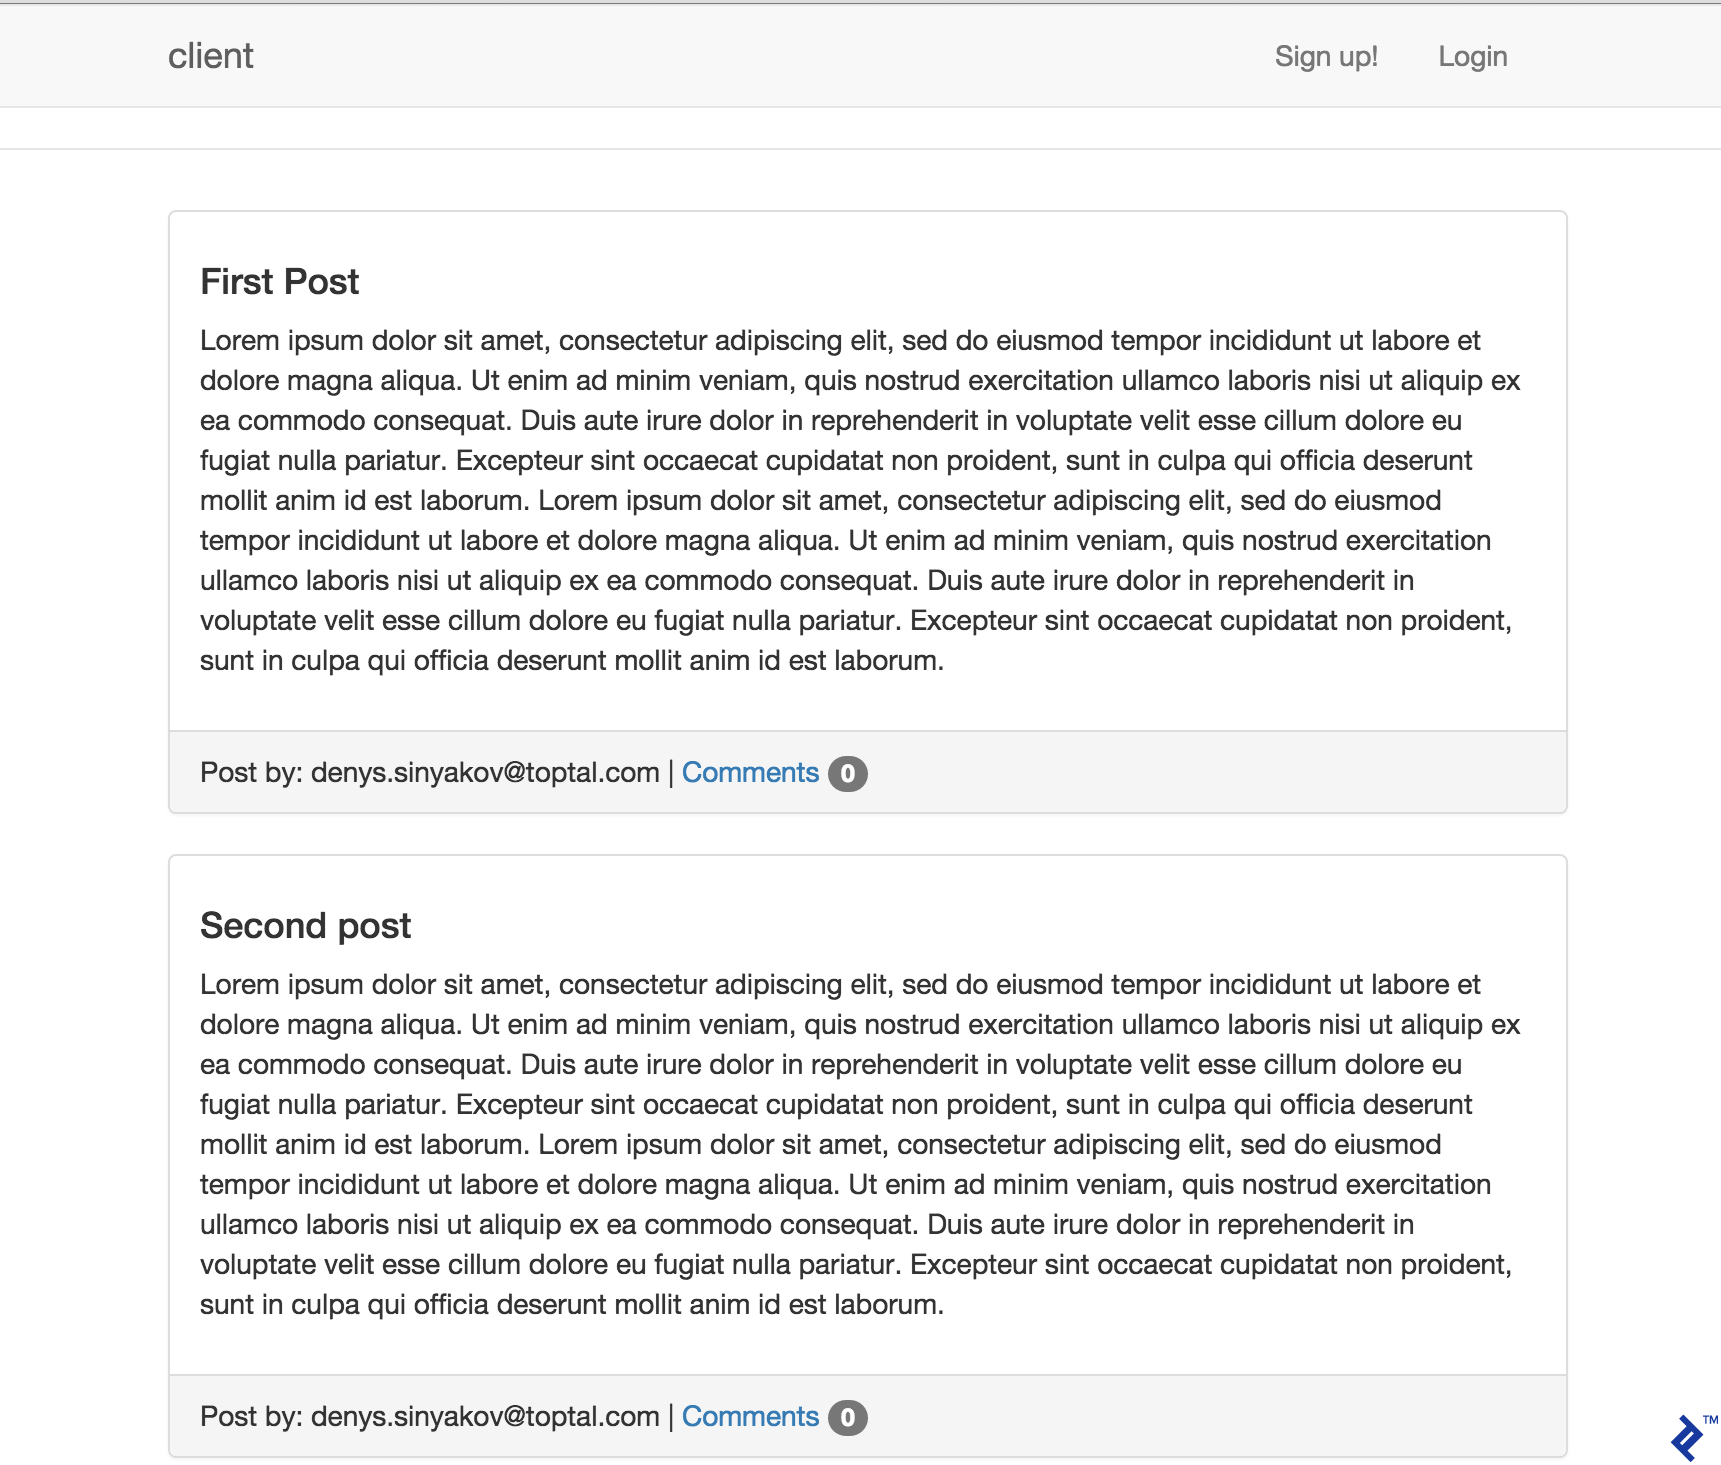
Now if you load your application home page you should be seeing something similar to this:
We should also probably have a separate view for individual posts.
yo angular:controller viewpost
yo angular:view viewpost
// viewpost.js

angular.module('clientApp')
   .controller('ViewpostCtrl', function ($scope, $http, alertService, userService, $location) {

     $scope.user = userService;
     $scope.params = $routeParams;
    $scope.postId = $scope.params.postId;

     $scope.viewPost = function() {
       $http.get('/app/post/' + $scope.postId)
           .error(function(data) {
             alertService.add('danger', data.error.message);
           })
           .success(function(data) {
             $scope.post = data;
           });
     };

     $scope.viewPost();
   });
<!-- viewpost.html -->

 <div class="panel panel-default" ng-show="post">
 <div class="panel-body">
   <h4>{{ post.subject }}</h4>
   <p>
     {{ post.content }}
   </p>
 </div>

 <div class="panel-footer">Post by: {{ post.user.email }} | Comments
   <span class="badge">{{ post.commentCount }}</span></a></div>
</div>
And the AngularJS route:
app.js:
.when('/viewpost/:postId', {
templateUrl: 'views/viewpost.html',
controller: 'ViewpostCtrl'
})
Like before, we add a new method to our application controller:
// Application.java

public static Result getPost(Long id) {
 BlogPost blogPost = BlogPost.findBlogPostById(id);
 if(blogPost == null) {
   return notFound(buildJsonResponse("error", "Post not found"));
 }
 return ok(Json.toJson(blogPost));
}
… And a new route:
GET /app/post/:id controllers.Application.getPost(id: Long)
Now if you navigate to http://localhost:9000/#/viewpost/1, you will be able to load a view for a particular post. Next, let’s add the ability to see user’s posts in the dashboard:
// dashboard.js

angular.module('clientApp')
   .controller('DashboardCtrl', function ($scope, $log, $http, alertService, $location) {

     $scope.loadPosts = function() {
       $http.get('/app/userposts')
           .error(function(data, status) {
             if(status === 401) {
               $location.path('/login');
             } else {
               alertService.add('danger', data.error.message);
             }
           })
           .success(function(data) {
             $scope.posts = data;
           });
     };

     $scope.loadPosts();
   });
<!-- dashboard.html -->

<h4>My Posts</h4>
<div ng-hide="posts.length">No posts yet. <a ng-href="/#/addpost">Add a post</a></div>
<div class="panel panel-default" ng-repeat="post in posts">
 <div class="panel-body">
   <a ng-href="/#/viewpost/{{ post.id }}">{{ post.subject }}</a> | Comments
   <span class="badge">{{ post.commentCount }}</span>
 </div>
</div>
Also add a new method to Post controller, followed by a route corresponding to this method:
// Post.java

public static Result getUserPosts() {
 User user = getUser();
 if(user == null) {
   return badRequest(Application.buildJsonResponse("error", "No such user"));
 }
 return ok(Json.toJson(BlogPost.findBlogPostsByUser(user)));
}
GET /app/userposts controllers.Post.getUserPosts
Now when you create posts, they will be listed on the dashboard:
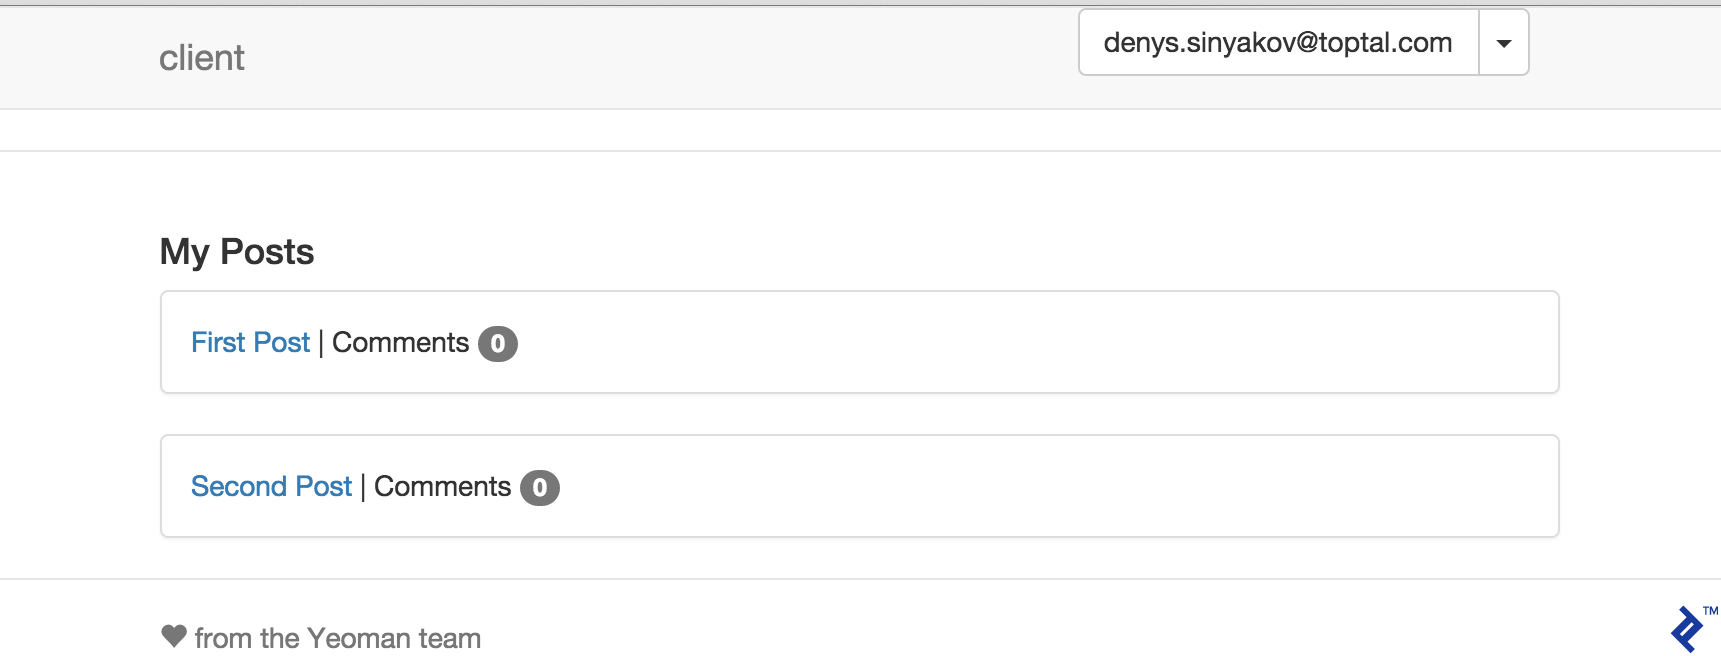
Commenting Functionality
To implement commenting functionality, we will begin by adding a new method in Post controller:
// Post.java

public static Result addComment() {
 Form<CommentForm> commentForm = Form.form(CommentForm.class).bindFromRequest();

 if (commentForm.hasErrors()) {
   return badRequest(commentForm.errorsAsJson());
 } else {
   PostComment newComment = new PostComment();
   BlogPost blogPost = BlogPost.findBlogPostById(commentForm.get().postId);
   blogPost.commentCount++;
   blogPost.save();
   newComment.blogPost = blogPost;
   newComment.user = getUser();
   newComment.content = commentForm.get().comment;
   newComment.save();
   return ok(Application.buildJsonResponse("success", "Comment added successfully"));
 }
}


public static class CommentForm {

 @Constraints.Required
 public Long postId;

 @Constraints.Required
 public String comment;

}
And as always, we need to register a new route for this method:
POST /app/comment controllers.Post.addComment
In our AngularJS application, we add the following to “viewpost.js”:
$scope.addComment = function() {
 var payload = {
   postId: $scope.postId,
   comment: $scope.comment
 };

 $http.post('/app/comment', payload)
     .error(function(data, status) {
       if(status === 400) {
         angular.forEach(data, function(value, key) {
           if(key === 'comment') {
             alertService.add('danger', key + ' : ' + value);
           } else {
             alertService.add('danger', value.message);
           }
         });
       } else if(status === 401) {
         $location.path('/login');
       } else if(status === 500) {
         alertService.add('danger', 'Internal server error!');
       } else {
         alertService.add('danger', data);
       }
     })
     .success(function(data) {
       alertService.add('success', data.success.message);
       $scope.comment = '';
       $scope.viewPost();
     });
};
And finally add the following lines to “viewpost.html”:
<div class="well" ng-repeat="comment in post.comments">
 <span class="label label-default">By: {{ comment.user.email }}</span>
 <br/>
 {{ comment.content }}
</div>

<div ng-hide="user.username || !post"><h4><a ng-href="/#/login">Login</a> to comment</h4></div>
<form name="addCommentForm" ng-submit="addComment()" novalidate ng-show="user.username">
 <div><h4>Add comment</h4></div>
 <div>
   <label for="comment">Comment</label>
   <textarea name="comment" class="form-control" id="comment" placeholder="Comment"
             ng-model="comment"></textarea>
 </div>

 <button type="submit" class="btn btn-primary">Add comment</button>
</form>
Now if you open any post, you will be able to add and view comments.
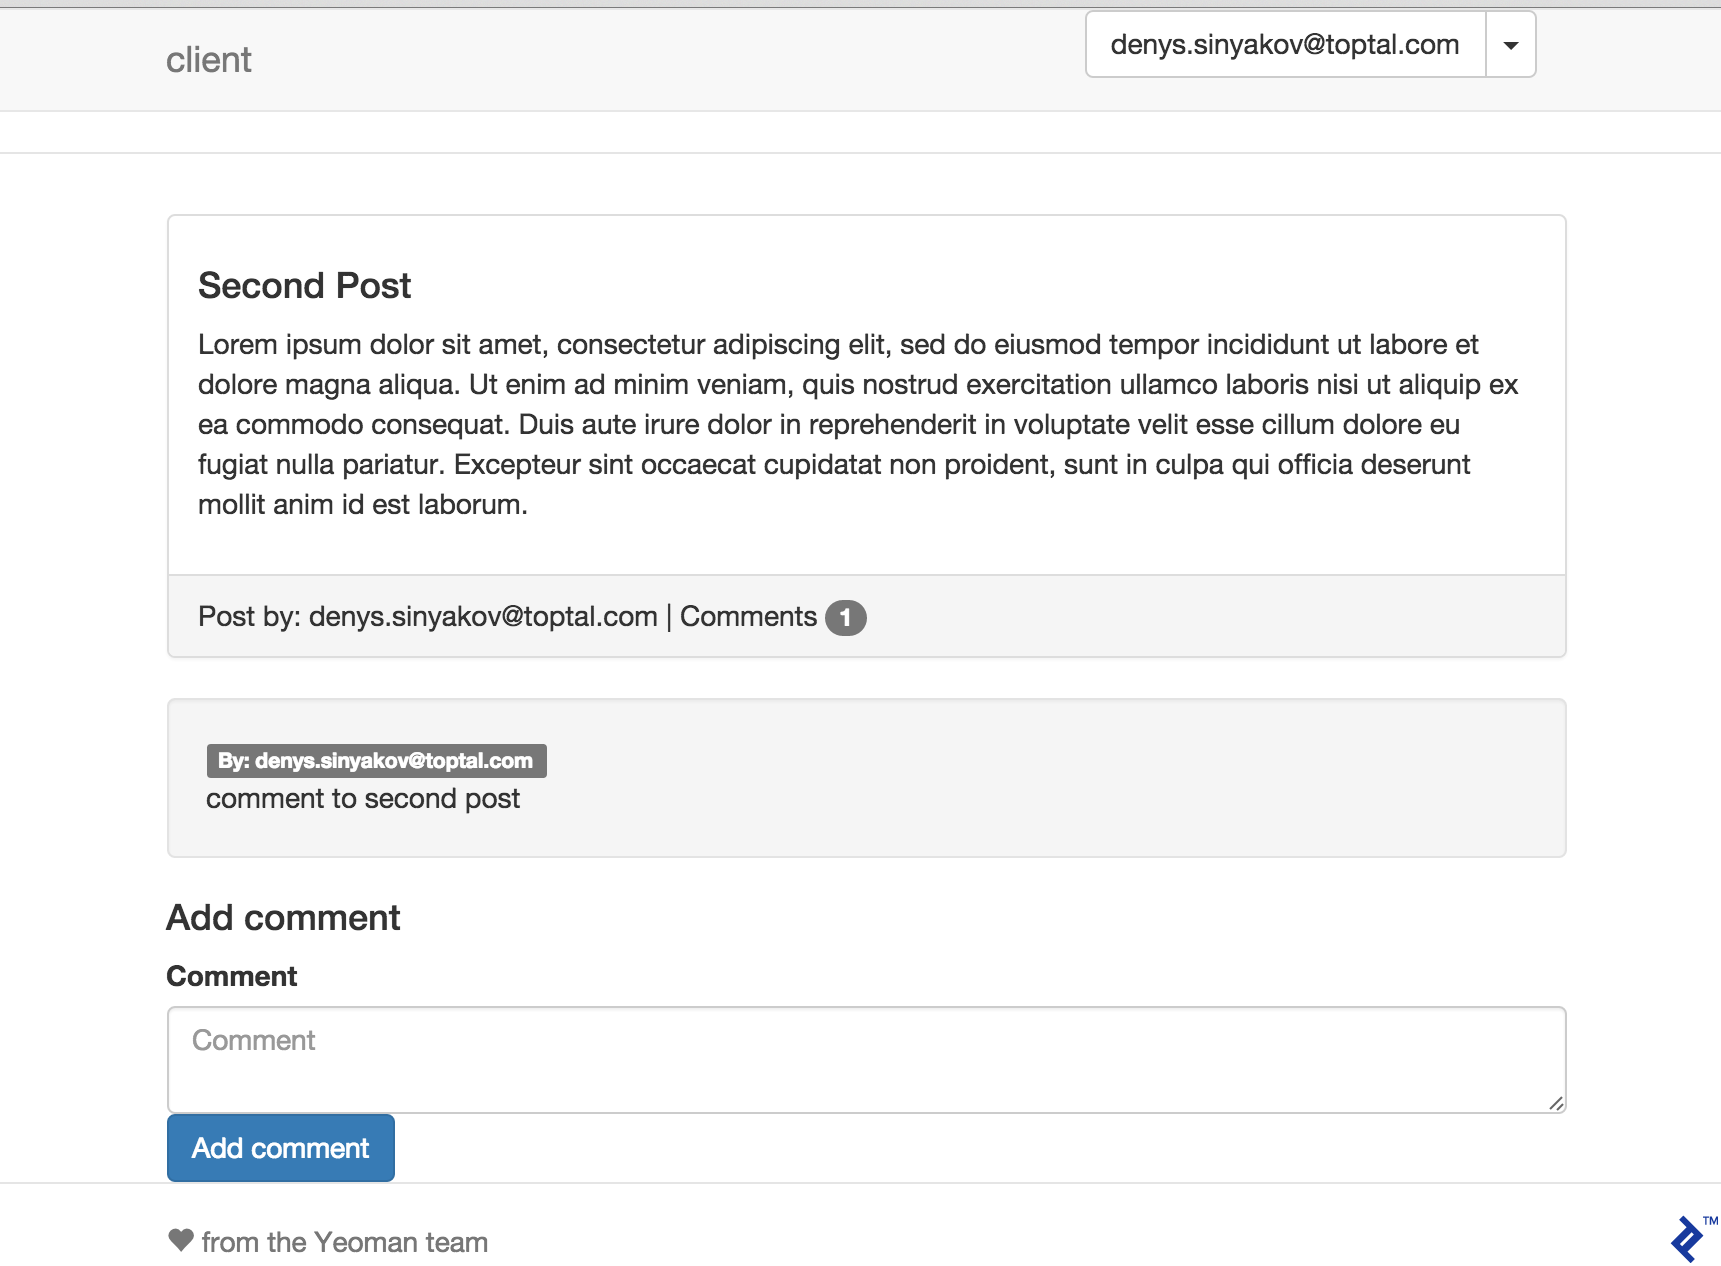
What’s Next?
In this tutorial, we have built an AngularJS blog with a Play application serving as a REST API back-end. Although the application lacks robust data validation (especially on the client side) and security, these topics were out of the scope of this tutorial. It was aiming to demonstrate one of the many possible ways of building an application of this kind. For convenience, the source code of this application has been uploaded to a GitHub repository.
If you find this combination of AngularJS and Play in web application development interesting, I highly recommend you review the following topics further:
- AngularJS documentation
- Play documentation
- Recommended security approach in one page JS app with Play as back-end (contains example)
- Secure REST API without OAuth
- Ready Play authentication plug-in (might be not fully usable for single-page JavaScript applications, but can be used as a good example)
Further Reading on the Toptal Blog:
Denys Sinyakov
San Francisco, CA, United States
Member since April 28, 2015
About the author
Denys (MSc) is a seasoned software scalability engineer, project manager, and entrepreneur with 12+ years of experience. Java is his focus.
PREVIOUSLY AT