From the Ground Up: How I Built the Developer's Dream Keyboard
Going from a software background, knowing nothing about electronics, to designing and building a powerful, marketable hardware device is an interesting and fascinating experience. In this article, I’ll describe the design of how this electronic masterpiece works.
Going from a software background, knowing nothing about electronics, to designing and building a powerful, marketable hardware device is an interesting and fascinating experience. In this article, I’ll describe the design of how this electronic masterpiece works.
László is a versatile full-stack developer experienced in a wide range of languages and frameworks with a system-wide understanding.
Working one day in August of 2007, I couldn’t help but realize that my regular PC keyboard didn’t serve me as much as possible. I had to move my hands between the various blocks of my keyboard excessively, hundreds if not thousands of times per day, and my hands were uncomfortably close to each other. There must be a better way, I thought.
This realization was followed by an overwhelming feeling of excitement as I thought about customizing the best keyboard for developers - and later, the realization that, as a freelance embedded software developer, I was hopelessly clueless about hardware.
At the time, I was quite busy with other projects, but not a day passed when I didn’t think about building the hacker keyboard. Soon I started dedicating my free time to working on the project. I managed to learn a whole new skill set, persuade a friend of mine, András Völgyi, mechanical engineer extraordinaire, to join to the project, gather some key people, and devote enough time to creating working prototypes. Nowadays, the Ultimate Hacking Keyboard is a reality. We’re making daily progress, and the launch of our crowdfunding campaign is within reach.
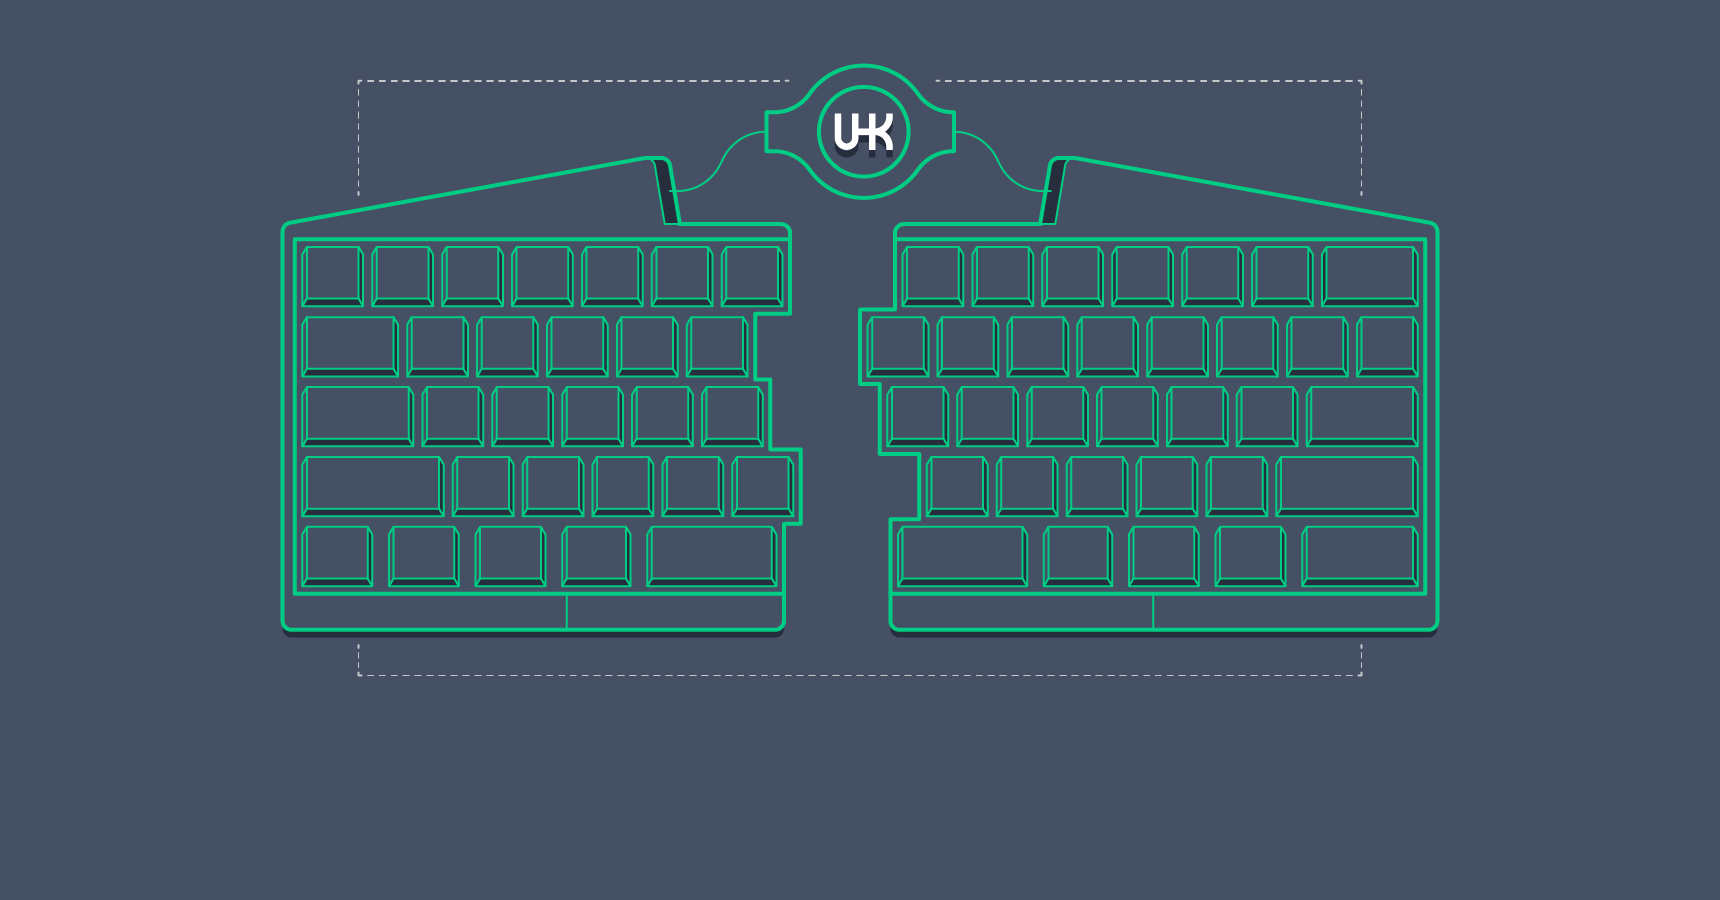
Going from a software background, knowing nothing about electronics, to designing and building a powerful, marketable hardware device, is an interesting and fascinating experience. In this article, I’ll describe the design of how this electronic masterpiece works. A basic understanding of electronic circuit diagrams may help you follow along.
How do you make a keyboard?
After dedicating thousands of hours of my life to this topic, it’s a hefty challenge for me to give a short answer, but there’s an interesting way to answer to this question. What if we start with something simple, like an Arduino board, and gradually build it up to be the Ultimate Hacking Keyboard? It should not only be more digestible but extremely educational. Therefore, let our keyboard tutorial journey begin!
Step One: A Keyboard Without Keys
First up, let’s make a USB keyboard that emits the x character on a once-per-second basis. The Arduino Micro development board is an ideal candidate for this purpose, because it features the ATmega32U4 microcontroller - an AVR microcrontroller and the same processor that is the brains of the UHK.
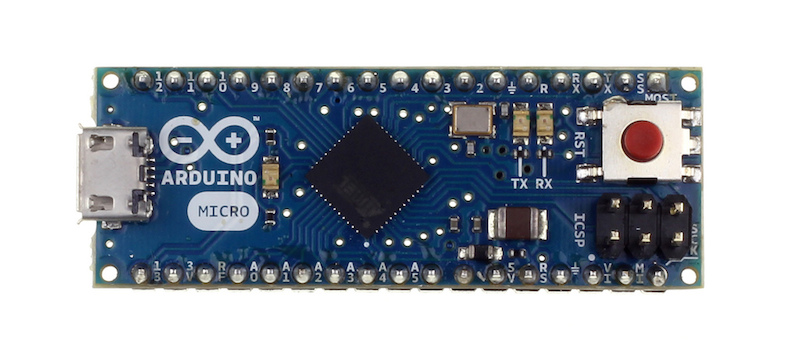
When it comes to USB-capable AVR microcontrollers, the Lightweight USB Framework for AVRs (LUFA) is the library of choice. It enables these processors to become the brains of printers, MIDI devices, keyboards, or almost any other type of USB device.
When plugging a device into the USB port, the device has to transfer some special data structures called USB descriptors. These descriptors tell the host computer the type and properties of the device being connected, and are represented by a tree structure. To make matters even more complex, a device can implement not only one but multiple functions. Let’s see the descriptors structure of the UHK:
- Device descriptor
- Configuration descriptor
- Interface descriptor 0: GenericHID
- Endpoint descriptor
- Interface descriptor 1: Keyboard
- Endpoint descriptor
- Interface descriptor 2: Mouse
- Endpoint descriptor
- Interface descriptor 0: GenericHID
- Configuration descriptor
Most standard keyboards only expose a single keyboard interface descriptor, which makes sense. However, as a custom programming keyboard, the UHK also exposes a mouse interface descriptor, because the user can program arbitrary keys of the keyboard to control the mouse pointer so the keyboard can be used as a mouse. The GenericHID interface serves as a communication channel, to exchange configuration information for all the special features of the keyboard. You can see the full implementation of the device and configuration descriptors of the UHK in LUFA here.
Now that we’ve created the descriptors, it’s time to send the x character in every second.
uint8_t isSecondElapsed = 0;

int main(void)
{
    while (1) {
        _delay_us(1000);
        isSecondElapsed = 1;
    }
}

bool CALLBACK_HID_Device_CreateHIDReport(USB_ClassInfo_HID_Device_t* const HIDInterfaceInfo,
                                         uint8_t* const ReportID,
                                         const uint8_t ReportType,
                                         void* ReportData,
                                         uint16_t* const ReportSize)
{
    USB_KeyboardReport_Data_t* KeyboardReport = (USB_KeyboardReport_Data_t*)ReportData;
    if (isSecondElapsed) {
        KeyboardReport->KeyCode[0] = HID_KEYBOARD_SC_X;
        isSecondElapsed = 0;
    }
    *ReportSize = sizeof(USB_KeyboardReport_Data_t);
    return false;
}
USB is a polled protocol, which means that the host computer queries the device on a regular interval (usually 125 times per second) to find out whether there’s any new data to send. The relevant callback is the CALLBACK_HID_Device_CreateHIDReport() function, which in this case sends the scancode of the x character to the host whenever the isSecondElapsed variable contains 1. isSecondElapsed gets set to 1 from the main loop on a per second basis, and set to 0 from the callback.
Step Two: A Keyboard of Four Keys
At this point our keyboard is not terribly useful. It’d be nice if we could actually type on it. But for that we need keys, and the keys have to be arranged into a keyboard matrix. A full-sized 104-key keyboard could have 18 rows and 6 columns but we’ll simply have a humble 2x2 keyboard matrix for starting up. This is the schematic:
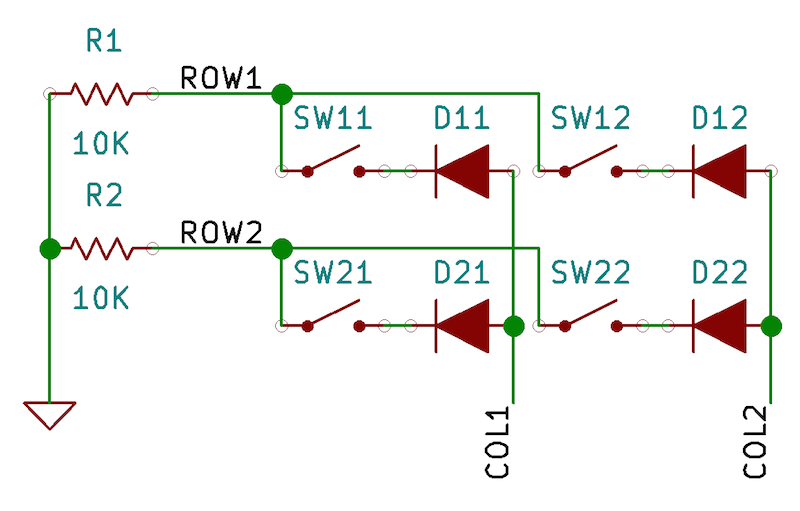
And this is how it looks on a breadboard:
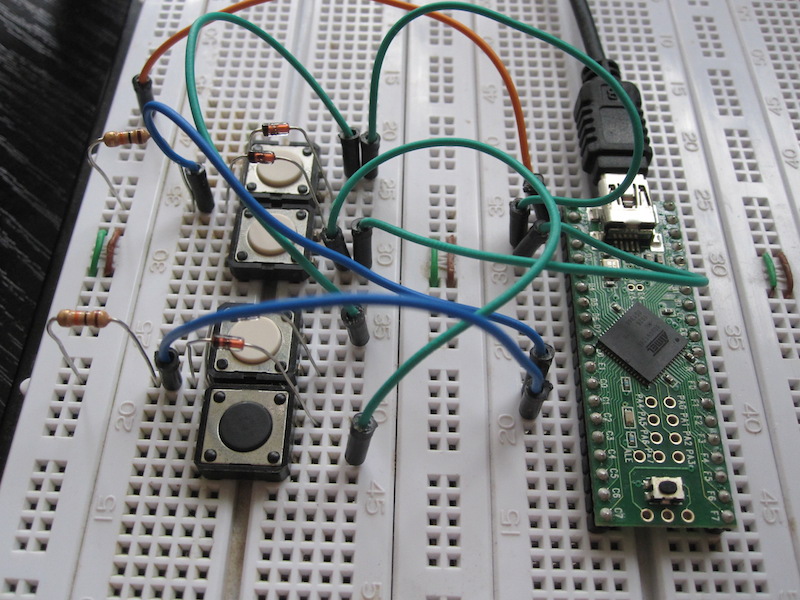
Assuming that ROW1 is connected to PINA0, ROW2 to PINA1, COL1 to PORTB0 and COL2 to PORTB1, here’s what the scanning code looks like:
/* A single pin of the microcontroller to which a row or column is connected. */
typedef struct {
    volatile uint8_t *Direction;
    volatile uint8_t *Name;
    uint8_t Number;
} Pin_t;

/* This part of the key matrix is stored in the Flash to save SRAM space. */
typedef struct {
    const uint8_t ColNum;
    const uint8_t RowNum;
    const Pin_t *ColPorts;
    const Pin_t *RowPins;
} KeyMatrixInfo_t;

/* This Part of the key matrix is stored in the SRAM. */
typedef struct {
    const __flash KeyMatrixInfo_t *Info;
    uint8_t *Matrix;
} KeyMatrix_t;

const __flash KeyMatrixInfo_t KeyMatrix = {
    .ColNum = 2,
    .RowNum = 2,
    .RowPins = (Pin_t[]) {
        { .Direction=&DDRA, .Name=&PINA, .Number=PINA0 },
        { .Direction=&DDRA, .Name=&PINA, .Number=PINA1 }
    },
    .ColPorts = (Pin_t[]) {
        { .Direction=&DDRB, .Name=&PORTB, .Number=PORTB0 },
        { .Direction=&DDRB, .Name=&PORTB, .Number=PORTB1 },
    }
};

void KeyMatrix_Scan(KeyMatrix_t *KeyMatrix)
{
    for (uint8_t Col=0; Col<KeyMatrix->Info->ColNum; Col++) {
        const Pin_t *ColPort = KeyMatrix->Info->ColPorts + Col;
        for (uint8_t Row=0; Row<KeyMatrix->Info->RowNum; Row++) {
            const Pin_t *RowPin = KeyMatrix->Info->RowPins + Row;
            uint8_t IsKeyPressed = *RowPin->Name & 1<<RowPin->Number;
            KeyMatrix_SetElement(KeyMatrix, Row, Col, IsKeyPressed);
        }
    }
}
The code scans one column at a time and within that column it reads the states of the individual key switches. The state of the key switches then gets saved into an array. Within our previous CALLBACK_HID_Device_CreateHIDReport() function the relevant scan codes will then be sent out based on the state of that array.
Step Three: A Keyboard with Two Halves
So far, we’ve created the beginnings of a normal keyboard. But in this keyboard tutorial we’re aiming for advanced ergonomics, and given that people have two hands we better add another keyboard half to the mix.
The other half will feature another keyboard matrix, working the same way as the previous one. The exciting new thing is the communication between the keyboard halves. The three most popular protocols to interconnect electronics devices are SPI, I2C and UART. For practical purposes we will use UART in this case.
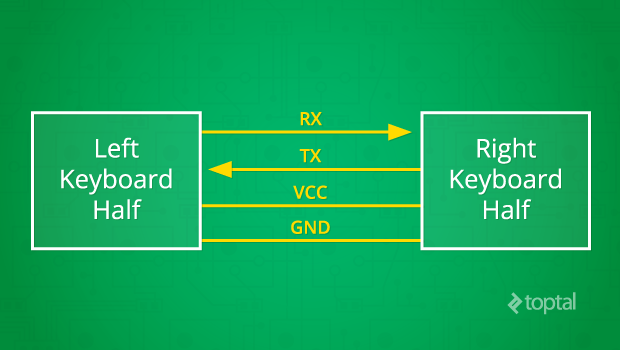
Bidirectional communication flows through RX rightwards and through TX leftwards according to the above diagram. VCC and GND is necessary to transfer power. UART needs the peers to use the same baud rate, number of data bits and number of stop bits. Once the UART transceiver of both peers gets set up, communication can start to flow.
For now, the left keyboard half sends one-byte messages to the right keyboard half through UART, representing key press or key release events. The right keyboard half processes these messages and manipulates the state of the full keyboard matrix array in memory accordingly. This is how left keyboard half send messages:
USART_SendByte(IsKeyPressed<<7 | Row*COLS_NUM + Col);
The code for the right keyboard half to receive the message looks like this:
void KeyboardRxCallback(void)
{
    uint8_t Event = USART_ReceiveByte();
    if (!MessageBuffer_IsFull(&KeyStateBuffer)) {
        MessageBuffer_Insert(&KeyStateBuffer, Event);
    }
}
The KeyboardRxCallback() interrupt handler gets triggered whenever a byte is received through UART. Given that interrupt handlers should execute as quickly as possible, the received message is put into a ring buffer for later processing. The ring buffer eventually gets processed from within the main loop and the keyboard matrix will be updated based on the message.
The above is the simplest way to make this happen, but the final protocol will be somewhat more complex. Multi-byte messages will have to be handled, and the individual messages will have to be checked for integrity by using CRC-CCITT checksums.
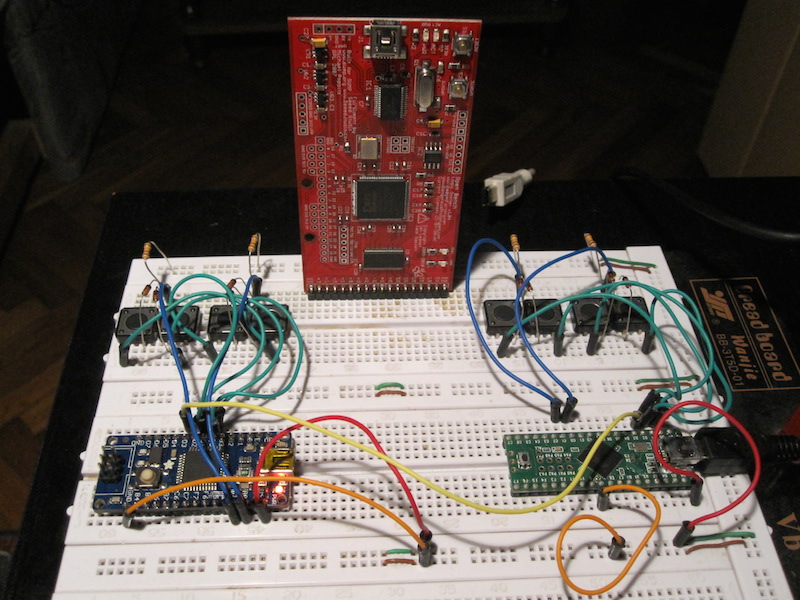
At this point, our breadboard prototype is looking pretty impressive:
Step Four: Meet the LED Display
One of our goals with the UHK was to enable the user to define multiple application-specific keyboard maps to further boost productivity. The user needs some way to be aware of the actual keymap being used, so an integrated LED display is built into the keyboard. Here is a prototype display with all LEDs lit:
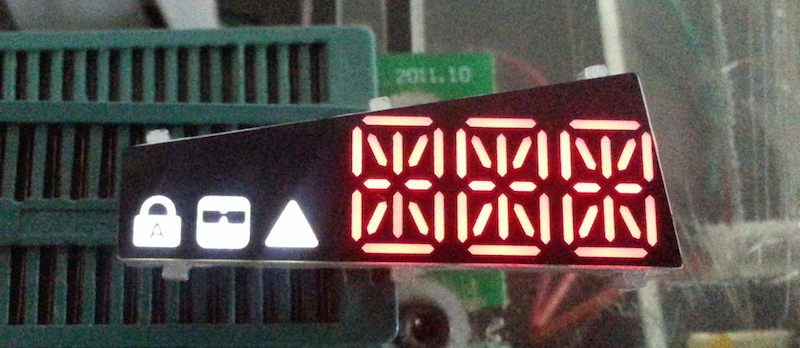
The LED display is implemented by a 8x6 LED matrix:
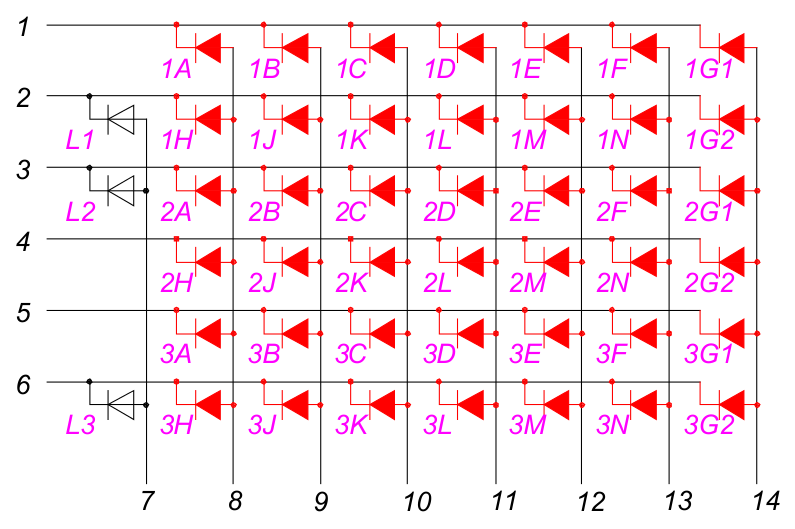
Every two rows of red-colored LED symbols represents the segments of one of the 14-segment LED displays. The white LED symbols represent the additional three status indicators.
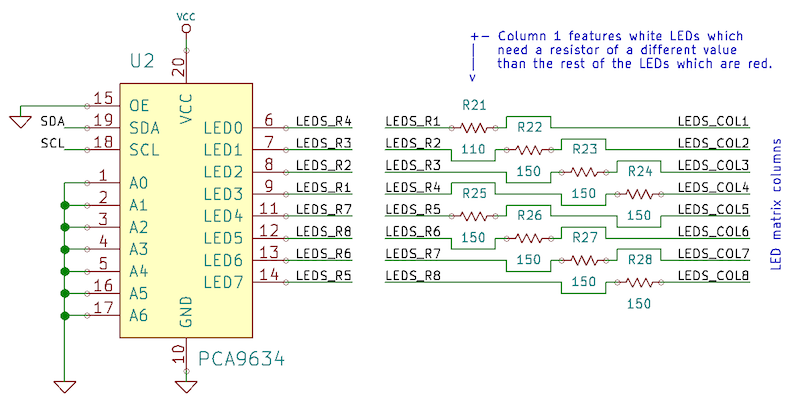
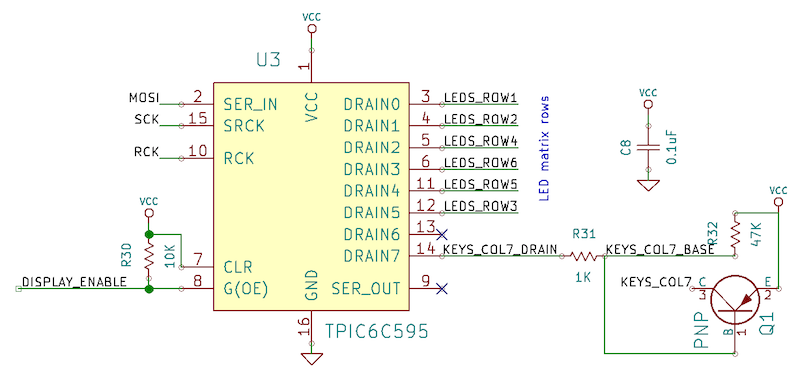
To drive current through an LED and light it up, the corresponding column is set to high voltage, and the corresponding row to low voltage. An interesting consequence of this system is that, at any given moment, only one column can be enabled (all of the LEDs on that column that should be lit have their corresponding rows set to low voltage), while the rest of the columns are disabled. One might think that this system cannot work to use the full set of LEDs, but in reality the columns and rows are updated so quickly that no flickering can be seen by the human eye.
The LED matrix is driven by two integrated circuits (ICs), one driving its rows and the other driving its columns. The source IC that drives the columns is the PCA9634 I2C LED driver:
The LED matrix sink IC that drives the rows is the TPIC6C595 power shift register:
Let’s see the relevant code:
uint8_t LedStates[LED_MATRIX_ROWS_NUM];

void LedMatrix_UpdateNextRow(bool IsKeyboardColEnabled)
{
    TPIC6C595_Transmit(LedStates[ActiveLedMatrixRow]);
    PCA9634_Transmit(1 << ActiveLedMatrixRow);

    if (++ActiveLedMatrixRow == LED_MATRIX_ROWS_NUM) {
          ActiveLedMatrixRow = 0;
    }
}
LedMatrix_UpdateNextRow() gets called about every millisecond, updating a row of the LED matrix. The LedStates array stores the state of the individual LEDs, is updated via UART based on messages originated from the right keyboard half, pretty much the same way as in the case of the key press/key release event.
The Big Picture
By now we have gradually built up all the necessary components for our custom hacker keyboard, and it’s time to see the big picture. The inside of the keyboard is like a mini computer network: lots of nodes interconnected. The difference is that the distance between the nodes is measured not in metres or kilometres, but in centimetres, and the nodes are not fully-fledged computers, but tiny integrated circuits.
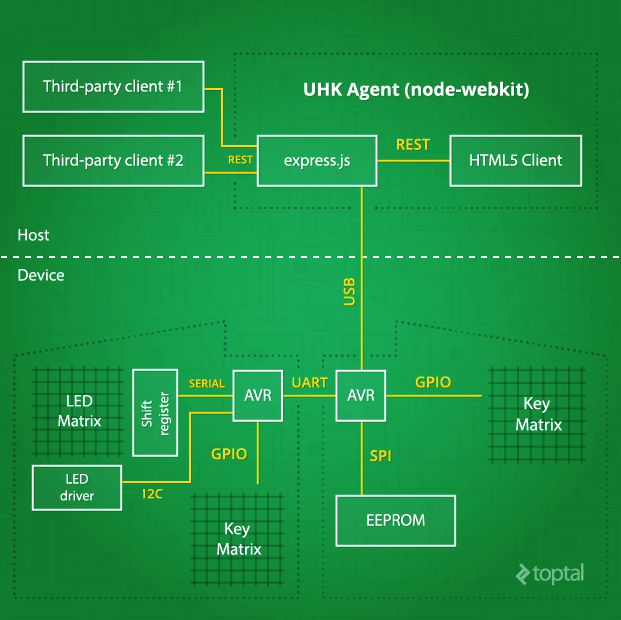
A lot has been said so far about the device-side details of the developer’s keyboard, but not so much about UHK Agent, the host-side software. The reason is that, unlike the hardware and the firmware, Agent is very rudimentary at this point. However, the high-level architecture of Agent is decided upon, which I’d like to share.
UHK Agent is the configurator application via which the keyboard can be customized to fit the needs of the user. Despite being a rich client, Agent uses web technologies and runs on top of the node-webkit platform.
Agent communicates with the keyboard using the node-usb library by sending special, device-specific USB control requests and processing their results. It uses Express.js to expose a REST API for consumption by third-party applications. It also uses Angular.js to provide a neat user interface.
var enumerationModes = {
    'keyboard'         : 0,
    'bootloader-right' : 1,
    'bootloader-left'  : 2
};

function sendReenumerateCommand(enumerationMode, callback)
{
    var AGENT_COMMAND_REENUMERATE = 0;
    sendAgentCommand(AGENT_COMMAND_REENUMERATE, enumerationMode, callback);
}

function sendAgentCommand(command, arg, callback)
{
    setReport(new Buffer([command, arg]), callback);
}

function setReport(message, callback)
{
    device.controlTransfer(
        0x21,             // bmRequestType (constant for this control request)
        0x09,             // bmRequest (constant for this control request)
        0,                // wValue (MSB is report type, LSB is report number)
        interfaceNumber,  // wIndex (interface number)
        message,          // message to be sent
        callback
    );
}
Every command has an 8-bit identifier and a set of command-specific arguments. Currently, only the re-enumerate command is implemented. The sendReenumerateCommand() makes the device re-enumerate as the left bootloader or the right bootloader, for upgrading the firmware, or as a keyboard device.
One might have no idea about the advanced features that can be achieved by this software, so I’ll name a few: Agent will be able to visualize the wear of the individual keys and notify the user about their life expectancy, so the user could purchase a couple of new key switches for the impending repair. Agent will also provide a user interface for configuring the various keymaps and layers of the hacker keyboard. The speed and acceleration of the mouse pointer could also be set, along with loads of other uber features. Sky’s the limit.
Creating the Prototype
A lot of work goes into creating customized keyboard prototypes. First of all, the mechanical design has to be finalized which, is pretty complex in itself and involves custom-designed plastic parts, laser-cut stainless steel plates, precision-milled steel guides and neodymium magnets that hold together the two keyboard halves. Everything is designed in CAD before fabrication begins.
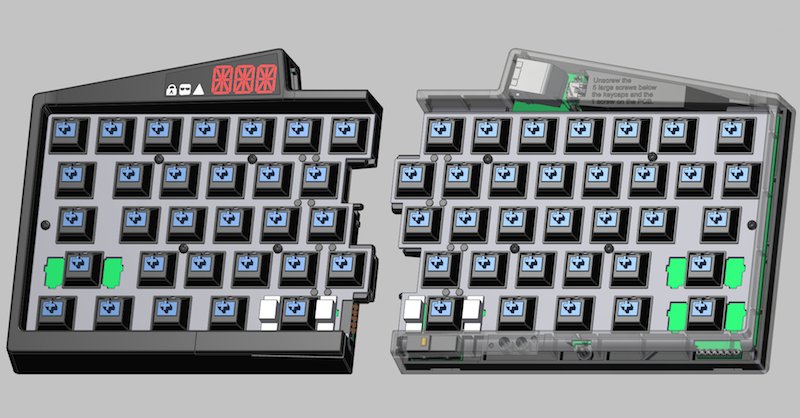
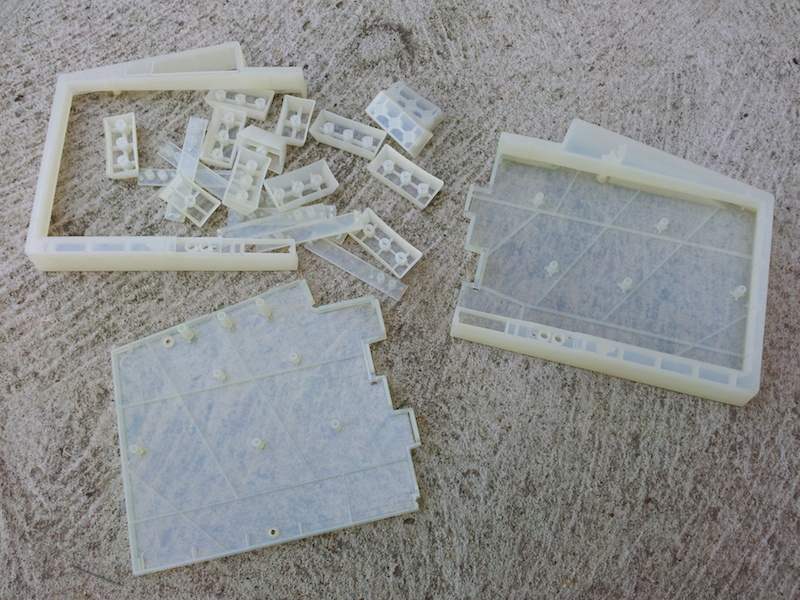
This is how the 3D printed keyboard case looks:
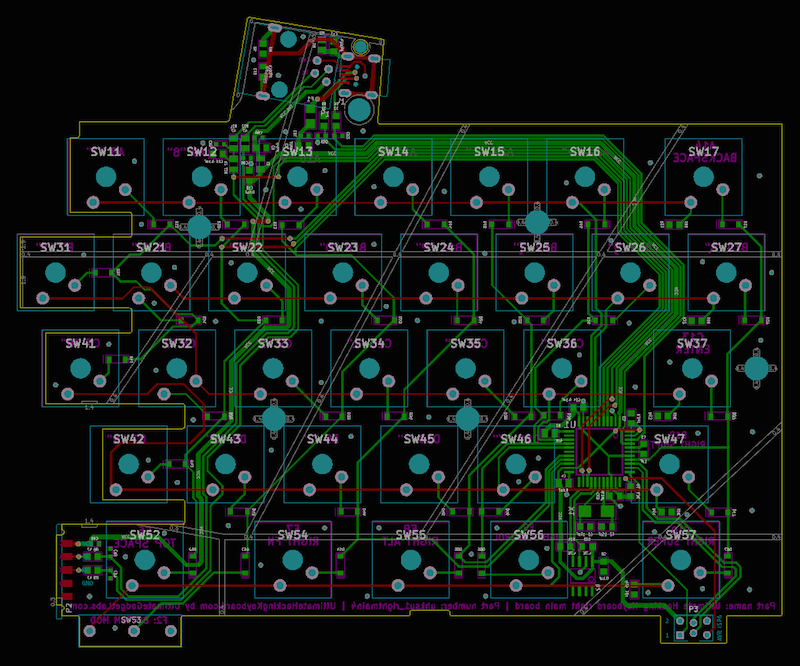
Based on the mechanical design and the schematic, the printed circuit board has to be designed. The right-hand PCB looks like this in KiCad:
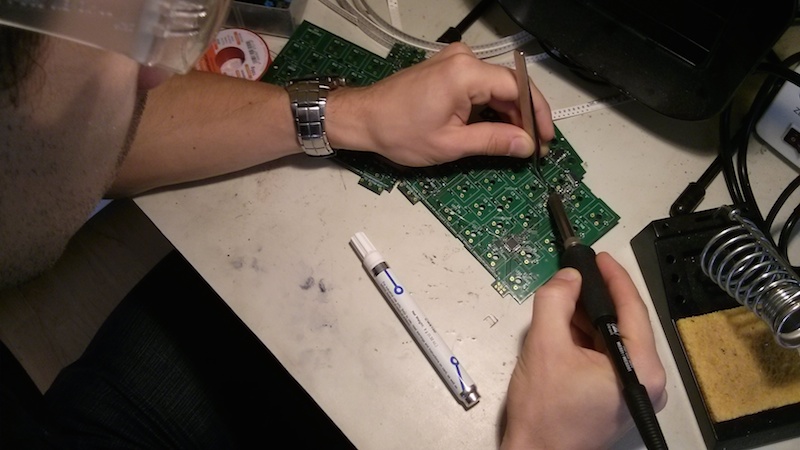
Then the PCB gets fabricated and the surface-mounted components must be soldered by hand:
Finally, after fabricating all the parts, including 3D printing, polishing and painting the plastic parts and assembling everything, we end up with a working hacker keyboard prototype like this one:
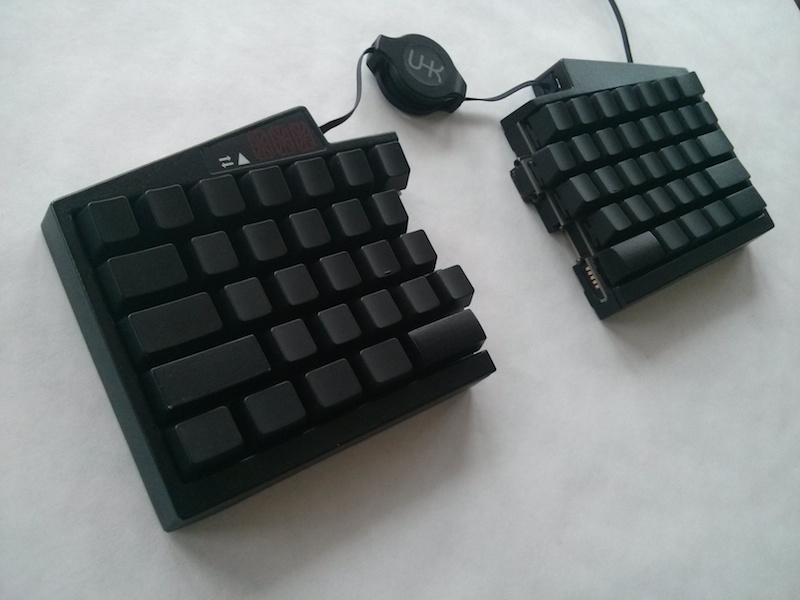
Conclusion
I like to compare developers’ keyboards to the instruments of musicians. Keyboards are fairly intimate objects if you think about it. After all, we use them all day to craft the software of tomorrow, character by character.
Probably because of the above, I consider developing the Ultimate Hacking Keyboard a privilege, and despite all the hardship, more often than not it’s been a very exciting journey and an incredibly intense learning experience.
This is a broad topic, and I could only scratch the surface here. My hope is that this article was a lot of fun and full of interesting material. Should you have any questions, please let me know in the comments.
Lastly, you’re welcome to visit https://ultimatehackingkeyboard.com for more info, and subscribe there to be notified about the launch of our campaign.
Further Reading on the Toptal Blog:
Szeged, Hungary
Member since April 23, 2014
About the author
László is a versatile full-stack developer experienced in a wide range of languages and frameworks with a system-wide understanding.
