How a Single Front-End Engineer Can Replace a Team of Two
Demand within the web design scene today has changed over the past few years: designers with front-end skills, and front-end developers with design skills, are more and more in demand. Yes, you could argue that the jobs are completely different—and maybe you straight-up don’t like one of them—but truth be told, in my six years as a freelance web developer and twelve years as a designer, I’ve learned that it’s much harder to get by as just a web designer or just a front-end developer.
Wearing both hats has a lot of advantages: from a professional perspective alone, you can find work more easily and charge a higher rate because you’re bringing more to the table.
Tomislav is a digital product & UX/UI designer. He’s an organized artist & a problem solver. He tells your story & makes your product work.
Expertise
Thinking With Two Minds
Demand within the web design scene has changed over the past few years: designers with front-end skills, and front-end developers with design skills, are more and more in demand. Yes, you could argue that the jobs are completely different—and maybe you straight-up don’t like one of them—but truth be told, in my six years as a freelance web developer and twelve years as a designer, I’ve learned that it’s much harder to get by as just a web designer or just a front-end developer than as a front-end engineer that knows both roles.
Wearing both hats has a lot of advantages: from a professional perspective alone, you can find work more easily and charge a higher rate because you’re bringing more to the table.
But working as a hybrid front-end engineer also has a few disadvantages that you need to know about—and how to work around them. As a creative designer, you will use your “right brain”, the half responsible for visual, spatial, and perceptual information—in other words, all things pretty in web design. As a technical front-end developer you will use your “left brain”, the logical and analytical partner to your crazy artist on the right.
And, since you’re just one person, this means that you’re working two totally different jobs at the same time, with the same brain—and that can get downright confusing for your brain. If you can’t handle it, you will not produce quality work, or reach your full potential. And, if you’re a freelancer trying to live up to a hybrid front-end engineering job description, you’re probably competing against a team of two (developer and designer), so you’ll have to work under the same timeframe while retaining quality. (Of course, you can also get paid as if you were a team of two!)
Knowing which part of your brain to use and when to use it is the key to streamlining your processes and producing the best results with zero frustration and ample time to spare on your deadline. Regardless of where you’re lacking, on the left or the right, this post will help you understand the skills you need and the ways you can acquire them.
One Night Stand With Your Project
Ok, ready? Great! Let’s say that you’ve been asked to design the site for miniCloud, a budding startup offering custom VPS solutions. Where do you begin?
Before I start any “real” work on a project, I like to go to bed with it. This means doing thorough research about your client’s product, services, competition, etc. In short, Google the hell out of it. After that, think about the project all day: How will it look like when you’re done with it? Take it to dinner, and fall asleep with your new, sexy design in mind. During this stage, always have a pencil (or mobile phone) ready to write down ideas as they come to you. This kind of mind work usually helps define key aspects of your process.
Let Your Creative Juices Flow: The Design Process
Now that you have some ideas to build off, it’s time to begin the real design process. This consists of three steps: 1) sketch, 2) wireframe, and 3) graphics. This is the part where you let the artistic half of the brain do its thing and go nuts with pencil, paper, and Photoshop.
During this design stage, It’s crucial that you let your “developer” side keep you in check so that you don’t go crazy with some aspects of the website that will be next to impossible to quickly recreate using HTML, CSS, and jQuery. If you try to reinvent the browser, your front-end developer will hate you for it. And your front-end developer is you—remember?
So, be guided by the best practices of web design (and some common sense), because it’s highly unlikely that you will be breaking any new ground by redesigning your friend’s wedding dress website. This isn’t to say that you shouldn’t aim to create a fantastic and impressive design. But rather, come up with something you know is feasible. Projects that re-invent the web are usually done in your spare time with no deadline hanging over your head.
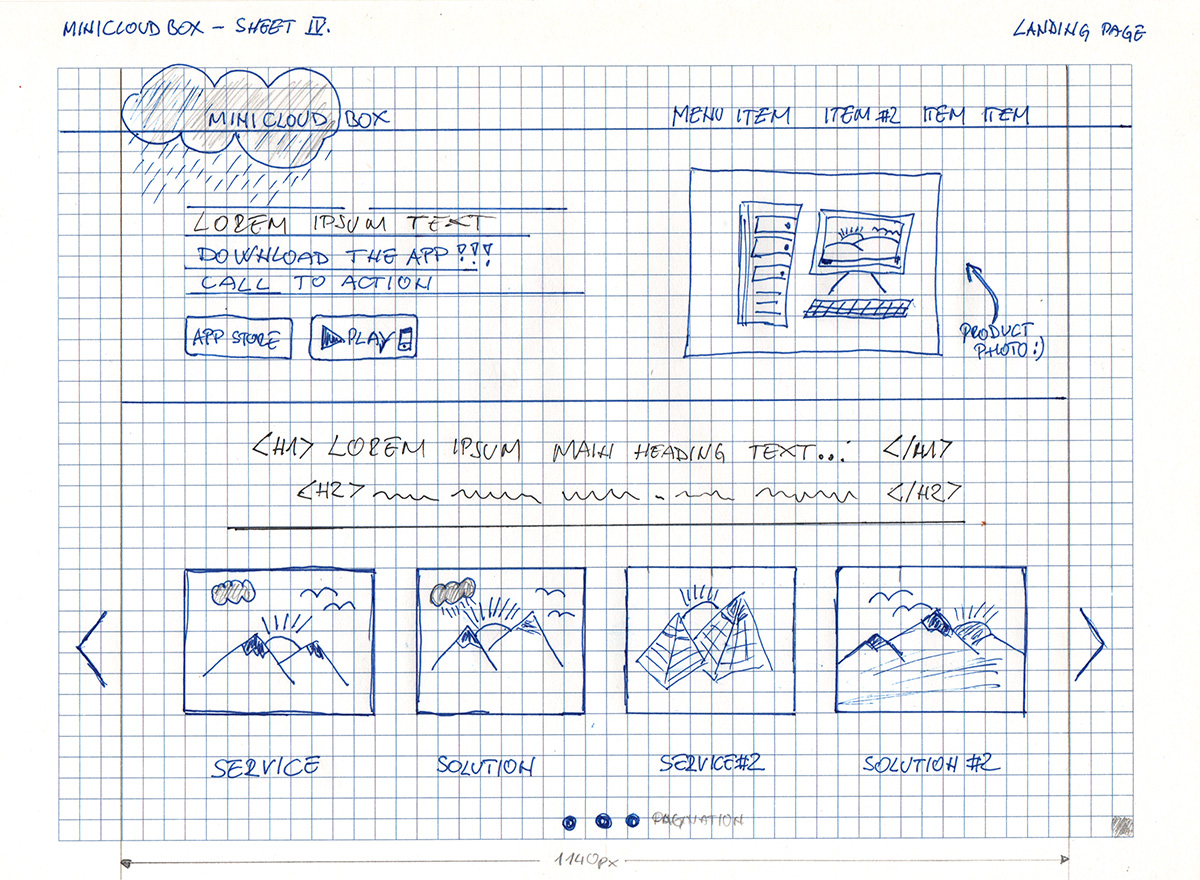
- Sketch: I start off with a squared paper notebook and a couple of pencils. Squared paper is particularly great because you can use it for grid-based designs. You’ll have no problem later on when you translate your sketch into wireframes and, at the very end, onto a grid-based website. For miniCloud, our sketch might look something like this:

Please note that additional details on the sketch, like snow, birds and clouds, are the product of my procrastination and are not mandatory in any part of your design process, but they look nice.
<div class="pop_out_box is-full_width">
<b>Personal tip</b>: There are some great resources online where you can download and print sketch sheets. One of my favorites is <b><a href="http://sneakpeekit.com/wireframe-sketchsheets/">sneakPeekit</a></b>. They also have sheets for mobile and tablet design.
</div>
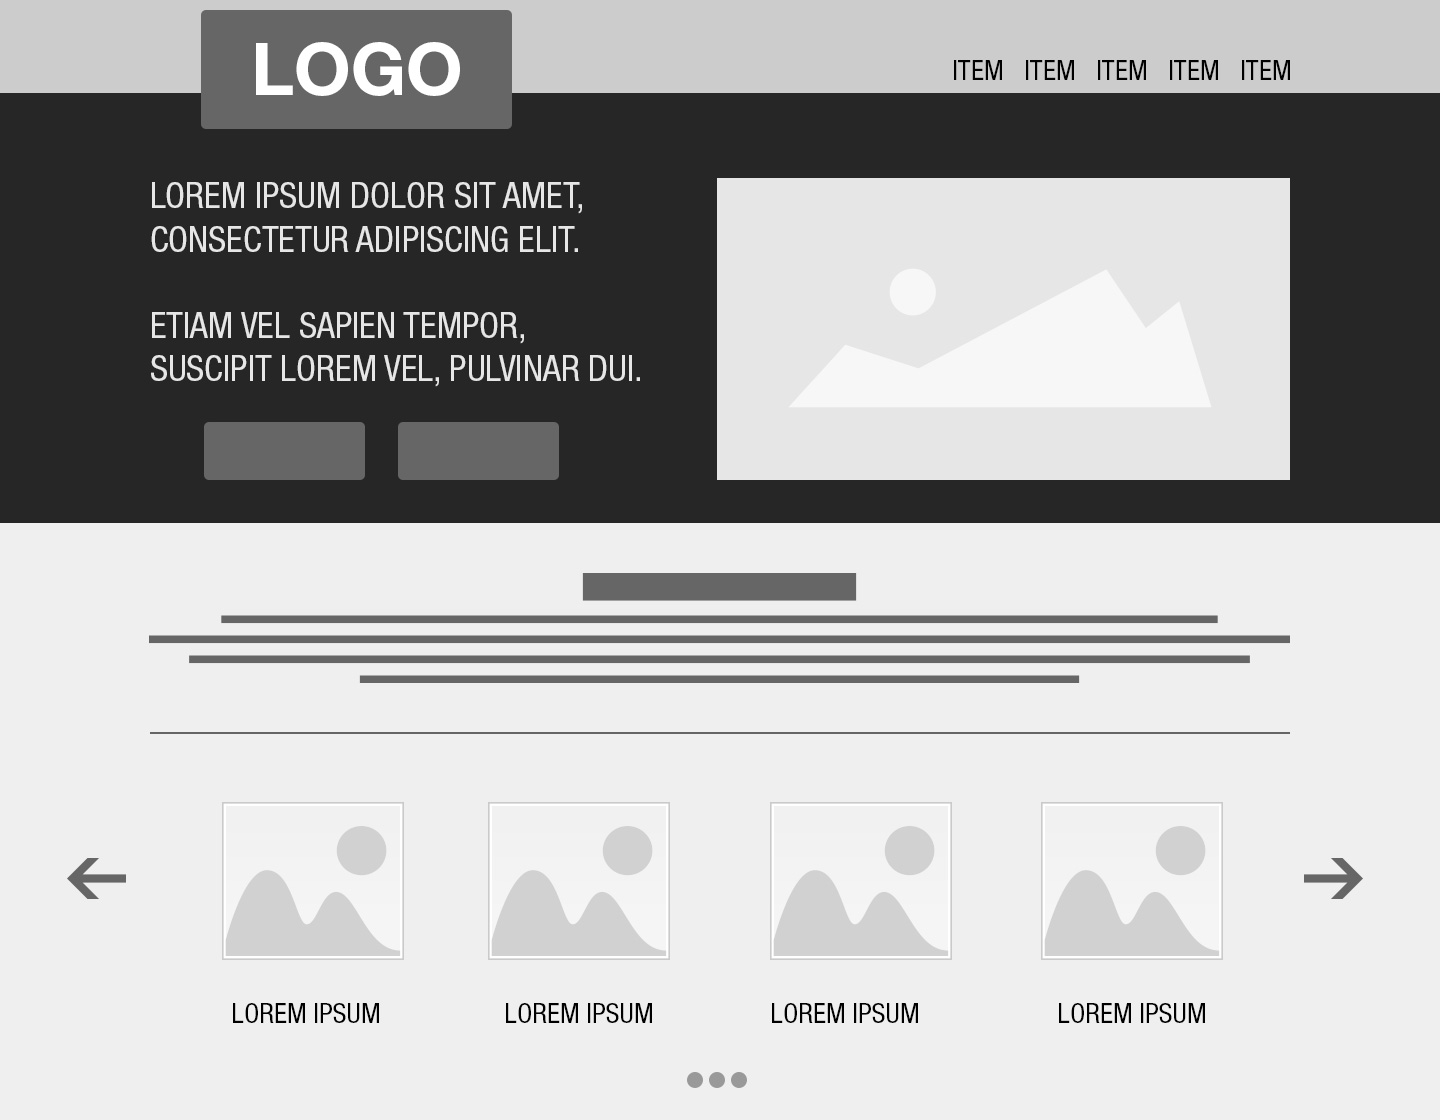
- Wireframe: Now that we have a basic idea of how our site will look, it’s time to create wireframes that we can show to the client. There are a lot of ways to get this done. In some cases, you can skip the step entirely if you feel there is no need. Personally, I use Photoshop to wireframe my idea since it’s the tool I’m most familiar with. There are a lot of free wireframe kits in .EPS or .PSD that get you started in seconds, so there is no need for you to create and draw all of your elements from scratch. There are a few online solutions as well if you want to avoid Photoshop, but I’m more of an offline kind of guy. Anyway, expanding off of our sketch, we might wireframe our website like this:

- Graphics: This is my favorite part: transforming our wireframe into a beautiful website. But not everyone is me. If you’re primarily a developer and have slim-to-no talent for design, colors, typography, etc., I would suggest starting with other websites for design inspiration. There are a lot of them, and they’re covered in great ideas—who knows, maybe there is a designer in you just waiting to come out? I find it helpful to keep a bookmarks folder of websites that I find particularly good-looking or well designed. Picasso (?) did say, “Good artists copy but great artists steal”—that doesn’t mean you take someone elses design and put your sticker on it. Instead, get inspired by someone else’s work and add your own spin and approach to it.
I do all of my designing in Photoshop. Ideally, your client will supply you with raw materials to work with, like photographs and copy text that you can use instead of placeholders. It looks much better when you send it to revisions.
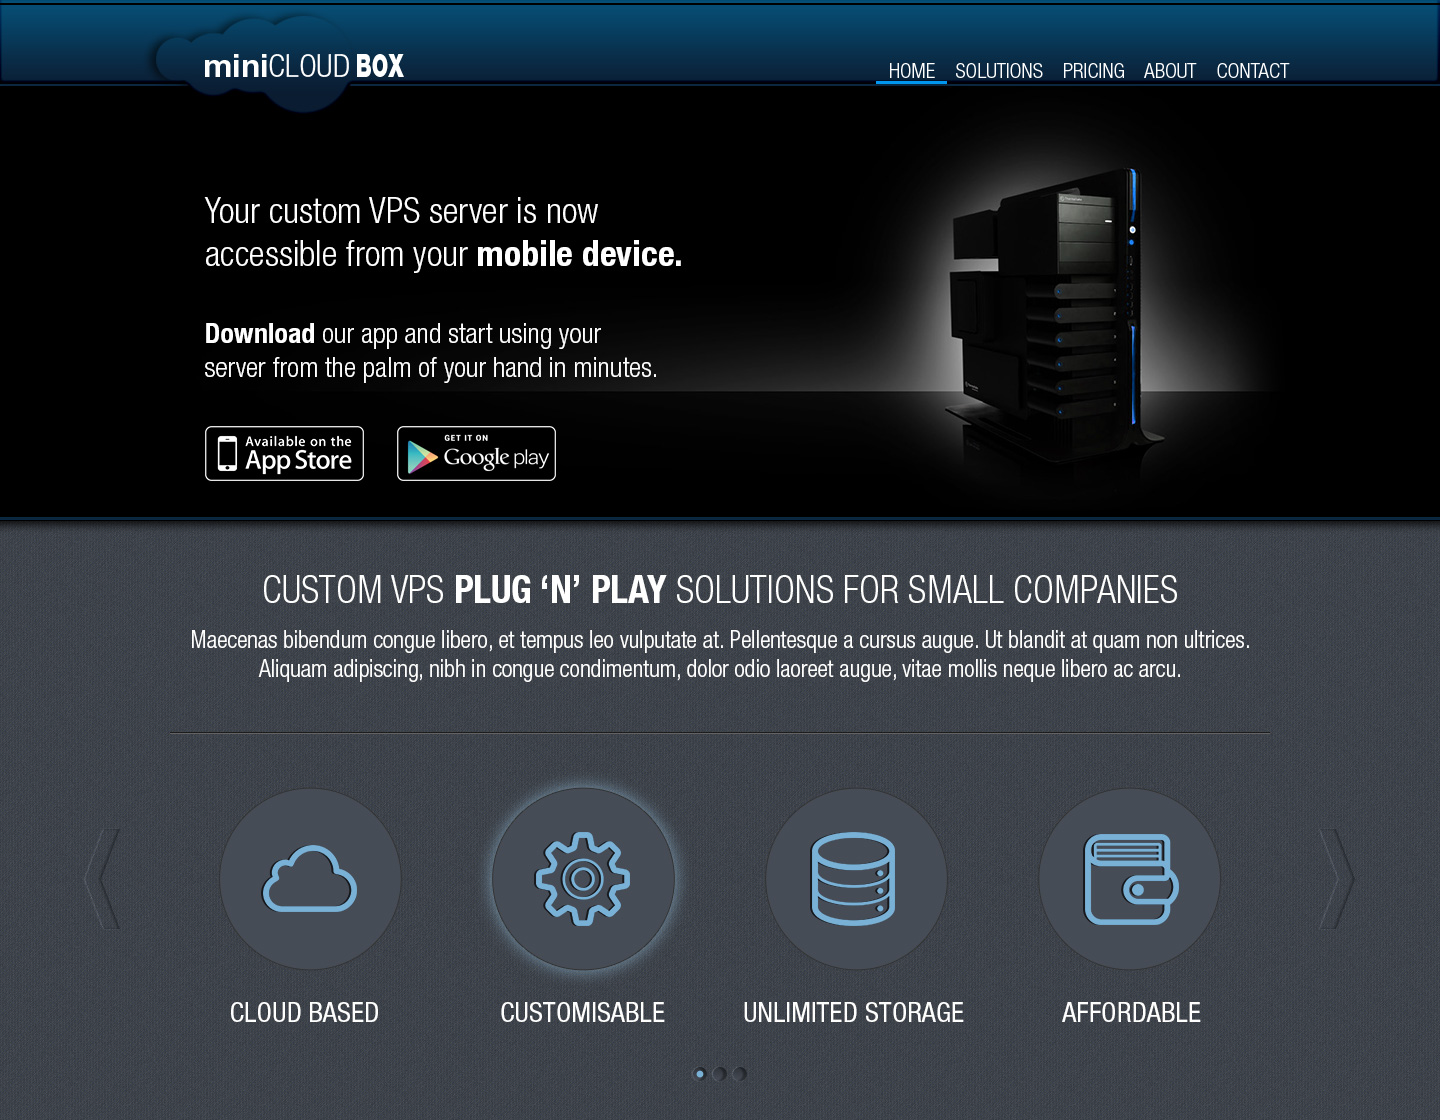
So, for step three, we take our wireframe and bring it to life:

By the way: if you do end up using Photoshop, there are a lot of cool resources out there that will make your process a lot faster, like plug-ins and styles. I could write an entire post about them alone, so I will just point out a few that I use often.
- CSS3Ps: Free cloud-based Photoshop plug-in that converts your layers to CSS3.
- Divine Elemente: Creates WordPress themes directly from your PSDs. It’s great for quick starting your WordPress project. Although they say “No HTML Skills Required”, you will actually need some if you want to get awesome results.
- Subtle Patterns: Collection of free patterns to use in your designs, usually as backgrounds. Details like these make all the difference when you’re trying to take your designs from good to awesome.
“Slice It Up”: The Front-End Process
After I’ve finished with the design stage and received an OK from the happy client, I’m ready to turn my static images into live websites. Remember, at this point, our design is still just that: a design. We have a ways to go before it’s ready for the web.
At this stage, it’s time to use the left, more analytical half of your brain.
In the web design world, we refer to this process as “slicing”. Although the term was more accurate some time ago, before CSS came to be the web’s main visual building block and you had to cut up every little piece of your PSD or PNG and put it into dreadful little tables, it stuck around.
If you’re a web designer and you don’t know how to ‘front-end’ yet, you’re in luck—because coding can be learned (unlike having a natural knack for design). I would recommend you invest in some online video tutorials like Lynda.com and go over the front-end development basics. (A more definitive list of resources can be found here.) In a matter of hours, you will go from zero to reading the code. And in a matter of days, you’ll be writing it yourself. And in couple of months, you will be a master of HTML and CSS—then there is no stopping you when it comes to front-end engineering jobs.
Now, if you created some great wireframes (in the previous stage) according to some grid that you’re comfortable with, you’ll know exactly how you want your site to be coded. The quickest way would be to use some kind of front-end framework, like Bootstrap.
Once you get the hang of grid-based design, you’ll begin to see every part of your website as a bunch of rows and columns. The first thing I do when I’m setting my HTML structure, before I add any real content or CSS, is write in the rows, then the columns, then basic stuff like navigation, followed by text and image placeholders. This lets you get the basic structure down first and build from there. Looking at this wireframe, we can see six rows:
- Logo / Navigation
- Image slider
- Intro text
- Category images
- Latest news / offers
- Footer
After we fit them into Bootstrap’s HTML structure, we’d have something like this:
A lot of basic websites use the same (or similar) code, and as you work on more and more projects, you’ll see that website development is largely an iterative process, and there is no point in writing the same code on each iteration. This is why frameworks are useful! Whether you created your own or decided to use Bootstrap or Foundation—it doesn’t matter. What does matter is that you can maintain it later on and expand it if-needed.
Almost anything you need for a project has been made before, and then re-made a couple of times. So for any major task, search around and ask others if they have suggestions before you go head-first through a wall. Most of the big frameworks have very active communities that create additional code and plug-ins to make your job easier. So work smart, not hard—and learn every day. And, if you do need something that no one has built before, well then, you’re breaking some new ground! Write about it and share with the community—it will help you grow as a designer and developer.
Choosing a CMS
For some front-end engineering projects, you’ll be done as soon as your design exists on a live webpage. These are usually smaller sites (e.g., for small businesses, lawyers, dentists, etc.). But often, you or your client will want to have a control over the website’s content. In that case, you need a Content Management System (CMS). The goal of a CMS is to let you edit and publish content to a webpage without having to code every new detail by hand, or even code at all.
Of all the large CMSs, I would call myself a WordPress Evangelist: I rave about it to other developers, especially beginners, because of its versatility, ease of use, comprehensive documentation for development, large community, large number of free plug-ins, and so on, and so forth…
If someone tells you that Joomla! is better, especially for smaller projects—then they don’t know what they’re talking about. Anyway, don’t just take my word for it: download WordPress and Joomla! starter themes, take a look at each folder, and then ask yourself—which do you wish to explore in your new front-end role?
I would need an entire article to write about this topic, but trust me on this one just like you would trust Baz Luhrmann on sunscreen.
If your project is particularly small and you just need a simple CMS that can be implemented without any coding skills, I would recommend you use CouchCMS. With just couple of XHTML tags, you can get it up and running within minutes, and even your grandma will know how to use it.
Maintaining Your Website
After you have delivered your website, and you have another satisfied customer, all that is left for you to do is maintain the site. If you’ve built a simple HTML site that will have no new content, you’re probably done.
If you’ve used a CMS, you’ll have to make sure that the technology is always up to date so that you avoid any security breaches. This includes the CMS itself and any plug-ins you used. If you took my advice and used WordPress, you’ll be notified via email for every available update.
This is the ballpark of my process. Granted, this won’t work for everybody, and it certainly won’t apply to every project. But I hope this helps you designers out there gain the skills you need to become great front-end engineers, and vice versa, so that we can continue to grow our talents as front-end developers.
I can only show you the door. You’re the one that has to walk through it. - Morpheus, the Matrix
P.S.: You can find a PSD of the above template and other cool designs on my dribbble portfolio.
London, United Kingdom
Member since June 3, 2013
About the author
Tomislav is a digital product & UX/UI designer. He’s an organized artist & a problem solver. He tells your story & makes your product work.

