Integrating Facebook Login in AngularJS App with Satellizer
Integrating social network login in web applications directly using their SDKs can be a time consuming task. The fact that these SDKs keep changing every now and then doesn’t help either.
In this article, Toptal engineer Son Nguyen Kim provides us with an in-depth tutorial on how to use Satellizer, a feature-rich AngularJS library to integrate Facebook Login in an AngularJS web app.
Son is highly skilled with software engineering and ML algorithms and always tries hard to tackle problems with a simple approach.
Expertise
PREVIOUSLY AT

With the arrival of feature-rich front-end frameworks such as AngularJS, more and more logic is being implemented on the front-end, such as data manipulation/validation, authentication, and more. Satellizer, an easy to use token-based authentication module for AngularJS, simplifies the process of implementing authentication mechanism in AngularJS, The library comes with built-in support for Google, Facebook, LinkedIn, Twitter, Instagram, GitHub, Bitbucket, Yahoo, Twitch, and Microsoft (Windows Live) accounts.
In this article, we will build a very simple webapp similar to the one here which allows you to login and see current user’s information.
Authentication vs Authorization
These are 2 scary words that you often encounter once your app starts integrating a user system. According to Wikipedia:
Authentication is the act of confirming the truth of an attribute of a single piece of data (a datum) claimed true by an entity.
Authorization is the function of specifying access rights to resources related to information security and computer security in general and to access control in particular.
In layman terms, let’s take an example of a blog website with some people working on it. The bloggers write articles and the manager validates the content. Each person can authenticate (login) into the system but their rights (authorisation) are different, so the blogger cannot validate content whereas the manager can.
Why Satellizer
You can create your own authentication system in AngularJS by following some tutorials such as this very detailed one: JSON Web Token Tutorial: An Example in Laravel and AngularJS. I suggest reading this article as it explains JWT (JSON Web Token) very well, and shows a simple way to implement authentication in AngularJS using directly the local storage and HTTP interceptors.
So why Satellizer? The principal reason is that it supports a handful of social network logins such as Facebook, Twitter, etc. Nowadays, especially for websites used on mobile, typing username and password is quite cumbersome and users expect to be able to use your website with little hindrance by using social logins. As integrating the SDK of each social network and following their documentations is quite repetitive, it would be nice to support these social logins with minimal effort.
Moreover Satellizer is an active project on Github. Active is key here as these SDKs change quite frequently and you don’t want to read their documentation every now and then (anyone working with Facebook SDK knows how annoying it is)
AngularJS App with Facebook Login
This is where things start to become interesting.
We will build a web app that has regular login/register (i.e. using username, password) mechanism and supports social logins as well. This webapp is very simple as it has only 3 pages:
- Home page: anyone can see
- Login page: to enter username/password
- Secret page: that only logged in users can see
For backend, we will use Python and Flask. Python and the framework Flask are quite expressive so I hope porting the code to other languages/frameworks will not be very hard. We will, of course, use AngularJS for front-end. And for the social logins, we will integrate with Facebook only as it is the most popular social network at this time.
Let’s start!
Step #1: Bootstrap Project
Here is how we will structure our code:
- app.py
- static/
	- index.html
- app.js
	- bower.json
	- partials/
		- login.tpl.html
		- home.tpl.html
		- secret.tpl.html
All the back-end code is in app.py. The front-end code is put in static/ folder. By default, Flask will automatically serve the contents of static/ folder. All the partial views are in static/partials/ and handled by the ui.router module.
To start coding the back-end, we’ll need Python 2.7.* and install the required libraries using pip. You can of course use virtualenv to isolate a Python environment. Below is the list of required Python modules to put in requirements.txt:
Flask==0.10.1
PyJWT==1.4.0
Flask-SQLAlchemy==1.0
requests==2.7.0
To install all these dependencies:
pip install -r requirements.txt
In app.py we have some initial code to bootstrap Flask (import statements are omitted for brevity):
app = Flask(__name__)

@app.route('/')
def index():
    return flask.redirect('/static/index.html')

if __name__ == '__main__':
    app.run(debug=True)
Next we init bower and install AngularJS and ui.router:
bower init # here you will need to answer some question. when in doubt, just hit enter :)
bower install angular angular-ui-router --save # install and save these dependencies into bower.json
Once these libraries are installed, we need to include AngularJS and ui-router in index.html and create routings for 3 pages: home, login, and secret.
<body ng-app="DemoApp">

<a ui-sref="home">Home</a>
<a ui-sref="login">Login</a>
<a ui-sref="secret">Secret</a>
<div ui-view></div>

<script src="bower_components/angular/angular.min.js"></script>
<script src="bower_components/angular-ui-router/release/angular-ui-router.min.js"></script>
<script src="main.js"></script>
</body>
Below is the code that we need in main.js to configure routing:
var app = angular.module('DemoApp', ['ui.router']);

app.config(function ($stateProvider, $urlRouterProvider) {
  $stateProvider
    .state('home', {
      url: '/home',
      templateUrl: 'partials/home.tpl.html'
    })
    .state('secret', {
      url: '/secret',
      templateUrl: 'partials/secret.tpl.html',
    })
    .state('login', {
      url: '/login',
      templateUrl: 'partials/login.tpl.html'
    });
  $urlRouterProvider.otherwise('/home');

});
At this point if you run the server python app.py, you should have this basic interface at http://localhost:5000

The links Home, Login, and Secret should work at this point and show the content of the corresponding templates.
Congratulation, you just finished setting up the skeleton! If you encounter any error, please check out the code on GitHub
Step #2: Login and Register
At the end of this step, you’ll have a webapp that you can register/login using email and password.
The first step is to configure the backend. We need a User model and a way to generate the JWT token for a given user. The User model shown below is really simplified and does not perform even any basic checks such as if field email contains “@”, or if field password contains at least 6 characters, etc.
class User(db.Model):
    id = db.Column(db.Integer, primary_key=True)
    email = db.Column(db.String(100), nullable=False)
    password = db.Column(db.String(100))

    def token(self):
        payload = {
            'sub': self.id,
            'iat': datetime.utcnow(),
            'exp': datetime.utcnow() + timedelta(days=14)
        }
        token = jwt.encode(payload, app.config['TOKEN_SECRET'])
        return token.decode('unicode_escape')
We use the jwt module in python to generate the payload part in JWT. The iat and exp part correspond to the timestamp that token is created and expired. In this code, the token will be expired in 2 weeks.
After the model User was created, we can add the “login” and “register” endpoints. The code for both are quite similar, so here I will just show the “register” part. Please note that by default, Satellizer will call the endpoints /auth/login and /auth/signup for the “login” and “register” respectively.
@app.route('/auth/signup', methods=['POST'])
def signup():
    data = request.json

    email = data["email"]
    password = data["password"]

    user = User(email=email, password=password)
    db.session.add(user)
    db.session.commit()

    return jsonify(token=user.token())
Let’s check the endpoint using curl first:
curl localhost:5000/auth/signup -H "Content-Type: application/json" -X POST -d '{"email":"test@abcd.com","password":"xyz"}'
The result should look like this:
{
  "token": "very long string…."
}
Now that the back-end part is ready, let’s attack the front-end! First, we need to install satellizer and add it as a dependency in main.js:
bower install satellizer --save
Add satellizer as dependency:
var app = angular.module('DemoApp', ['ui.router', 'satellizer']);
Login and signup in satellizer is actually quite simple in comparison to all the setup until now:
$scope.signUp = function () {
    $auth
      .signup({email: $scope.email, password: $scope.password})
      .then(function (response) {
        // set the token received from server
        $auth.setToken(response);
        // go to secret page
        $state.go('secret');
      })
      .catch(function (response) {
        console.log("error response", response);
      })
  };
If you have any difficulty setting up the code, you can take a look at the code on GitHub.
Step #3: But Secret View Is Not Really Secret, Because Anyone Can See It!
Yes, that is correct! Until now, anyone can go to secret page without logging in.
It’s time to add some interceptor in AngularJS to make sure that if someone goes to secret page and if this user is not logged in, they will be redirected to the login page.
First, we should add a flag requiredLogin to distinguish secret page from other ones.
    .state('secret', {
      url: '/secret',
      templateUrl: 'partials/secret.tpl.html',
      controller: 'SecretCtrl',
      data: {requiredLogin: true}
    })
The “data” part will be used in the $stateChangeStart event which is fired each time the routing changes:
app.run(function ($rootScope, $state, $auth) {
  $rootScope.$on('$stateChangeStart',
    function (event, toState) {
      var requiredLogin = false;
      // check if this state need login
      if (toState.data && toState.data.requiredLogin)
        requiredLogin = true;

      // if yes and if this user is not logged in, redirect him to login page
      if (requiredLogin && !$auth.isAuthenticated()) {
        event.preventDefault();
        $state.go('login');
      }
    });
});
Now, the user cannot go directly to the secret page without logging in. Hooray!
As usual, the code of this step can be found here.
Step #4: It’s Time to Get Something Really Secret!
At this moment, there’s nothing really secret in the secret page. Let’s put something personal there.
This step starts by creating an endpoint in the back-end which is only accessible for an authenticated user, such as having a valid token. The endpoint /user below returns the user_id and email of the user corresponding to the token.
@app.route('/user')
def user_info():
    # the token is put in the Authorization header
    if not request.headers.get('Authorization'):
        return jsonify(error='Authorization header missing'), 401

    # this header looks like this: “Authorization: Bearer {token}”
    token = request.headers.get('Authorization').split()[1]
    try:
        payload = jwt.decode(token, app.config['TOKEN_SECRET'])
    except DecodeError:
        return jsonify(error='Invalid token'), 401
    except ExpiredSignature:
        return jsonify(error='Expired token'), 401
    else:
        user_id = payload['sub']
        user = User.query.filter_by(id=user_id).first()
        if user is None:
            return jsonify(error='Should not happen ...'), 500
        return jsonify(id=user.id, email=user.email), 200
    return jsonify(error="never reach here..."), 500
Again, we make use of the module jwt to decode the JWT token included in the ‘Authorization’ header and to handle the case when the token is expired or not valid.
Let’s test this endpoint using curl. First, we need to get a valid token:
curl localhost:5000/auth/signup -H "Content-Type: application/json" -X POST -d '{"email":"test@abcd.com","password":"xyz"}'
Then with this token:
curl localhost:5000/user -H "Authorization: Bearer {put the token here}"
Which gives this result:
{
  "email": "test@abcd.com",
  "id": 1
}
Now we need to include this endpoint in the Secret Controller. This is quite simple as we just need to call the endpoint using the regular $http module. The token is automatically inserted to the header by Satellizer, so we don’t need to bother with all the details of saving the token and then putting it in the right header.
  getUserInfo();

  function getUserInfo() {
    $http.get('/user')
      .then(function (response) {
        $scope.user = response.data;
      })
      .catch(function (response) {
        console.log("getUserInfo error", response);
      })
  }
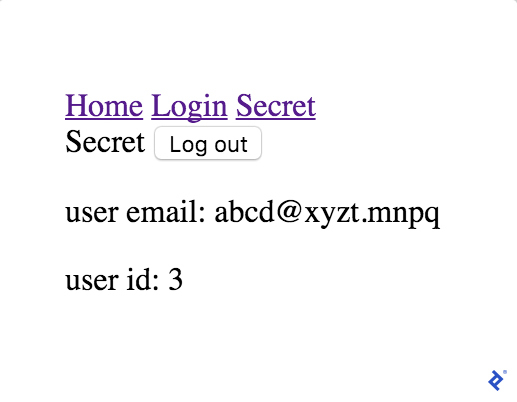
Finally, we have something truly personal in the secret page!

The code of this step is on GitHub.
Step #5: Facebook Login with Satellizer
A nice thing about Satellizer, as mentioned at the beginning, is it makes integrating social login a lot easier. At the end of this step, users can login using their Facebook account!

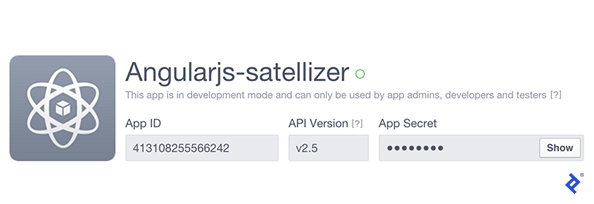
First thing to do is to create an application on Facebook developers page in order to have an application_id and a secret code. Please follow developers.facebook.com/docs/apps/register to create a Facebook developer account if you don’t have one already and create a website app. After that, you will have the application ID and application secret as in the screenshot below.

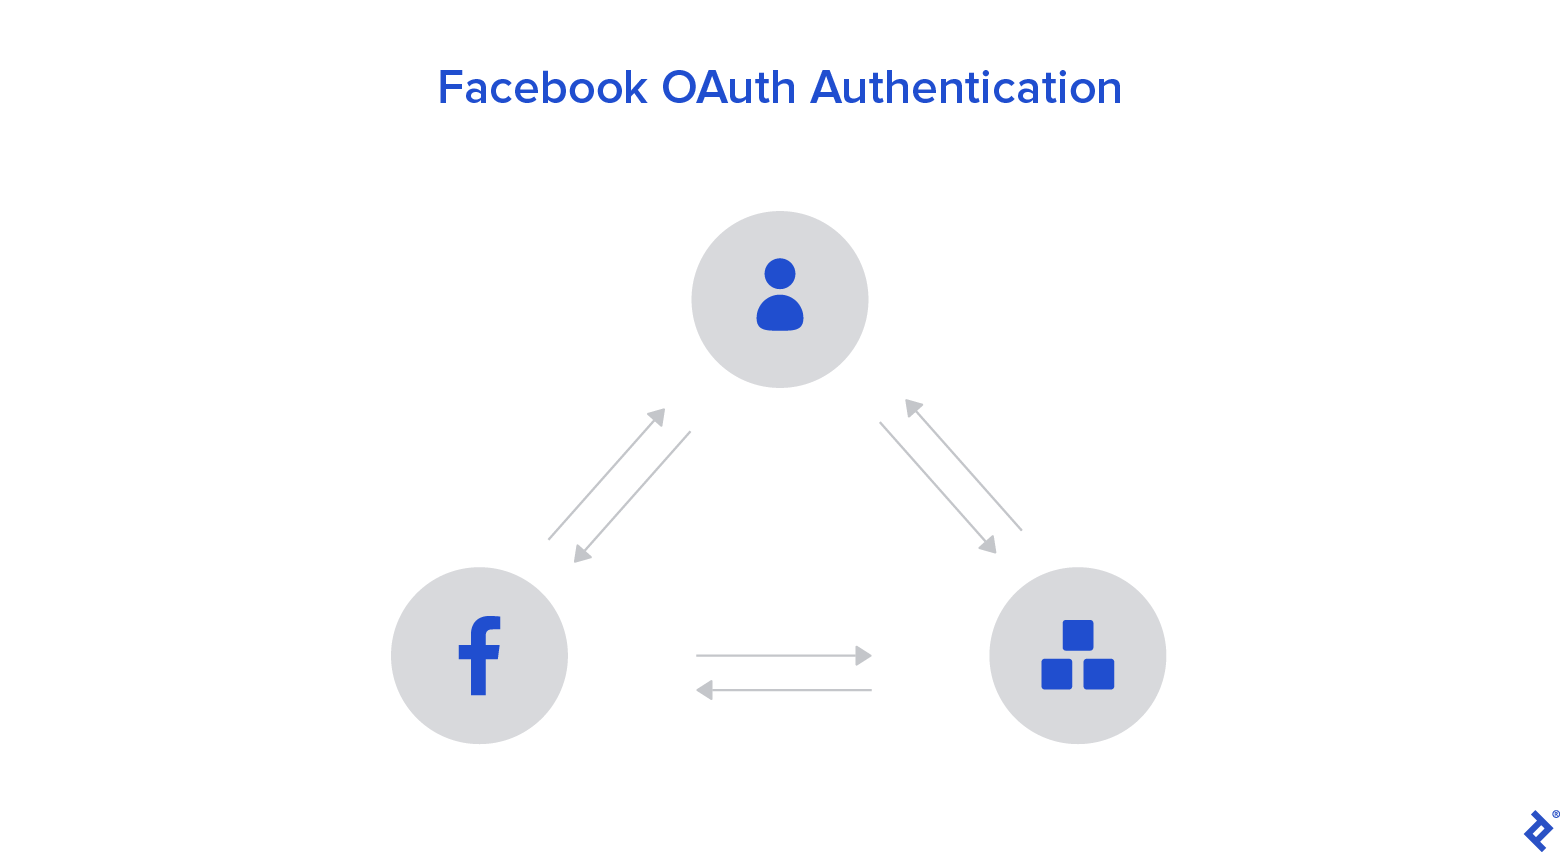
Once the user chooses to connect with Facebook, Satellizer will send an authorization code to the endpoint /auth/facebook. With this authorization code, the back-end can retrieve an access token from Facebook /oauth endpoint that allows the call to Facebook Graph API to get user information such as location, user_friends, user email, etc.
We also need to keep track of whether a user account is created with Facebook or through regular signup. To do so, we add facebook_id to our User model.
facebook_id = db.Column(db.String(100))
The facebook secret is configured via env variables FACEBOOK_SECRET that we add to app.config.
app.config['FACEBOOK_SECRET'] = os.environ.get('FACEBOOK_SECRET')
So to launch the app.py, you should set this env variable:
FACEBOOK_SECRET={your secret} python app.py
Here is the method which handles Facebook logins. By default Satellizer will call the endpoint /auth/facebook.
@app.route('/auth/facebook', methods=['POST'])
def auth_facebook():
    access_token_url = 'https://graph.facebook.com/v2.3/oauth/access_token'
    graph_api_url = 'https://graph.facebook.com/v2.5/me?fields=id,email'

    params = {
        'client_id': request.json['clientId'],
        'redirect_uri': request.json['redirectUri'],
        'client_secret': app.config['FACEBOOK_SECRET'],
        'code': request.json['code']
    }

    # Exchange authorization code for access token.
    r = requests.get(access_token_url, params=params)
    # use json.loads instead of urlparse.parse_qsl
    access_token = json.loads(r.text)

    # Step 2. Retrieve information about the current user.
    r = requests.get(graph_api_url, params=access_token)
    profile = json.loads(r.text)

    # Step 3. Create a new account or return an existing one.
    user = User.query.filter_by(facebook_id=profile['id']).first()
    if user:
        return jsonify(token=user.token())

    u = User(facebook_id=profile['id'], email=profile['email'])
    db.session.add(u)
    db.session.commit()
    return jsonify(token=u.token())
To send a request to the Facebook server, we use the handy module requests. Now the difficult part on the back-end is done. On the front-end, adding Facebook login is quite simple. First, we need to tell Satellizer our facebook_id by adding this code into app.config function:
$authProvider.facebook({
    clientId: {your facebook app id},
    // by default, the redirect URI is http://localhost:5000
    redirectUri: 'http://localhost:5000/static/index.html'
  });
To login using Facebook, we can just call:
$auth.authenticate(“facebook”)
As usual, you can check the code on GitHub
At this time, the webapp is complete in terms of functionality. The user can login/register using regular email and password or by using Facebook. Once logged in, the user can see his secret page.
Make a Pretty Interface
The interface is not very pretty at this point, so let’s add a little bit of Bootstrap for the layout and the angular toaster module to handle an error message nicely, such as when login fails.
The code for this beautifying part can be found here.
Conclusion
This article shows a step-by-step integration of Satellizer in a (simple) AngularJS webapp. With Satellizer, we can easily add other social logins such as Twitter, Linkedin, and more. The code on the front-end is quite the same as in the article. However, the back-end varies as social network SDKs have different endpoints with different protocols. You can take a look at https://github.com/sahat/satellizer/blob/master/examples/server/python/app.py which contains examples for Facebook, Github, Google, Linkedin, Twiter and Bitbucket. When in doubt, you should take a look at the documentation on https://github.com/sahat/satellizer.
Further Reading on the Toptal Blog:
Son Nguyen Kim
Paris, France
Member since June 17, 2015
About the author
Son is highly skilled with software engineering and ML algorithms and always tries hard to tackle problems with a simple approach.
Expertise
PREVIOUSLY AT


