
An HDFS Tutorial for Data Analysts Stuck with Relational Databases
The Hadoop Distributed File System (HDFS) is a scalable, open-source solution for storing and processing large volumes of data. With its built-in replication and resilience to disk failures, HDFS is an ideal system for storing and processing data for analytics.
In this step-by-step tutorial, Toptal Database Developer Dallas H. Snider details how to migrate existing data from a PostgreSQL database into the more efficient HDFS.

Dallas has 22 years of database application development experience. He has worked with SQL servers & Oracle, in both Windows & Linux.
Expertise
Previously At

Introduction
By now, you have probably heard of the Hadoop Distributed File System (HDFS), especially if you are data analyst or someone who is responsible for moving data from one system to another. However, what are the benefits that HDFS has over relational databases?
HDFS is a scalable, open-source solution for storing and processing large volumes of data. HDFS has been proven to be reliable and efficient across many modern data centers.
HDFS utilizes commodity hardware along with open source software to reduce the overall cost per byte of storage.
With its built-in replication and resilience to disk failures, HDFS is an ideal system for storing and processing data for analytics. It does not require the underpinnings and overhead to support transaction atomicity, consistency, isolation, and durability (ACID) as is necessary with traditional relational database systems.
Moreover, when compared with enterprise and commercial databases, such as Oracle, utilizing Hadoop as the analytics platform avoids any extra licensing costs.
One of the questions many people ask when first learning about HDFS is: How do I get my existing data into the HDFS?
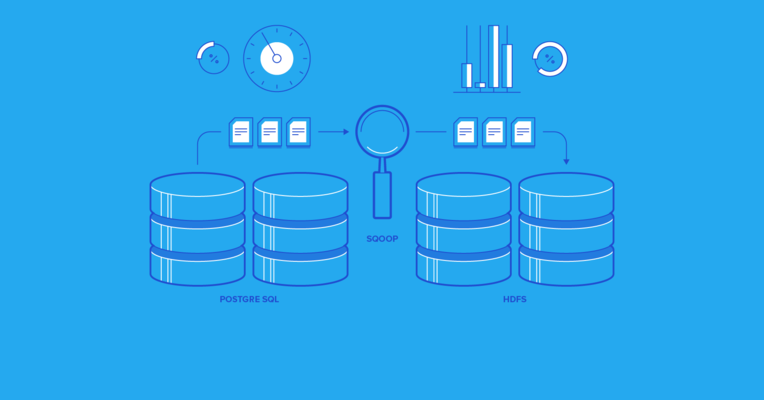
In this article, we will examine how to import data from a PostgreSQL database into HDFS. We will use Apache Sqoop, which is currently the most efficient, open source solution to transfer data between HDFS and relational database systems. Apache Sqoop is designed to bulk-load data from a relational database to the HDFS (import) and to bulk-write data from the HDFS to a relational database (export).

The steps in this tutorial are written for someone with a basic knowledge of executing SQL queries and an elementary knowledge of HDFS commands.
The database system used is PostgreSQL 9.5 for Windows, and the HDFS version is Cloudera Hadoop 2.5.0-cdh5.2.0 on a Centos 6.4 Linux virtual machine.
Apache Sqoop relies on the JDBC driver JAR files that are specific to the relational database vendor and database version.
To execute the steps shown in this article, the user will need permissions to connect remotely to the PostgreSQL database, SELECT permissions on the relational database, write permissions on the HDFS, and execute permissions on the Sqoop executable.
For the purpose of this tutorial, we created a PostgreSQL database, named it Toptal, and made it accessible through port 5432.
PostgreSQL Data Source
To get started, in our PostgreSQL Toptal database, we will create a test data table named sales. We will assume that the OpenSSL certificate and private key files already exist on the PostgreSQL server.
Server [localhost]:
Database [postgres]: Toptal
Port [5432]:
Username [postgres]:
Password for user postgres:
psql (9.5.3)
Toptal=# create table sales
Toptal-# (
Toptal(#    pkSales integer constraint salesKey primary key,
Toptal(#    saleDate date,
Toptal(#    saleAmount money,
Toptal(#    orderID int not null,
Toptal(#    itemID int not null
Toptal(# );
CREATE TABLE
Next, we will insert 20 rows into the table:
Toptal=# insert into sales values (1, '2016-09-27', 1.23, 1, 1);
INSERT 0 1
Toptal=# insert into sales values (2, '2016-09-27', 2.34, 1, 2);
INSERT 0 1
Toptal=# insert into sales values (3, '2016-09-27', 1.23, 2, 1);
INSERT 0 1
Toptal=# insert into sales values (4, '2016-09-27', 2.34, 2, 2);
INSERT 0 1
Toptal=# insert into sales values (5, '2016-09-27', 3.45, 2, 3);
INSERT 0 1
Toptal=# insert into sales values (6, '2016-09-28', 3.45, 3, 3);
INSERT 0 1
Toptal=# insert into sales values (7, '2016-09-28', 4.56, 3, 4);
INSERT 0 1
Toptal=# insert into sales values (8, '2016-09-28', 5.67, 3, 5);
INSERT 0 1
Toptal=# insert into sales values (9, '2016-09-28', 1.23, 4, 1);
INSERT 0 1
Toptal=# insert into sales values (10, '2016-09-28', 1.23, 5, 1);
INSERT 0 1
Toptal=# insert into sales values (11, '2016-09-28', 1.23, 6, 1);
INSERT 0 1
Toptal=# insert into sales values (12, '2016-09-29', 1.23, 7, 1);
INSERT 0 1
Toptal=# insert into sales values (13, '2016-09-29', 2.34, 7, 2);
INSERT 0 1
Toptal=# insert into sales values (14, '2016-09-29', 3.45, 7, 3);
INSERT 0 1
Toptal=# insert into sales values (15, '2016-09-29', 4.56, 7, 4);
INSERT 0 1
Toptal=# insert into sales values (16, '2016-09-29', 5.67, 7, 5);
INSERT 0 1
Toptal=# insert into sales values (17, '2016-09-29', 6.78, 7, 6);
INSERT 0 1
Toptal=# insert into sales values (18, '2016-09-29', 7.89, 7, 7);
INSERT 0 1
Toptal=# insert into sales values (19, '2016-09-29', 7.89, 8, 7);
INSERT 0 1
Toptal=# insert into sales values (20, '2016-09-30', 1.23, 9, 1);
INSERT 0 1
Let’s select the data to verify that the data looks correct:
Toptal=# select * from sales;
 pksales |  saledate  | saleamount | orderid | itemid
---------+------------+------------+---------+--------
       1 | 2016-09-27 |      $1.23 |       1 |      1
       2 | 2016-09-27 |      $2.34 |       1 |      2
       3 | 2016-09-27 |      $1.23 |       2 |      1
       4 | 2016-09-27 |      $2.34 |       2 |      2
       5 | 2016-09-27 |      $3.45 |       2 |      3
       6 | 2016-09-28 |      $3.45 |       3 |      3
       7 | 2016-09-28 |      $4.56 |       3 |      4
       8 | 2016-09-28 |      $5.67 |       3 |      5
       9 | 2016-09-28 |      $1.23 |       4 |      1
      10 | 2016-09-28 |      $1.23 |       5 |      1
      11 | 2016-09-28 |      $1.23 |       6 |      1
      12 | 2016-09-29 |      $1.23 |       7 |      1
      13 | 2016-09-29 |      $2.34 |       7 |      2
      14 | 2016-09-29 |      $3.45 |       7 |      3
      15 | 2016-09-29 |      $4.56 |       7 |      4
      16 | 2016-09-29 |      $5.67 |       7 |      5
      17 | 2016-09-29 |      $6.78 |       7 |      6
      18 | 2016-09-29 |      $7.89 |       7 |      7
      19 | 2016-09-29 |      $7.89 |       8 |      7
      20 | 2016-09-30 |      $1.23 |       9 |      1
(20 rows)
The data looks good, so let’s proceed.
Import into the HDFS Using Sqoop
With the data source defined, we are now ready to import the data into the HDFS. The sqoop command we will examine is listed below, and we will break down each argument in the bullet points that follow. Note that the command is supposed to be on one complete line or, as shown below, with the backslash (the Linux command line continuation character) at the end of each line except the last.
sqoop import --connect 'jdbc:postgresql://aaa.bbb.ccc.ddd:5432/Toptal?ssl=true&sslfactory=org.postgresql.ssl.NonValidatingFactory' \
--username 'postgres' -P \
--table 'sales' \
--target-dir 'sales' \
--split-by 'pksales'
-
sqoop import- The executable is namedsqoop, and we are instructing it to import the data from a table or view from a database to the HDFS. -
--connect- With the--connectargument, we are passing in the JDBC connect string for PostgreSQL. In this case, we use the IP address, port number, and database name. We also need to specify that SSL is being utilized and need to supply theSSLSocketFactoryclass to be used. -
--username- In this example, the username is a PostgreSQL login, not a Windows login. The user must have permissions to connect to the specified database and to select from the specified table. -
-P- This will prompt the command line user for the password. If Sqoop is rarely executed, this might be a good option. There are multiple other ways to pass the password to the command automatically, but we are trying to keep it simple for this article. -
--table- This is where we pass in the name of the PostgreSQL table. -
--target-dir- This argument specifies the HDFS directory where the data is to be stored. -
--split-by- We must provide Sqoop with a unique identifier to help it distribute the workload. Later in the job output, we will see where Sqoop selects the minimum and maximum values to help set split boundaries.
It is a good idea to put the command in a script for repeatability and editing purposes, as shown below:
[hdfs@localhost:/sqoop]$ cat sqoopCommand.sh
sqoop import --connect 'jdbc:postgresql://aaa.bbb.ccc.ddd:5432/toptal?ssl=true&sslfactory=org.postgresql.ssl.NonValidatingFactory' \
--username 'postgres' -P \
--table 'sales' \
--target-dir 'sales' \
--split-by 'pksales'
[hdfs@localhost:/sqoop]$
Now, it is time to execute the above Sqoop command script. The output from the Sqoop command is shown below.
[hdfs@localhost:/sqoop]$ ./sqoopCommand.sh
16/10/02 18:58:34 INFO sqoop.Sqoop: Running Sqoop version: 1.4.5-cdh5.2.0
Enter password:
16/10/02 18:58:40 INFO manager.SqlManager: Using default fetchSize of 1000
16/10/02 18:58:40 INFO tool.CodeGenTool: Beginning code generation
16/10/02 18:58:41 INFO manager.SqlManager: Executing SQL statement: SELECT t.* FROM "sales" AS t LIMIT 1
16/10/02 18:58:41 INFO orm.CompilationManager: HADOOP_MAPRED_HOME is /usr/lib/hadoop-0.20-mapreduce
Note: /tmp/sqoop-training/compile/77f9452788024792770d52da72ae871f/sales.java uses or overrides a deprecated API.
Note: Recompile with -Xlint:deprecation for details.
16/10/02 18:58:43 INFO orm.CompilationManager: Writing jar file: /tmp/sqoop-training/compile/77f9452788024792770d52da72ae871f/sales.jar
16/10/02 18:58:43 WARN manager.PostgresqlManager: It looks like you are importing from postgresql.
16/10/02 18:58:43 WARN manager.PostgresqlManager: This transfer can be faster! Use the --direct
16/10/02 18:58:43 WARN manager.PostgresqlManager: option to exercise a postgresql-specific fast path.
16/10/02 18:58:43 INFO mapreduce.ImportJobBase: Beginning import of sales
16/10/02 18:58:45 WARN mapred.JobClient: Use GenericOptionsParser for parsing the arguments. Applications should implement Tool for the same.
16/10/02 18:58:46 INFO db.DBInputFormat: Using read commited transaction isolation
16/10/02 18:58:46 INFO db.DataDrivenDBInputFormat: BoundingValsQuery: SELECT MIN("pksales"), MAX("pksales") FROM "sales"
16/10/02 18:58:47 INFO mapred.JobClient: Running job: job_201609280401_0005
16/10/02 18:58:48 INFO mapred.JobClient:  map 0% reduce 0%
16/10/02 18:59:04 INFO mapred.JobClient:  map 50% reduce 0%
16/10/02 18:59:14 INFO mapred.JobClient:  map 75% reduce 0%
16/10/02 18:59:15 INFO mapred.JobClient:  map 100% reduce 0%
16/10/02 18:59:18 INFO mapred.JobClient: Job complete: job_201609280401_0005
16/10/02 18:59:18 INFO mapred.JobClient: Counters: 23
16/10/02 18:59:18 INFO mapred.JobClient:   File System Counters
16/10/02 18:59:18 INFO mapred.JobClient:     FILE: Number of bytes read=0
16/10/02 18:59:18 INFO mapred.JobClient:     FILE: Number of bytes written=1190344
16/10/02 18:59:18 INFO mapred.JobClient:     FILE: Number of read operations=0
16/10/02 18:59:18 INFO mapred.JobClient:     FILE: Number of large read operations=0
16/10/02 18:59:18 INFO mapred.JobClient:     FILE: Number of write operations=0
16/10/02 18:59:18 INFO mapred.JobClient:     HDFS: Number of bytes read=438
16/10/02 18:59:18 INFO mapred.JobClient:     HDFS: Number of bytes written=451
16/10/02 18:59:18 INFO mapred.JobClient:     HDFS: Number of read operations=4
16/10/02 18:59:18 INFO mapred.JobClient:     HDFS: Number of large read operations=0
16/10/02 18:59:18 INFO mapred.JobClient:     HDFS: Number of write operations=4
16/10/02 18:59:18 INFO mapred.JobClient:   Job Counters
16/10/02 18:59:18 INFO mapred.JobClient:     Launched map tasks=4
16/10/02 18:59:18 INFO mapred.JobClient:     Total time spent by all maps in occupied slots (ms)=48877
16/10/02 18:59:18 INFO mapred.JobClient:     Total time spent by all reduces in occupied slots (ms)=0
16/10/02 18:59:18 INFO mapred.JobClient:     Total time spent by all maps waiting after reserving slots (ms)=0
16/10/02 18:59:18 INFO mapred.JobClient:     Total time spent by all reduces waiting after reserving slots (ms)=0
16/10/02 18:59:18 INFO mapred.JobClient:   Map-Reduce Framework
16/10/02 18:59:18 INFO mapred.JobClient:     Map input records=20
16/10/02 18:59:18 INFO mapred.JobClient:     Map output records=20
16/10/02 18:59:18 INFO mapred.JobClient:     Input split bytes=438
16/10/02 18:59:18 INFO mapred.JobClient:     Spilled Records=0
16/10/02 18:59:18 INFO mapred.JobClient:     CPU time spent (ms)=3980
16/10/02 18:59:18 INFO mapred.JobClient:     Physical memory (bytes) snapshot=481574912
16/10/02 18:59:18 INFO mapred.JobClient:     Virtual memory (bytes) snapshot=2949685248
16/10/02 18:59:18 INFO mapred.JobClient:     Total committed heap usage (bytes)=127401984
16/10/02 18:59:18 INFO mapreduce.ImportJobBase: Transferred 451 bytes in 33.7555 seconds (13.3608 bytes/sec)
16/10/02 18:59:18 INFO mapreduce.ImportJobBase: Retrieved 20 records.
[hdfs@localhost:/sqoop]$
Notice the last line of output above shows that 20 records were retrieved, which corresponds to the 20 records in the table on the PostgreSQL database.
After executing the Sqoop command, we can execute the hdfs dfs -ls command to see the directory that was created by default with the table name on the HDFS.
[hdfs@localhost:/sqoop]$ hdfs dfs -ls
Found 1 items
drwxrwxrwx   - toptal data          0 2016-10-02 18:59 sales
[hdfs@localhost:/sqoop]$
We can use the hdfs dfs -ls command again to list the contents of the sales directory. If you look on the HDFS, you can notice the data is partitioned and spread across four files by default, not just contained in one.
[hdfs@localhost:/sqoop]$ hdfs dfs -ls sales
Found 6 items
-rw-rw-rw-   1 toptal data          0 2016-10-02 18:59 sales/_SUCCESS
drwxrwxrwx   - toptal data          0 2016-10-02 18:58 sales/_logs
-rw-rw-rw-   1 toptal data        110 2016-10-02 18:59 sales/part-m-00000
-rw-rw-rw-   1 toptal data        111 2016-10-02 18:59 sales/part-m-00001
-rw-rw-rw-   1 toptal data        115 2016-10-02 18:59 sales/part-m-00002
-rw-rw-rw-   1 toptal data        115 2016-10-02 18:59 sales/part-m-00003
[hdfs@localhost:/sqoop]$
The hdfs dfs -cat command will display all of the records in the first partition of the sales data on the HDFS.
[hdfs@localhost:/sqoop]$ hdfs dfs -cat sales/part-m-00000
1,2016-09-27,1.23,1,1
2,2016-09-27,2.34,1,2
3,2016-09-27,1.23,2,1
4,2016-09-27,2.34,2,2
5,2016-09-27,3.45,2,3
[hdfs@localhost:/sqoop]$
Notice that the default file delimiter is a comma. Also, notice that there are only five rows in each partition, because the 20 rows in the source have been equally distributed across the four partitions.
To limit the number of rows that are output to the screen, we can pipe the output of the cat command to the head command as shown below, to check the contents of the other three partitions.
The -n 5 argument to the head command limits the screen output to the first five rows.
(Note that in our case, this is unnecessary since there are only five rows in each partition to begin with. In practice, though, you will probably have many more rows than this in each partition and will want to just check the first few to make sure that they look right, so this shows you how to do so.)
[hdfs@localhost:/sqoop]$ hdfs dfs -cat sales/part-m-00001 |head -n 5
6,2016-09-28,3.45,3,3
7,2016-09-28,4.56,3,4
8,2016-09-28,5.67,3,5
9,2016-09-28,1.23,4,1
10,2016-09-28,1.23,5,1
[hdfs@localhost:/sqoop]$ hdfs dfs -cat sales/part-m-00002 |head -n 5
11,2016-09-28,1.23,6,1
12,2016-09-29,1.23,7,1
13,2016-09-29,2.34,7,2
14,2016-09-29,3.45,7,3
15,2016-09-29,4.56,7,4
[hdfs@localhost:/sqoop]$ hdfs dfs -cat sales/part-m-00003 |head -n 5
16,2016-09-29,5.67,7,5
17,2016-09-29,6.78,7,6
18,2016-09-29,7.89,7,7
19,2016-09-29,7.89,8,7
20,2016-09-30,1.23,9,1
[hdfs@localhost:/sqoop]$
If you need to run a query to extract data from multiple tables in the PostgreSQL database, this can be accomplished with the following command:
[hdfs@localhost:/sqoop]$ cat sqoopCommand.sh
sqoop import --connect 'jdbc:postgresql://aaa.bbb.ccc.ddd:5432/toptal?ssl=true&sslfactory=org.postgresql.ssl.NonValidatingFactory' \
--username 'postgres' -P \
--target-dir 'creditCardOrders' \
--split-by 'pksales' \
--query "select s.pksales, s.saledate, s.saleamount, o.shippingtype, o.methodofpayment from sales s inner join orders o on s.orderid=o.orderid where o.methodofpayment='credit card' and \$CONDITIONS"
[hdfs@localhost:/sqoop]$
In the above command, we use some of the same arguments to the Sqoop command, but they take on differing importance when used with a SQL command.
-
--target-dir- The target directory tells Sqoop in which directory on the HDFS to store the selected data. This argument is required by Sqoop when using a free-form query. -
--split-by- Even though we are selecting the primary key of the sales table, we still have to provide Sqoop with a unique identifier to help it distribute the workload. -
--query- This is the argument in which we supply the SQL query. The query above is enclosed in double quotes. Notice that there is not a backslash (the line continuation character) in the multiple lines containing the query. Also notice theand \$CONDITIONSat the end of theWHEREclause. This is required by Sqoop because Sqoop will automatically replace the$CONDITIONStoken with a unique expression.
Issues or No Issues: You Should Consider HDFS
HDFS has many advantages over the relational databases. If you are doing data analysis, you should consider migrating your data to HDFS, today.
With the skills learned here, importing data from a relational database system into HDFS is a simple and straightforward process that can be accomplished with a single command. While these examples have a small number of rows, the mechanics of importing large volumes of data to HDFS from a PostgreSQL database table remains the same.
You can even experiment with importing large tables and varying storage delimiters. Using Apache Sqoop is more efficient than exporting the database data to a file, transferring the file from the database server to the HDFS, and then loading the file to the HDFS.
Dallas H. Snider
Pace, FL, United States
Member since September 15, 2016
About the author
Dallas has 22 years of database application development experience. He has worked with SQL servers & Oracle, in both Windows & Linux.
Expertise
PREVIOUSLY AT