How to Implement T9 Search in iOS
T9 predictive text has been around for ages, and it lost relevance with the advent of modern smartphones. However, T9 can still be a useful addition to certain types of apps on iOS.
In this article, Toptal Swift Developer George Vashakidze explains why T9 can still be useful and practical, and how you can add it to your next iOS app.
George is an extremely motivated and hardworking mobile developer with extensive experience working with iOS and Android.
PREVIOUSLY AT

A couple of years ago I was working on an app called “BOG mBank - Mobile Banking” with my iOS/Android team. There is a basic feature in the app where you can use the mobile banking functionality to top up your own cell phone postpaid balance or any contact’s cell phone balance.
While developing this module, we noticed that it was much easier to find a particular contact in the Android version of the app than in iOS one. Why? The key reason behind this is T9 search in iOS, which is missing from Apple devices.
What is T9 searching? What is T9 dialing? Let’s explain what T9 is all about, and why it probably didn’t become a part of iOS, and how iOS developers can implement it if necessary.
What is T9?
T9 is a predictive text technology for mobile phones, specifically those that contain a physical 3x4 numeric keypad. Those too young to remember the T9 era can try a demo of a T9-based predictive text emulator.

T9 was originally developed by Tegic Communications, and the name stands for Text on 9 keys.
You can guess why T9 dialing probably never made it to iOS. During the smartphone revolution, T9 pad input became obsolete, as modern smartphones phones relied on full keyboards, courtesy of their touchscreen displays. Since Apple never had any phones with physical keyboards and wasn’t in the phone business during the heyday of T9, it’s understandable this technology was omitted from iOS.
T9 is still used on certain inexpensive phones without a touchscreen (so-called feature phones). However, despite the fact that most Android phones never featured physical keyboards, modern Android devices feature support for T9 input, which can be used to dial contacts by spelling the name of the contact one is trying to call.
An Example of T9 Predictive Input in Action
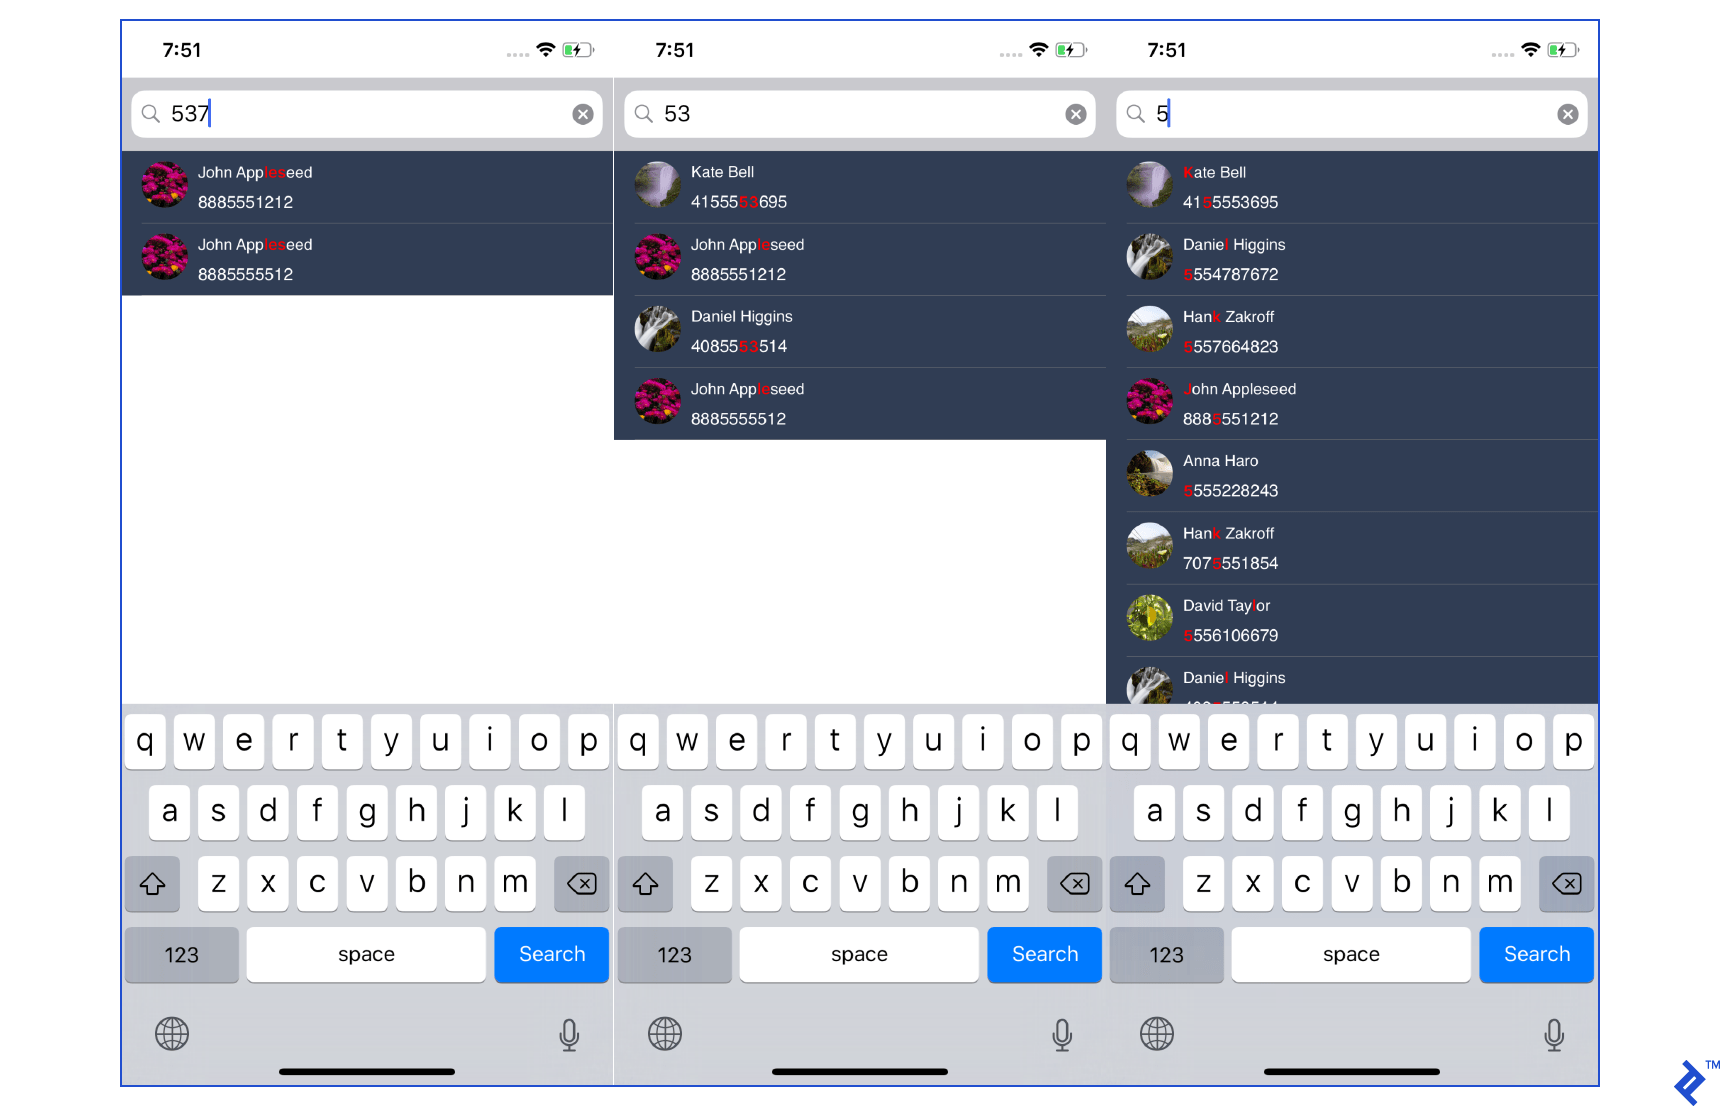
On a phone with a numeric keypad, each time a key (1-9) is pressed (when in a text field), the algorithm returns a guess for what letters are most likely for the keys pressed to that point.

For example, to enter the word “the,” the user would press 8 then 4 then 3, and the display would display “t,” then “th,” and then “the.” If the less-common word “fore” is intended (3673), the predictive algorithm may select “Ford.” Pressing the “next” key (typically the “*” key) might bring up “dose,” and finally “fore.” If “fore” is selected, then the next time the user presses the sequence 3673, fore will be more likely to be the first word displayed. If the word “Felix” is intended, however, when entering 33549, the display shows “E,” then “De,” “Del,” “Deli,” and “Felix.”
This is an example of a letter changing while entering words.
Programmatic Use of T9 in iOS
So, let’s dive into this feature and write an easy example of T9 input for iOS. First of all, we need to create a new project.
The prerequisites needed for our project are basic: Xcode and Xcode build tools installed on your Mac.
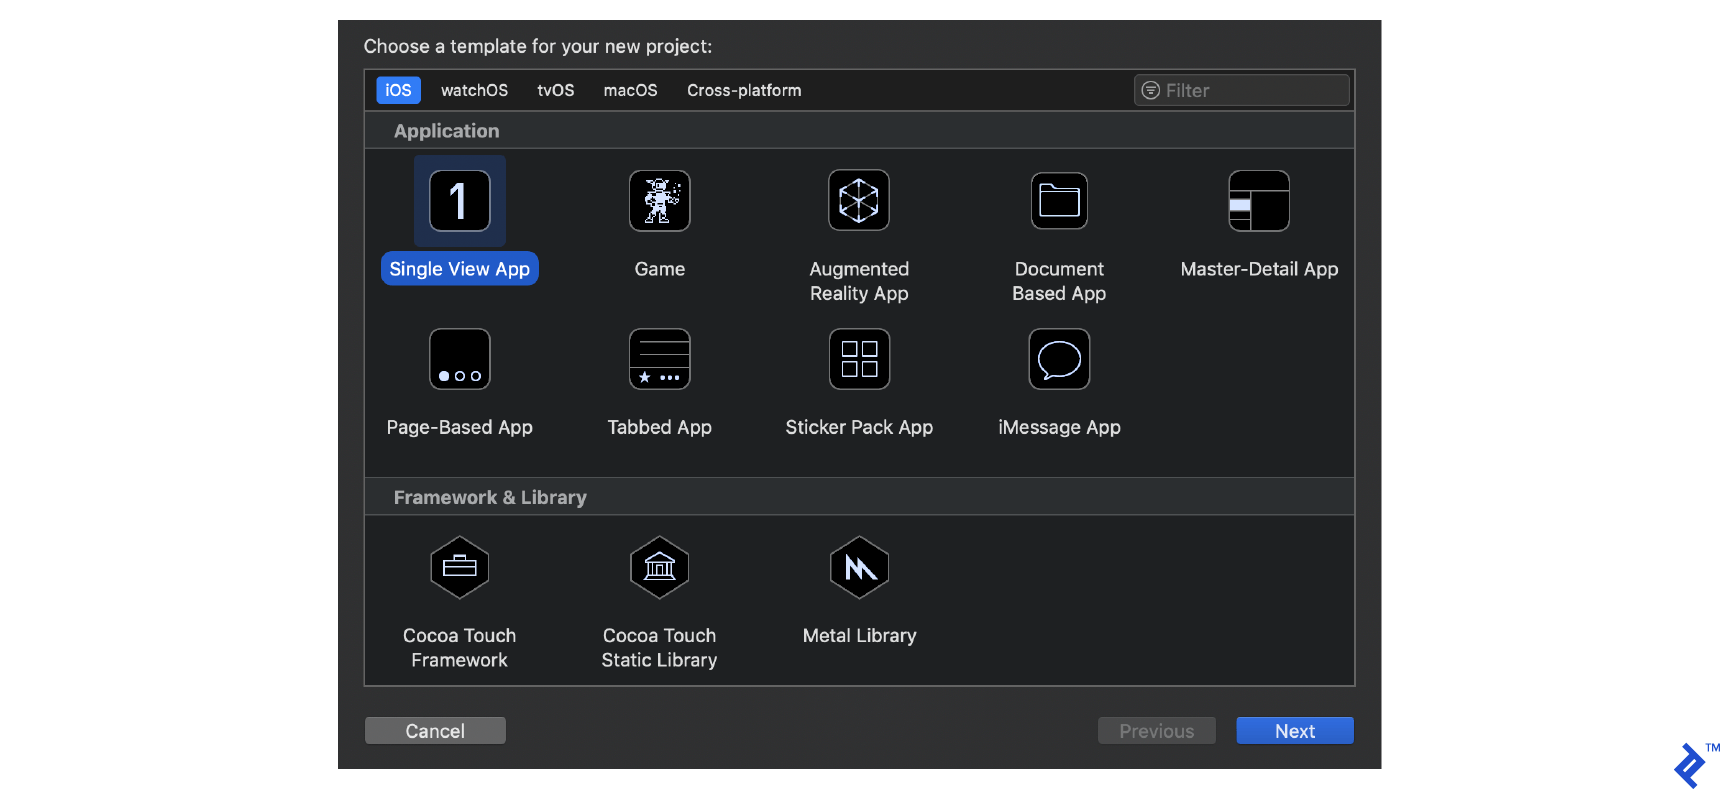
To create a new project, open your Xcode application on your Mac and select “Create a new Xcode project,” then name your project, and choose the type of application to be created. Simply select “Single View App” and press Next.

On the next screen, as you can see there will be some info that you need to provide.
- Product Name: I named it T9Search
- Team. Here, if you want to run this application on a real device, you will have to have a developer account. In my case, I will use my own account for this.
Note: If you do not have a developer account, you can run this on Simulator as well.
- Organization Name: I named it Toptal
- Organization Identifier: I named it “com.toptal”
- Language: Choose Swift
- Uncheck “Use Core Data,” “Include Unit Tests,” and “Include UI Tests”
Press the Next button, and we are ready to start.
Simple Architecture
As you already know, when you create a new app, you already have MainViewController class and Main.Storyboard. For testing purposes, of course, we can use this controller.
Before we start designing something, let’s first create all the necessary classes and files to make sure we have everything set up and running to move to the UI part of the job.
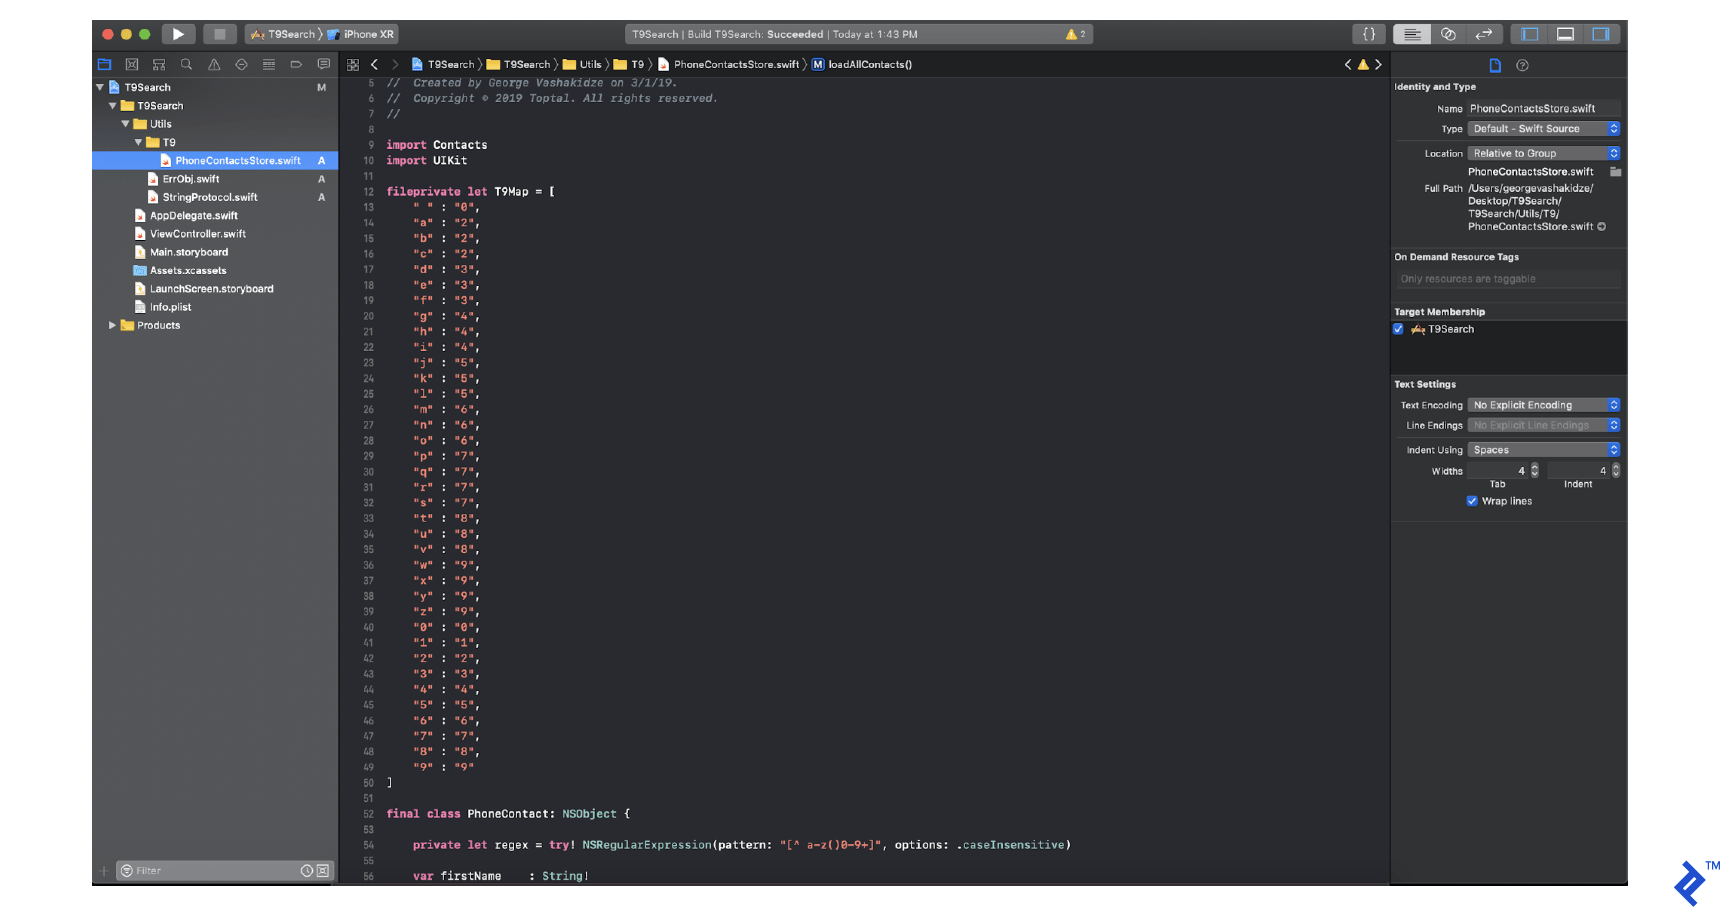
Somewhere inside your project, simply create a new file called “PhoneContactsStore.swift” In my case, it looks like this.

Our first order of business is to create a map with all variations of numeric keyboard inputs.
import Contacts
import UIKit
fileprivate let T9Map = [
    " " : "0",
    "a" : "2", "b" : "2", "c" : "2", "d" : "3", "e" : "3", "f" : "3",
    "g" : "4", "h" : "4", "i" : "4", "j" : "5", "k" : "5", "l" : "5",
    "m" : "6", "n" : "6", "o" : "6", "p" : "7", "q" : "7", "r" : "7",
    "s" : "7", "t" : "8", "u" : "8", "v" : "8", "w" : "9",  "x" : "9",
    "y" : "9", "z" : "9", "0" : "0", "1" : "1",  "2" : "2", "3" : "3",
    "4" : "4",  "5" : "5", "6" : "6", "7" : "7", "8" : "8", "9" : "9"
]
That’s it. We’ve implemented the complete map with all variations. Now, let’s proceed to create our first class called “PhoneContact.”
Your file should look like this:

First, in this class, we need to make sure we have a Regex Filter from A-Z + 0-9.
private let regex = try! NSRegularExpression(pattern: "[^ a-z()0-9+]", options: .caseInsensitive)
Basically, the user has default properties that need to be displayed:
var firstName    : String!
var lastName     : String!
var phoneNumber  : String!
var t9String     : String = ""
var image        : UIImage?

var fullName: String! {
    get {
         return String(format: "%@ %@", self.firstName, self.lastName)
     }
}
Make sure you have overridden hash and isEqual to specify your custom logic for list filtering.
Also, we need to have the replace method to avoid having anything except numbers in the string.
   override var hash: Int {
        get {
            return self.phoneNumber.hash
        }
    }

    override func isEqual(_ object: Any?) -> Bool {
        if let obj = object as? PhoneContact {
            return obj.phoneNumber == self.phoneNumber
        }

        return false
    }

    private func replace(str : String) -> String {
        let range = NSMakeRange(0, str.count)
        return self.regex.stringByReplacingMatches(in: str,
                                                   options: [],
                                                   range: range,
                                                   withTemplate: "")
    }
Now we need one more method called calculateT9, to find contacts related to fullname or phonenumber.
     func calculateT9() {
        for c in self.replace(str: self.fullName) {
            t9String.append(T9Map[String(c).localizedLowercase] ?? String(c))
        }

        for c in self.replace(str: self.phoneNumber) {
            t9String.append(T9Map[String(c).localizedLowercase] ?? String(c))
        }
    }
After implementing the PhoneContact object, we need to store our contacts somewhere in the memory. For this purpose, I am going to create a new class called PhoneContactStore.
We will have two local properties:
fileprivate let contactsStore = CNContactStore()
And:
fileprivate lazy var dataSource = Set<PhoneContact>()
I am using Set to make sure there is no duplication during filling out this data source.
final class PhoneContactStore {

    fileprivate let contactsStore   = CNContactStore()
    fileprivate lazy var dataSource = Set<PhoneContact>()

    static let instance : PhoneContactStore = {
        let instance = PhoneContactStore()
        return instance
    }()
}
As you can see, this is a Singleton class, which means we keep it in memory until the app is running. For more information about Singletons or design patterns, you could read here.
We are now very close to having T9 search finalized.
Putting It All Together
Before you access the list of contacts on Apple, you need to ask for permission first.
class func hasAccess() -> Bool {
        let authorizationStatus = CNContactStore.authorizationStatus(for: CNEntityType.contacts)
        return authorizationStatus == .authorized
    }

class func requestForAccess(_ completionHandler: @escaping (_ accessGranted: Bool, _ error : CustomError?) -> Void) {
        let authorizationStatus = CNContactStore.authorizationStatus(for: CNEntityType.contacts)
        switch authorizationStatus {
        case .authorized:
            self.instance.loadAllContacts()
            completionHandler(true, nil)
        case .denied, .notDetermined:
            weak var wSelf = self.instance
            self.instance.contactsStore.requestAccess(for: CNEntityType.contacts, completionHandler: { (access, accessError) -> Void in
                var err: CustomError?
                if let e = accessError {
                    err = CustomError(description: e.localizedDescription, code: 0)
                } else {
                    wSelf?.loadAllContacts()
                }
                completionHandler(access, err)
            })
        default:
            completionHandler(false, CustomError(description: "Common Error", code: 100))
        }
    }
After we have authorized to access contacts, we can write the method to get the list from the system.
fileprivate func loadAllContacts() {
        if self.dataSource.count == 0 {
            let keys = [CNContactGivenNameKey, CNContactFamilyNameKey, CNContactThumbnailImageDataKey, CNContactPhoneNumbersKey]
            do {

                let request = CNContactFetchRequest(keysToFetch: keys as [CNKeyDescriptor])
                request.sortOrder = .givenName
                request.unifyResults = true
                if #available(iOS 10.0, *) {
                    request.mutableObjects = false
                } else {} // Fallback on earlier versions

                try self.contactsStore.enumerateContacts(with: request, usingBlock: {(contact, ok) in
                    DispatchQueue.main.async {
                        for phone in contact.phoneNumbers {
                            let local = PhoneContact()
                            local.firstName = contact.givenName
                            local.lastName = contact.familyName
                            if let data = contact.thumbnailImageData {
                                local.image = UIImage(data: data)
                            }
                            var phoneNum = phone.value.stringValue

                            let strArr = phoneNum.components(separatedBy: CharacterSet.decimalDigits.inverted)
                            phoneNum = NSArray(array: strArr).componentsJoined(by: "")
                            local.phoneNumber = phoneNum
                            local.calculateT9()
                            self.dataSource.insert(local)
                        }
                    }
                })
            } catch {}
        }
    }
We have already loaded the contact list into the memory, which means we can now write a simple method:
findWith - t9StringfindWith - str
class func findWith(t9String: String) -> [PhoneContact] {
    return PhoneContactStore.instance.dataSource.filter({ $0.t9String.contains(t9String) })
}

class func findWith(str: String) -> [PhoneContact] {
        return PhoneContactStore.instance
       .dataSource.filter({  $0.fullName.lowercased()
       .contains(str.lowercased()) })
}

class func count() -> Int {
        let request = CNContactFetchRequest(keysToFetch: [])
        var count = 0;
        do {
            try self.instance.contactsStore.enumerateContacts(
                with: request, usingBlock: {(contact, ok) in
                count += 1;
            })
        } catch {}

        return count
}
That’s it. We are done.
Now we can use T9 search inside UIViewController.
fileprivate let cellIdentifier = "contact_list_cell"

final class ViewController: UIViewController {

    @IBOutlet weak var tableView: UITableView!
    @IBOutlet weak var searchBar: UISearchBar!

    fileprivate lazy var dataSource = [PhoneContact]()
    fileprivate var searchString : String?
    fileprivate var searchInT9   : Bool = true

    override func viewDidLoad() {
        super.viewDidLoad()
        self.tableView.register(
            UINib(
                nibName: "ContactListCell",
                bundle: nil
            ),
            forCellReuseIdentifier: "ContactListCell"
        )
        self.searchBar.keyboardType = .numberPad

        PhoneContactStore.requestForAccess { (ok, err) in }
    }

    func filter(searchString: String, t9: Bool = true) {

    }

    func reloadListSection(section: Int, animation: UITableViewRowAnimation = .none) {
    }
}
Filter method implementation:
func filter(searchString: String, t9: Bool = true) {
        self.searchString = searchString
        self.searchInT9 = t9

        if let str = self.searchString {
            if t9 {
                self.dataSource = PhoneContactStore.findWith(t9String: str)
            } else {
                self.dataSource = PhoneContactStore.findWith(str: str)
            }
        } else {
            self.dataSource = [PhoneContact]()
        }

        self.reloadListSection(section: 0)
    }
Reload List method implementation:
func reloadListSection(section: Int, animation: UITableViewRowAnimation = .none) {
        if self.tableView.numberOfSections <= section {
            self.tableView.beginUpdates()
            self.tableView.insertSections(IndexSet(integersIn:0..<section + 1), with: animation)
            self.tableView.endUpdates()
        }
        self.tableView.reloadSections(IndexSet(integer:section), with: animation)
    }
And here is the last part of our brief tutorial, UITableView implementation:
extension ViewController: UITableViewDelegate, UITableViewDataSource, UISearchBarDelegate {

    func tableView(_ tableView: UITableView, cellForRowAt indexPath: IndexPath) -> UITableViewCell {
        return tableView.dequeueReusableCell(withIdentifier: "ContactListCell")!
    }

    func numberOfSections(in tableView: UITableView) -> Int {
        return 1
    }

    func tableView(_ tableView: UITableView, numberOfRowsInSection section: Int) -> Int {
        return self.dataSource.count
    }

    func tableView(_ tableView: UITableView, willDisplay cell: UITableViewCell, forRowAt indexPath: IndexPath) {
        guard let contactCell = cell as? ContactListCell else { return }
        let row = self.dataSource[indexPath.row]
        contactCell.configureCell(
            fullName: row.fullName,
            t9String: row.t9String,
            number: row.phoneNumber,
            searchStr: searchString,
            img: row.image,
            t9Search: self.searchInT9
        )
    }

    func tableView(_ tableView: UITableView, heightForRowAt indexPath: IndexPath) -> CGFloat {
        return 55
    }

    func searchBar(_ searchBar: UISearchBar, textDidChange searchText: String) {
        self.filter(searchString: searchText)
    }

}
Wrapping Up
This concludes our T9 search tutorial, and hopefully you found it straightforward and easy to implement in iOS.
But why should you? And why didn’t Apple include T9 support in iOS to begin with? As we pointed out in the introduction, T9 is hardly a killer feature on today’s phones - it’s more of an afterthought, a throwback to the days of “dumb” phones with mechanical number pads.
However, there are still a few valid reasons why you should implement T9 search in certain scenarios, either for the sake of consistency, or to improve accessibility and user experience. On a more cheerful note, if you’re the nostalgic kind, playing around with T9 input could bring back fond memories of your school days.
Lastly, you can find the complete code for T9 implementation in iOS at my GitHub repo.
Understanding the basics
What is predictive text?
Predictive text is an input technology where one key or button represents many letters, such as on numeric keypads used on older mobile phones. It is also used to improve accessibility in certain scenarios.
Why is T9 called that?
T9 stands for Text on 9 keys, as it relies on a 9-digit numeric keypad for text input.
How do I use T9 on my keyboard?
Here’s a quick example. For “HELLO,” you would only need to press 4-3-5-5-6. These are the numbers containing the letters that spell “HELLO.”
George Vashakidze
Tbilisi, Georgia
Member since June 21, 2018
About the author
George is an extremely motivated and hardworking mobile developer with extensive experience working with iOS and Android.
PREVIOUSLY AT


