Apache Cordova Tutorial: Developing Mobile Applications with Cordova
Mobile applications are creeping in. Developing for each mobile platform can be an exhaustive task, especially if resources are limited. This is where Apache Cordova comes in handy by providing a way to develop mobile applications using standard web technologies - HTML5, CSS3 and JavaScript. This article explores how one can get started with Apache Cordova and build mobile applications targeted at a wide range of mobile devices.

Mobile applications are creeping in. Developing for each mobile platform can be an exhaustive task, especially if resources are limited. This is where Apache Cordova comes in handy by providing a way to develop mobile applications using standard web technologies - HTML5, CSS3 and JavaScript. This article explores how one can get started with Apache Cordova and build mobile applications targeted at a wide range of mobile devices.

With an MCS degree and a solid start via Google Summer of Code (2012), Filip has experience as a desktop, mobile, and full-stack web dev.
Expertise
PREVIOUSLY AT

Mobile applications are creeping in everywhere, starting with smartphones and tablets, to smart watches, and soon be found in other wearables, too. However, developing for each separate mobile platform can be an exhaustive task, especially if your resources are limited, or if you are a single developer rather than a mobile app development company.
This is where becoming a well-versed Apache Cordova developer can come in handy by providing a way to develop mobile applications using standard web technologies—HTML5, CSS3, and JavaScript.
In 2009, a startup called Nitobi created PhoneGap, an open source API for accessing native mobile resources, with the goal of enabling developers to create mobile applications using standard web technologies. In Nitobi’s vision, most mobile applications would soon be developed using PhoneGap, but developers would still have the option of writing native code when necessary, be it due to performance issues, or lack of a method of accessing specific hardware.
Cordova PhoneGap?
There’s no such thing, really. What happened was, Adobe acquired Nitobi in 2011, and donated the open-source core to the Apache Software Foundation, who rebranded it Apache Cordova. A common analogy you will often run into is that Cordova is to PhoneGap what WebKit is to Chrome or Safari.
Obviously, the differences between Cordova and PhoneGap were minimal in the beginning. With time, Adobe PhoneGap developed its own set of proprietary features, while Cordova was—and still is—supported by the open-source community. This Apache Cordova review and tutorial will examine Cordova app development in more detail, and while some of it may apply to PhoneGap, this shouldn’t be considered a PhoneGap tutorial, per se.
Apache Cordova Capabilities
In essence, Cordova has no limitations in relation to natively developed applications. What you get with Cordova is simply a JavaScript API, which serves as a wrapper for native code and is consistent across devices. You can consider Cordova to be an application container with a web view, which covers the entire screen of the device. The web view used by Cordova is the same web view used by the native operating system. On iOS, this is the default Objective-C UIWebView or a custom WKWebView class; on Android, this is android.webkit.WebView.
Apache Cordova comes with a set of pre-developed plugins which provide access to the device’s camera, GPS, file system, etc. As mobile devices evolve, adding support for additional hardware is simply a matter of developing new plugins.
Finally, Cordova applications install just like native applications. This means that building your code for iOS will produce an IPA file, for Android an APK file, and building for Windows Phone produces an XAP file. If you put enough effort into the development process, your users might not even realize that they are not using a native application.

Apache Cordova Development Workflows
There are two basic paths you can follow when developing with Cordova:
- When your intention is to deploy an application to as many platforms as possible, with little or no platform-specific development, you should use the cross-platform workflow. The main tool supporting this workflow is the Cordova Command-Line Interface (CLI), which serves as a higher level abstraction for configuring and building your application for different platforms. This is the more commonly used development path.
- If you plan to develop your application with a specific platform in mind, you should use the platform-centered workflow. This way, you will be able to tweak and modify your code at a lower level by mixing native components with Cordova components. Even though you could use this approach for cross-platform development, the process will be longer and more tedious.
It is usually recommended to start with the cross-platform development workflow, since switching to platform-centered development is fairly straightforward. However, if you initially start with the platform-centered workflow, you will not be able to switch to cross-platform development since the CLI will overwrite your customizations once you run the build process.
Prerequisites and Cordova Installation
Before installing and running anything related to Cordova, you will need to install the SDK for each platform that you intend to build your application for. We will focus on the Android platform in this article; however, the process involving other platforms is similar.
You should download the Android SDK found here. For Windows, the SDK comes as an installer, while for Linux and OSX it comes as an archive which can be simply extracted. After extracting/installing the package, you will need to add the sdk/tools and sdk/platform-tools directories to your PATH variable. The PATH variable is used by Cordova to look for the binaries it needs for the build process. If you don’t have Java installed, you should go ahead and install the JDK together with Ant. ANT_HOME and JAVA_HOME should be set to the bin folders of JDK and Ant, and after installing the Android SDK, set the ANDROID_HOME variable to Android/Sdk. All locations in the three *_HOME variables should also be in your PATH variable.
After you installed the SDK android command will become available in your command line. Execute it to open the SDK manager and install the latest tools and Android API. You would likely need Android SDK Tools, Android SDK Platform tools, Android SDK Build-tools, SDK Platform, Google APIs Intel x86 Atom System Image, Sources for Android SDK and Intel x86 Emulator Accelerator (HAXM installer). After that you will be able to create an emulator with android avd.
Cordova CLI depends on Node.js and the Git client, so go ahead and download and install Node from nodejs.org, and Git from git-scm.com. You will be using npm to install Cordova CLI itself as well as for installing additional plugins, and Cordova will use git behind the scenes in order to download required dependencies. Finally, run
npm install -g cordova
…to install the Cordova CLI globally (npm install cordova isn’t sufficient by itself.)
To summarize, these are the packages that you will need:
- Java
- Ant
- Android SDK
- NodeJS
- Git
And these environment variables will need to be updated:
PATHJAVA_HOMEANT_HOMEANDROID_HOME
Bootstrapping an Application
Provided you have successfully installed Cordova, you should now have access to the Cordova command line utility. Open your terminal or command-line, and navigate to a directory where you would like to create your first Cordova project. To bootstrap an application, type in the following command:
cordova create toptal toptal.hello HelloToptal
The command line consists of the name of the command cordova, following by the subcommand create. The subcommand is invoked with three additional parameters: The folder where the application will be placed, the namespace of the application, and its display name. This bootstraps the application in a folder with the following structure:
toptal/
|-- hooks/
|-- platforms/
|-- plugins/
|-- www/
`-- config.xml
The www folder contains your application core. This is where you will place your application code which is common for all platforms.
While Cordova allows you to easily develop an app for different platforms, sometimes you need to add customizations. When developing for multiple platforms, you don’t want to modify the source files in the various platforms/[platform-name][assets]/www directories, because they’re regularly overwritten with the top-level www files.
At this point you can also open up the config.xml file and change the metadata for your application, such as author and description.
Add your first platform using:
cordova platform add android
If you change your mind later on, you can remove a platform from the build process easily:
cordova platform rm android
Upon inspecting the platforms directory, you will notice the android folder within it. For each platform that you add, Cordova will create a new directory in platforms and duplicate the www folder within it. If, for example, you want to customize your application for Android, you can modify the files in platforms/android/assets/www and switch to platform-specific shell tools.
However, remember that if you rebuild your application with the CLI (used for cross-platform development), Cordova will overwrite the changes you have made for each platform, so either make sure you have them under version control, or you do platform-specific changes after you have finished with cross-platform development. As we mentioned earlier, moving from cross-platform to platform-specific development is easy. Moving in the other direction is not.
If you want to keep using the cross-platform workflow and still make platform-specific customizations, you should use the top-level merges folder. From Cordova version 3.5 onward, this folder has been removed from the default application template, but if you need it, you can simply create it alongside the other top-level directories (hooks, platforms, plugins, and www).
Platform-specific customizations are placed in merges/[platform-name], and are applied after the source files in the top-level www folder. This way, you can either add new source files for certain platforms, or you can override entire top-level source files with platform-specific ones. Take the following structure for example:
merges/
|-- wp8/
|    `-- app.js
|-- android/
|    `-- android.js
|-- www/
`-- app.js
In this case, the output file for Android will contain both the app.js and android.js files, but the output file for Windows Phone 8 will only contain the app.js file which is found in the merges/wp8 folder, since the files in merges/[platform] override the files in www.
The plugins directory contains information for each platform’s plugins. At this point, you should only have the android.json file which should have the following structure:
{
    "prepare_queue": {
        "installed": [],
        "uninstalled": []
    },
    "config_munge": {
        "files": {}
    },
    "installed_plugins": {},
    "dependent_plugins": {}
}
Let us build the application and deploy it to an Android device. You can use the emulator too, if you want.
Cordova provides several CLI steps for building and running your apps: cordova prepare, cordova compile, cordova build (which is a shortcut for the previous two), cordova emulate and cordova run (which incorporates build and can run emulator too). This should not confuse you, because in most cases you would like to build and run your app in the emulator:
cordova run --emulator
If you want, you can plug your device in through the USB port, enable USB debugging mode and deploy your first Apache Cordova application straight to your device simply running:
cordova run
This will copy all of your files into platforms/* and execute all required tasks.
You can limit the scope of the build process by specifying the name of the platform for which you want to build the application and/or even the specific emulator, e.g:
cordova run android --emulator
or
cordova run ios --emulator --target="iPhone-8-Plus"
Hands-on Apache Cordova Tutorial
Let’s create a simple tutorial application to demonstrate the use of Cordova and its plugins. The entire demo can be found in this GitHub repository so that you can download it and go through parts of it along with this short Cordova tutorial.
We will use the initial setup you created and add additional code. Let’s say that we want to add new projects to an imaginary Toptal database, as well as view existing ones. Open up index.html and set up two tabs in the following manner:
<!DOCTYPE html>
<html>
    <head>
        <meta charset="utf-8" />
        <meta name="format-detection" content="telephone=no" />
        <meta name="msapplication-tap-highlight" content="no" />
        <meta name="viewport" content="user-scalable=no, initial-scale=1, maximum-scale=1, minimum-scale=1, width=device-width, height=device-height, target-densitydpi=device-dpi" />
        <link rel="stylesheet" type="text/css" href="css/bootstrap.min.css" />
        <link rel="stylesheet" href="css/jquery.mobile-1.4.5.min.css" />
        <link rel="stylesheet" type="text/css" href="css/toptal.css" />
        <title>Hello Toptal</title>
    </head>
    <body>
        <div id="container">
            <div id="tab-content">

            </div>
        </div>
        <footer>
            <ul id="menu">
                <li id="search-tab-button" class="tab-button active" data-tab="#search-tab">Search Projects</li>
                <li id="post-tab-button" class="tab-button" data-tab="#add-tab">Post a Project</li>
            </ul>
        </footer>
        <div id="dev-null" style="display: none"></div>
        <script src="js/lib/jquery-1.11.1.min.js"></script>
        <script src="js/lib/jquery.mobile-1.4.5.min.js"></script>
        <script type="text/javascript" src="cordova.js"></script>
        <script type="text/javascript" src="js/SQLiteStorageService.js"></script>
        <script type="text/javascript" src="js/Controller.js"></script>
        <script type="text/javascript" src="js/index.js"></script>
    </body>
</html>
Notice that I have added Bootstrap and jQuery Mobile as dependencies. Please be aware that much better solutions and frameworks have been developed for building modern hybrid applications, but since most (if not all) web developers are familiar with these two libraries, it makes sense to use them for a beginners’ tutorial. You can download the stylesheets from GitHub or use your own, if you prefer.
Let us move to the index.js file, and strip it down to the following:
var app = {
    // Application Constructor
    initialize: function() {
        if (navigator.userAgent.match(/(iPhone|iPod|iPad|Android|BlackBerry)/)) {
            document.addEventListener("deviceready", this.onDeviceReady, false);
        } else {
            this.onDeviceReady();
        }
    },

    onDeviceReady: function() {
        // We will init / bootstrap our application here
    },
};
app.initialize();
Remember that the advocated architecture for Cordova applications is setting up a Single Page Application (SPA). This way, all of the resources are only loaded once when the app starts, and can stay in the web view for as long as the application is running. In addition, with SPAs, the user will not have page reloads which are not simply typical for native applications. Keeping that in mind, let us set up a simple controller to switch between the two tabs:
var Controller = function() {
    var controller = {
        self: null,
        initialize: function() {
            self = this;
            this.bindEvents();
            self.renderSearchView();
        },

        bindEvents: function() {
            $('.tab-button').on('click', this.onTabClick);
        },

        onTabClick: function(e) {
            e.preventDefault();
            if ($(this).hasClass('active')) {
                return;
            }

            var tab = $(this).data('tab');
            if (tab === '#add-tab') {
                self.renderPostView();
            } else {
                self.renderSearchView();
            }
        },

        renderPostView: function() {
            $('.tab-button').removeClass('active');
            $('#post-tab-button').addClass('active');

            var $tab = $('#tab-content');
            $tab.empty();
            $("#tab-content").load("./views/post-project-view.html", function(data) {
                $('#tab-content').find('#post-project-form').on('submit', self.postProject);
            });
        },

        renderSearchView: function() {
            $('.tab-button').removeClass('active');
            $('#search-tab-button').addClass('active');

            var $tab = $('#tab-content');
            $tab.empty();

            var $projectTemplate = null;
            $("#tab-content").load("./views/search-project-view.html", function(data) {
                $projectTemplate = $('.project').remove();
                // Load projects here
            });
        }
    }
    controller.initialize();
    return controller;
}
The controller has two methods so far, one for rendering the Search View, and one for rendering the Post Project view. Let’s initialize it in our index.js file by first declaring it at the top and constructing it in the onDeviceReady method:
// top of index.js
var controller = null
// inside onDeviceReady method
controller = new Controller();
Finally, add a script reference in index.html above the reference to index.js.
You can download the Search and Post views directly from GitHub. Since the partial views are read from a file, some browsers like Chrome, while trying to render your page, will complain about cross-domain requests.
The possible solution here would be to run a local static server, for example using the node-static npm module. Also, here you can start thinking about using some framework such as PhoneGap and/or Ionic. All of them provide a range of development tools, including emulating in browser, hot reloading, and code generating (scaffolding).
For now, let’s simply deploy to an Android device by running the following:
cordova run android
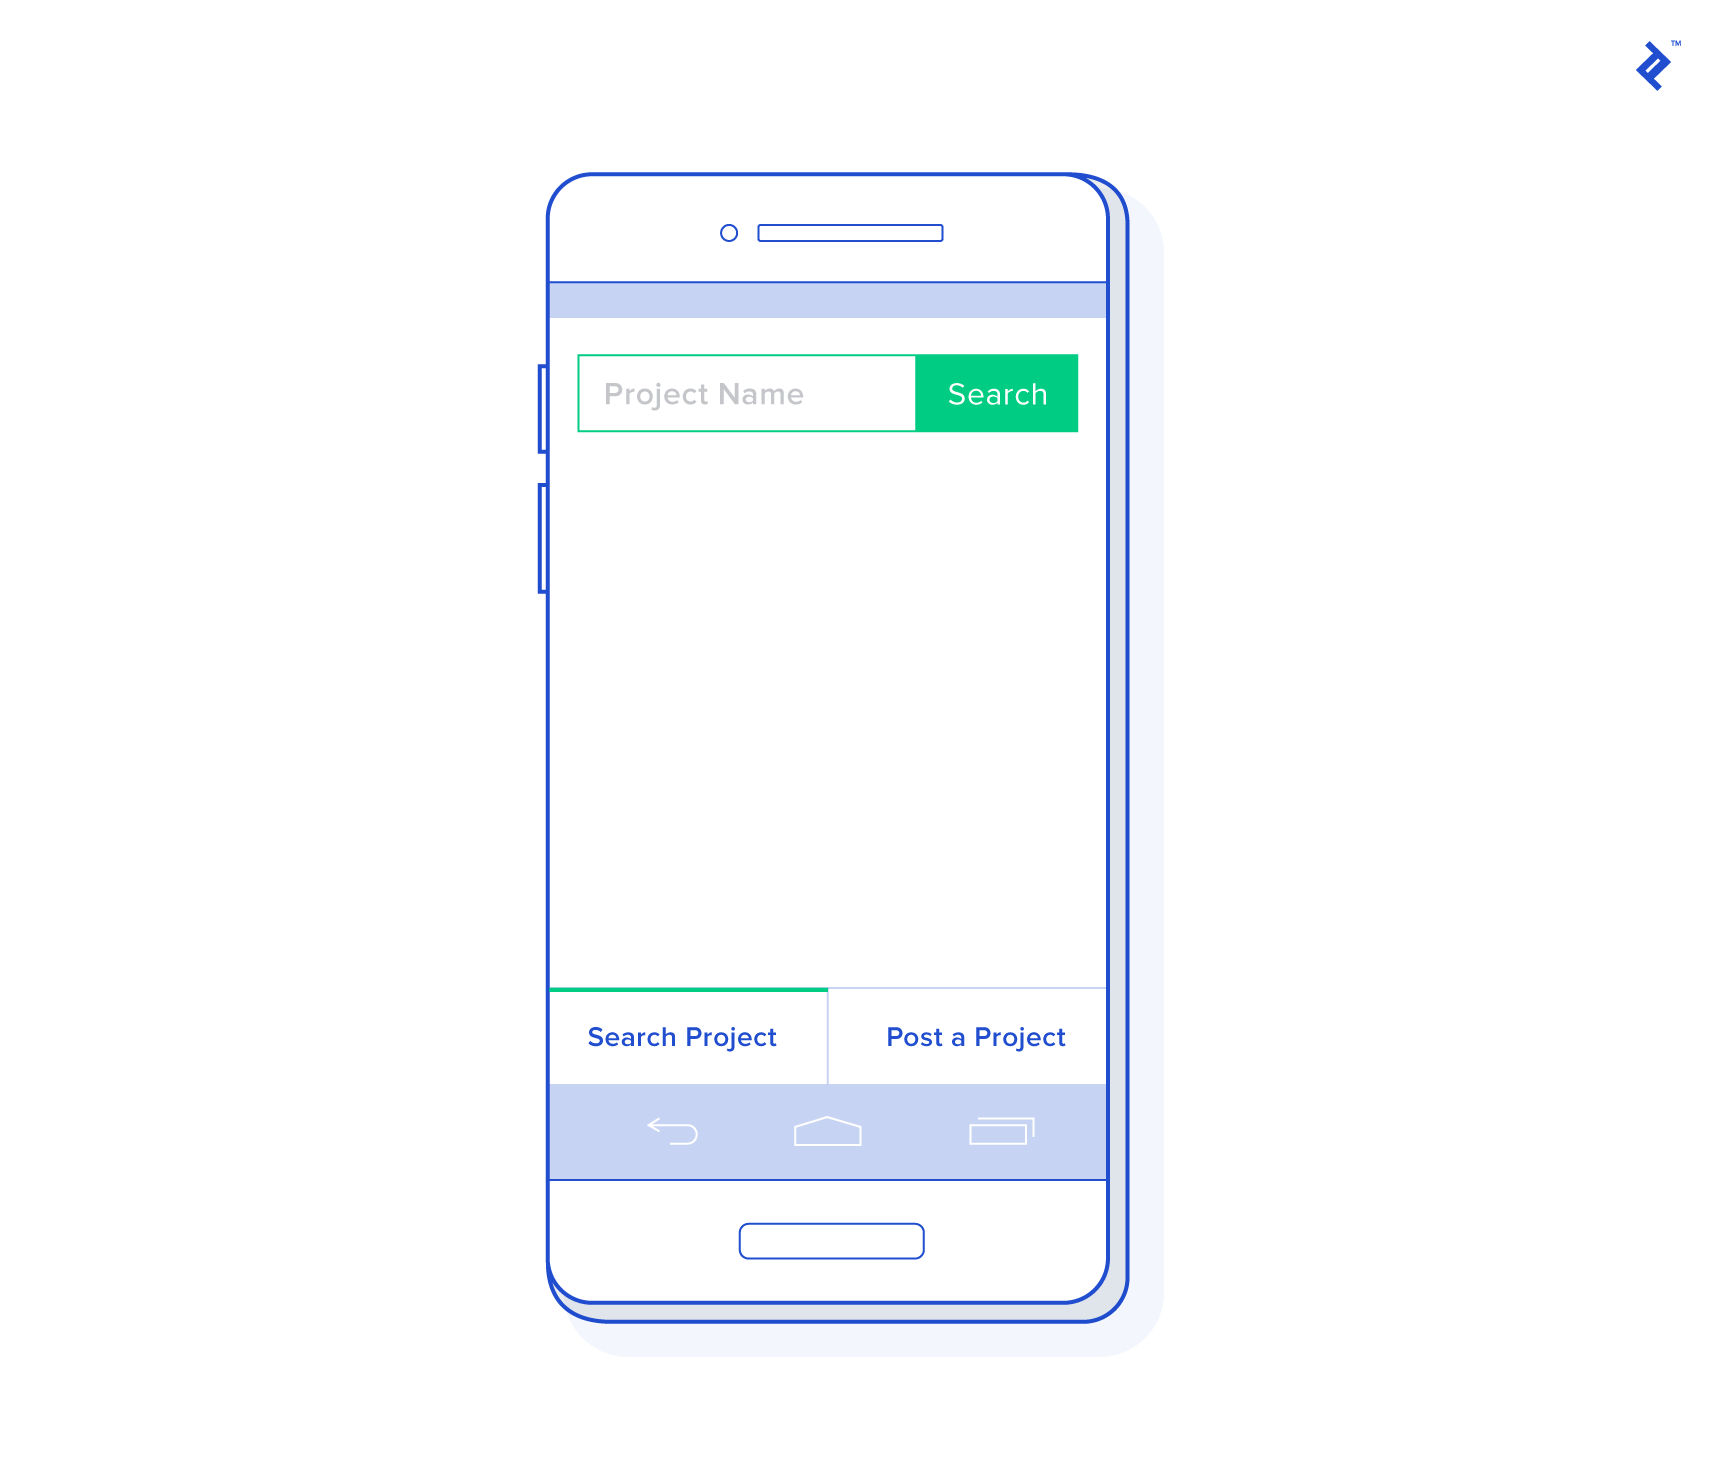
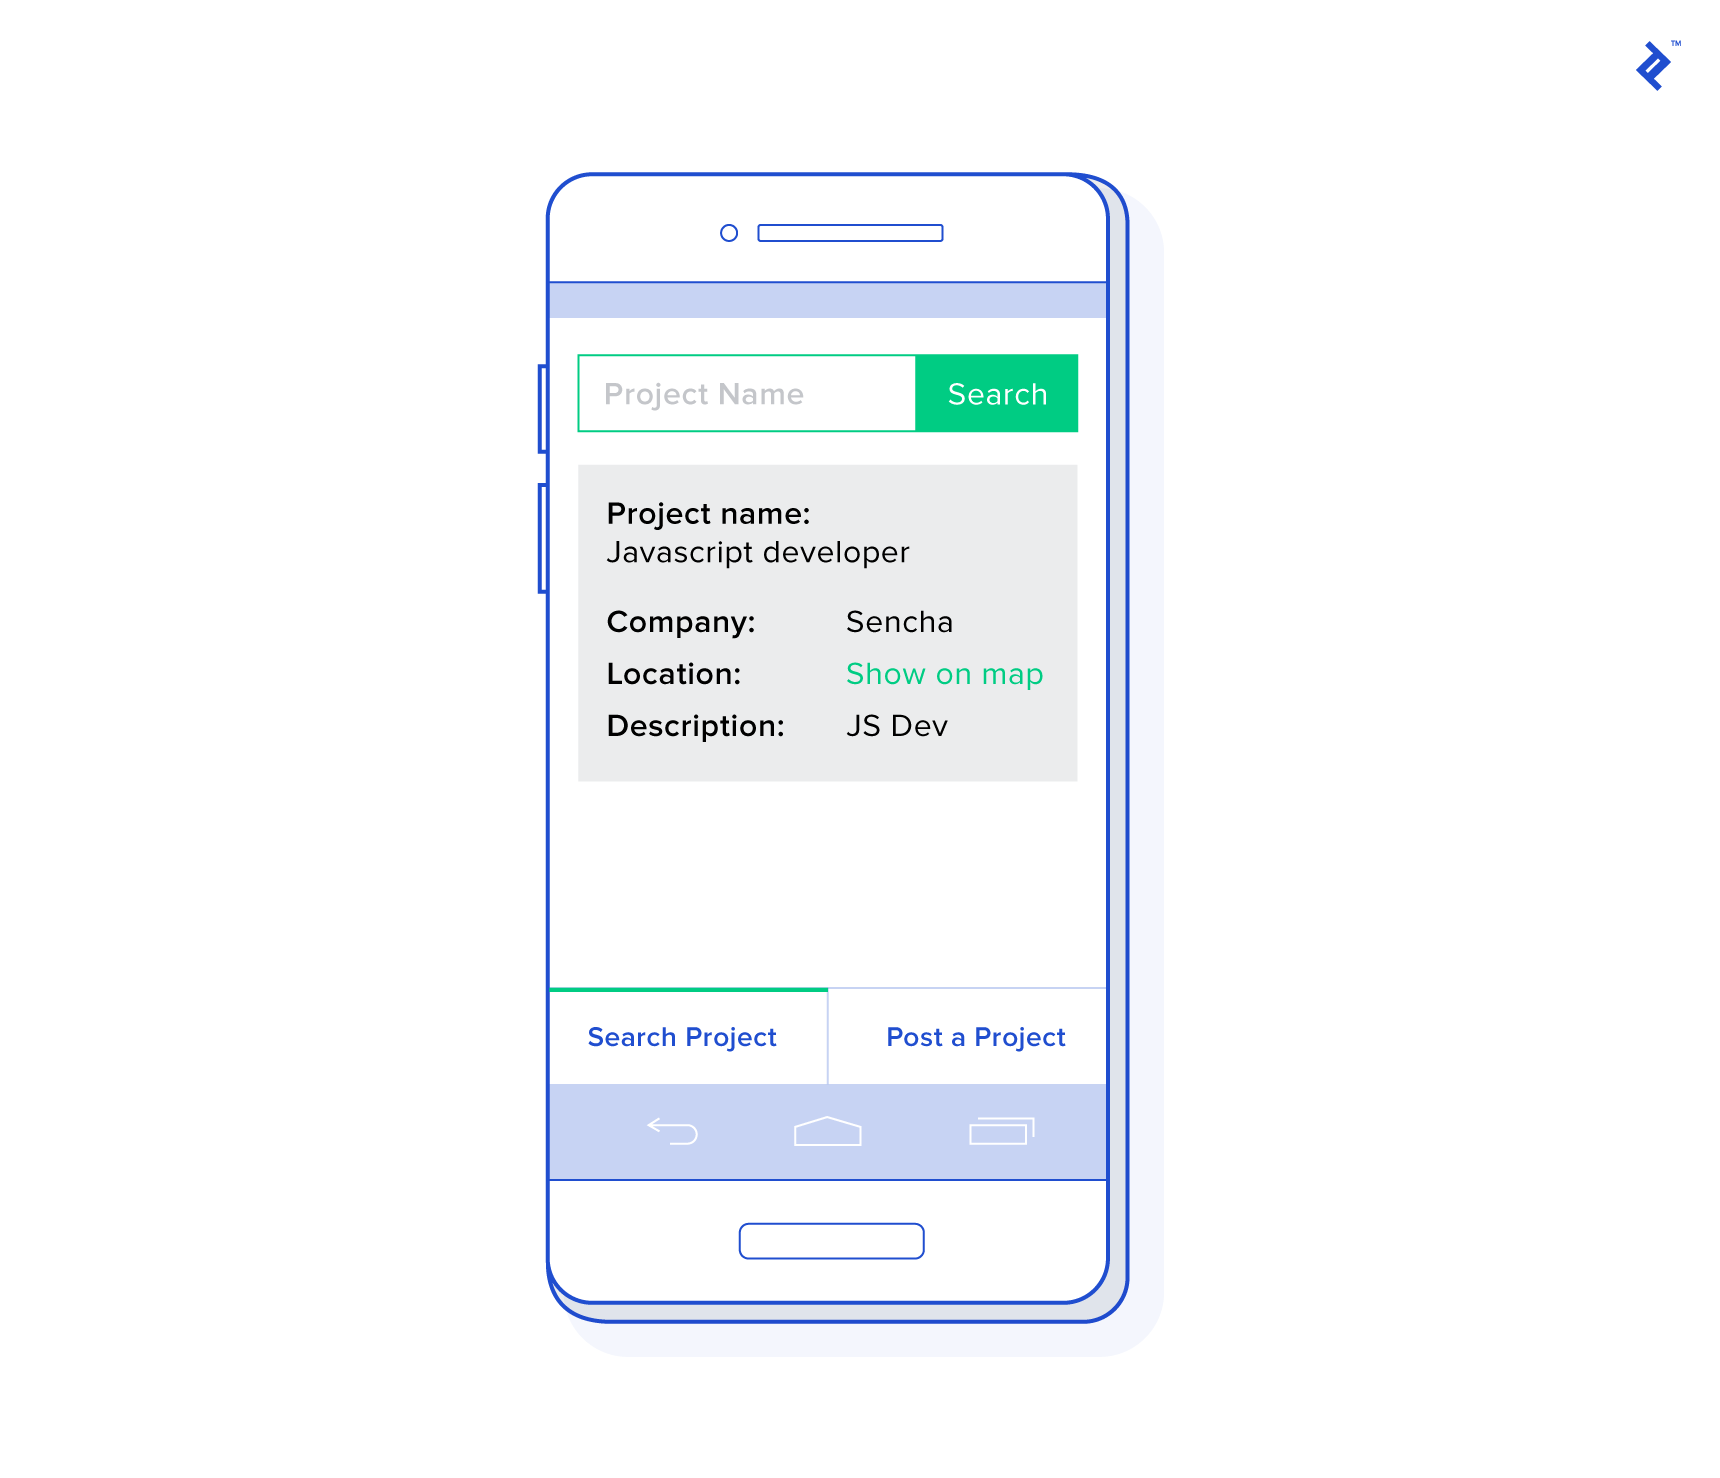
At this point, your application should have two tabs. The first tab allows projects to be searched:
The second tab allows new projects to be posted:

All we have now is a classic web application running inside a web view. We haven’t really used any of the native features so let’s try to do that now. A common question is how to store data locally on the device, or more precisely, what type of storage to use. There are several ways to go:
- LocalStorage
- WebSQL
- IndexedDB
- Server-side storage accessed through a web service
- Third-party plugins providing other options
LocalStorage is OK for storing small amounts of data, but it won’t suffice if you are building a data-intensive application, as the available space varies from 3 to 10 MB. IndexedDB may be a better solution for this case. WebSQL is deprecated and not supported on some platforms. Finally, using web services to fetch and modify data fits well within the SPA paradigm, but it breaks down when your application goes offline. PWA techniques along with Service Workers has recently come into Cordova world to help with this.
Also, there are a lot of additional, third-party plugins that come in to fill the gaps in Cordova’s core. The File plugin may be quite useful as it provides you with access to the device’s file system, allowing you to create and store files. For now, let’s try SQLitePlugin which provides you with a local SQLite database. You can add it to your project by running:
cordova plugin add https://github.com/brodysoft/Cordova-SQLitePlugin
SQLitePlugin provides an API to the device’s SQLite database and serves as a true persistence mechanism. We can create a simple Storage Service in the following manner:
SQLiteStorageService = function () {
    var service = {};
    var db = window.sqlitePlugin ?
        window.sqlitePlugin.openDatabase({name: "demo.toptal", location: "default"}) :
        window.openDatabase("demo.toptal", "1.0", "DB para FactAV", 5000000);

    service.initialize = function() {
        // Initialize the database
        var deferred = $.Deferred();
        db.transaction(function(tx) {
            tx.executeSql(
                'CREATE TABLE IF NOT EXISTS projects ' +
                '(id integer primary key, name text, company text, description text, latitude real, longitude real)'
            ,[], function(tx, res) {
                tx.executeSql('DELETE FROM projects', [], function(tx, res) {
                    deferred.resolve(service);
                }, function(tx, res) {
                    deferred.reject('Error initializing database');
                });
            }, function(tx, res) {
                deferred.reject('Error initializing database');
            });
        });
        return deferred.promise();
    }

    service.getProjects = function() {
        // fetch projects
    }

    service.addProject = function(name, company, description, addLocation) {
        // add a new project
    }

    return service.initialize();
}
You can download the code for fetching and adding projects from GitHub and paste it in the respective placeholders. Do not forget to add SQLiteStorageService.js to your index.html file above Controller.js, and initialize it in your controller by modifying the Controller’s init function:
initialize: function() {
    self = this;
    new SQLiteStorageService().done(function(service) {
        self.storageService = service;
        self.bindEvents();
        self.renderSearchView();
    }).fail(function(error) {
        alert(error);
    });
}
If you take a glimpse at the service.addProject(), you will notice that it makes a call to the navigator.geolocation.getCurrentPosition() method. Cordova has a geolocation plugin which you can use to get the phone’s current location, and you can even use the navigator.geolocation.watchPosition() method to receive updates when the user’s position changes.
Finally, let’s add the controller event handles for adding and fetching projects from the database:
renderPostView: function() {
    $('.tab-button').removeClass('active');
    $('#post-tab-button').addClass('active');

    var $tab = $('#tab-content');
    $tab.empty();
    $("#tab-content").load("./views/post-project-view.html", function(data) {
        $('#tab-content').find('#post-project-form').on('submit', self.postProject);
    });
},


postProject: function(e) {

    e.preventDefault();
    var name = $('#project-name').val();
    var description = $('#project-description').val();
    var company = $('#company').val();
    var addLocation = $('#include-location').is(':checked');

    if (!name || !description || !company) {
        alert('Please fill in all fields');
        return;
    } else {
        var result = self.storageService.addProject(
            name, company, description, addLocation);

        result.done(function() {
            alert('Project successfully added');
            self.renderSearchView();
        }).fail(function(error) {
            alert(error);
        });
    }
},


renderSearchView: function() {
    $('.tab-button').removeClass('active');
    $('#search-tab-button').addClass('active');

    var $tab = $('#tab-content');
    $tab.empty();

    var $projectTemplate = null;
    $("#tab-content").load("./views/search-project-view.html", function(data) {
        $('#addressSearch').on('click', function() {
            alert('Not implemented');
        });

        $projectTemplate = $('.project').remove();

        var projects = self.storageService.getProjects().done(function(projects) {

            for(var idx in projects) {
                var $div = $projectTemplate.clone();
                var project = projects[idx];

                $div.find('.project-name').text(project.name);
                $div.find('.project-company').text(project.company);
                $div.find('.project-description').text(project.description);

                if (project.location) {
                    var url =
                        '<a target="_blank" href="https://www.google.com.au/maps/preview/@' +
                        project.location.latitude + ',' + project.location.longitude + ',10z">Click to open map</a>';

                    $div.find('.project-location').html(url);
                } else {
                    $div.find('.project-location').text("Not specified");
                }

                $tab.append($div);
            }
        }).fail(function(error) {
            alert(error);
        });
    });
}
To add the console and the dialog plugins, execute the following:
cordova plugin add org.apache.cordova.dialogs
cordova plugin add org.apache.cordova.console
The cordova.console plugin will assist you in debugging by enabling the console.log() function within emulators.
You can easily debug Android applications through the Chrome remote debugger. Once you have connected your device, click the drop down menu in the top right corner (below the X button), expand More Tools, and click Inspect Devices. You should see your device in the list and should be able to open its debug console.
Safari provides the same functionality for debugging iOS apps that run on USB-connected device or emulator. Just enable Developer Tools under the Safari Settings > Advanced tab.
The cordova.dialogs plugin enables native notifications. A common practice is to redefine the windows.alert method using the cordova.dialogs API in the following manner:
overrideBrowserAlert: function() {
    if (navigator.notification) { // Override default HTML alert with native dialog
        window.alert = function (message) {
            navigator.notification.alert(
                message,    // message
                null,       // callback
                "Toptal", // title
                'OK'        // buttonName
            );
        };
    }
}
The overrideBrowserAlert function should be called within the deviceready event handler.
You should now be able to add new projects and view existing ones from the database. If you select the checkbox “Include location”, the device will make a call to the Geolocation API and add your current location to the project.
Let us add a finishing touch to the application by setting an icon and a splash screen. Add the following to your config.xml file:
<platform name="android">
    <icon src="www/img/logo.png" />
    <splash src="www/img/logo.png" density="mdpi"/>
    <splash src="www/img/logo.png" density="hdpi"/>
    <splash src="www/img/logo.png" density="xhdpi"/>
</platform>
Finally, place a logo image in the www/img folder.
Your Own Cordova App
We went through the basic steps of Apache Cordova app development and used our own JavaScript architecture and CSS stylesheet. This Cordova tutorial was an attempt to show the potential of Apache Cordova as a means of developing mobile applications using familiar technologies, reducing both development time and the effort required to build multiple applications for different platforms.
However, when building applications that will go into production, it’s recommended that you use an existing framework. In addition to structuring your application in a predefined architecture, this might also provide you a set of components which will help your application come closer to the native look and feel. Some frameworks worth noting are Ionic, Framework7, Weex, Ratchet, Kendo UI, and Onsen UI. Best of luck!
Further Reading on the Toptal Blog:
Understanding the basics
What is Cordova?
Apache Cordova is a framework for creating cross-platform mobile apps using standard web technologies. Essentially, it’s an application container with a web view that covers the entire screen of the device.
What is PhoneGap?
Nowadays, PhoneGap refers to a product built by Adobe on top of Apache Cordova. Originally, it was the framework made by Nitobi before Adobe acquired them and open-sourced it as Apache Cordova.
What is WebView?
Android’s WebView and iOS’ UIWebView are the classes the respective operating systems use to display web pages full-screen. Developers can build web browsers with them, or, in the case of Apache Cordova, use them to display a web app as if it were a native app.
What is a Cordova plugin?
Apache Cordova plugins allow for further access to cross-platform features. These can be hardware-based services like geolocation, or purely software-based functionality such as OS-provided SQLite database access.
Filip Petkovski
Skopje, Macedonia
Member since March 21, 2014
About the author
With an MCS degree and a solid start via Google Summer of Code (2012), Filip has experience as a desktop, mobile, and full-stack web dev.
Expertise
PREVIOUSLY AT