
Web Scraping with a Headless Browser: A Puppeteer Tutorial
In this article, Toptal Freelance JavaScript Developer Nick Chikovani shows how easy it is to perform web scraping using a headless browser. Specifically, he provides a Puppeteer tutorial, going through a few examples of how to control Google Chrome to take screenshots and gather structured data.
In this article, Toptal Freelance JavaScript Developer Nick Chikovani shows how easy it is to perform web scraping using a headless browser. Specifically, he provides a Puppeteer tutorial, going through a few examples of how to control Google Chrome to take screenshots and gather structured data.

With more than six years of experience working as a developer and team lead, Nick has a passion for robust, scalable and clean code design.
Expertise
In this article, we’ll see how easy it is to perform web scraping (web automation) with the somewhat non-traditional method of using a headless browser.
What Is a Headless Browser and Why Is It Needed?
The last few years have seen the web evolve from simplistic websites built with bare HTML and CSS. Now there are much more interactive web apps with beautiful UIs, which are often built with frameworks such as Angular or React. In other words, nowadays JavaScript rules the web, including almost everything you interact with on websites.
For our purposes, JavaScript is a client-side language. The server returns JavaScript files or scripts injected into an HTML response, and the browser processes it. Now, this is a problem if we are doing some kind of web scraping or web automation because more times than not, the content that we’d like to see or scrape is actually rendered by JavaScript code and is not accessible from the raw HTML response that the server delivers.
As we mentioned above, browsers do know how to process the JavaScript and render beautiful web pages. Now, what if we could leverage this functionality for our scraping needs and had a way to control browsers programmatically? That’s exactly where headless browser automation steps in!
Headless? Excuse me? Yes, this just means there’s no graphical user interface (GUI). Instead of interacting with visual elements the way you normally would—for example with a mouse or touch device—you automate use cases with a command-line interface (CLI).
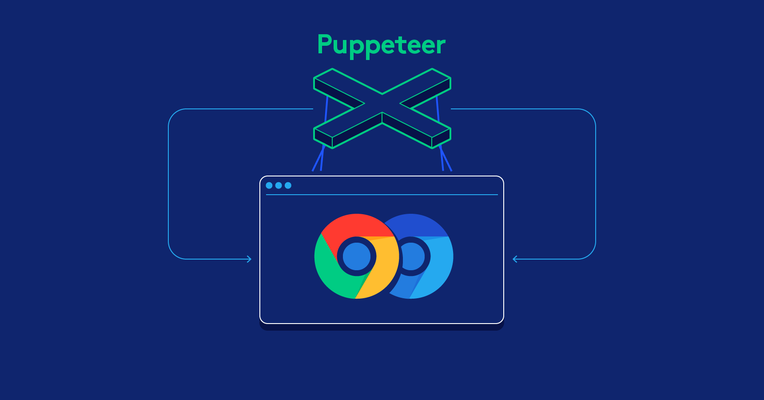
Headless Chrome and Puppeteer
There are many web scraping tools that can be used for headless browsing, like Zombie.js or headless Firefox using Selenium. But today we’ll be exploring headless Chrome via Puppeteer, as it’s a relatively newer player, released at the start of 2018. Editor’s note: It’s worth mentioning Intoli’s Remote Browser, another new player, but that will have to be a subject for another article.
What exactly is Puppeteer? It’s a Node.js library which provides a high-level API to control headless Chrome or Chromium or to interact with the DevTools protocol. It’s maintained by the Chrome DevTools team and an awesome open-source community.
Enough talking—let’s jump into the code and explore the world of how to automate web scraping using Puppeteer’s headless browsing!
Preparing the Environment
First of all, you’ll need to have Node.js 8+ installed on your machine. You can install it here, or if you are CLI lover like me and like to work on Ubuntu, follow those commands:
curl -sL https://deb.nodesource.com/setup_8.x | sudo -E bash -
sudo apt-get install -y nodejs
You’ll also need some packages that may or may not be available on your system. Just to be safe, try to install those:
sudo apt-get install -yq --no-install-recommends libasound2 libatk1.0-0 libc6 libcairo2 libcups2 libdbus-1-3 libexpat1 libfontconfig1 libgcc1 libgconf-2-4 libgdk-pixbuf2.0-0 libglib2.0-0 libgtk-3-0 libnspr4 libpango-1.0-0 libpangocairo-1.0-0 libstdc++6 libx11-6 libx11-xcb1 libxcb1 libxcursor1 libxdamage1 libxext6 libxfixes3 libxi6 libxrandr2 libxrender1 libxss1 libxtst6 libnss3
Setup Headless Chrome and Puppeteer
I’d recommend installing Puppeteer with npm, as it’ll also include the stable up-to-date Chromium version that is guaranteed to work with the library.
Run this command in your project root directory:
npm i puppeteer --save
Note: This might take a while as Puppeteer will need to download and install Chromium in the background.
Okay, now that we are all set and configured, let the fun begin!
Using Puppeteer API for Automated Web Scraping
Let’s start our Puppeteer tutorial with a basic example. We’ll write a script that will cause our headless browser to take a screenshot of a website of our choice.
Create a new file in your project directory named screenshot.js and open it in your favorite code editor.
First, let’s import the Puppeteer library in your script:
const puppeteer = require('puppeteer');
Next up, let’s take the URL from command-line arguments:
const url = process.argv[2];
if (!url) {
    throw "Please provide a URL as the first argument";
}
Now, we need to keep in mind that Puppeteer is a promise-based library: It performs asynchronous calls to the headless Chrome instance under the hood. Let’s keep the code clean by using async/await. For that, we need to define an async function first and put all the Puppeteer code in there:
async function run () {
    const browser = await puppeteer.launch();
    const page = await browser.newPage();
    await page.goto(url);
    await page.screenshot({path: 'screenshot.png'});
    browser.close();
}
run();
Altogether, the final code looks like this:
const puppeteer = require('puppeteer');
const url = process.argv[2];
if (!url) {
    throw "Please provide URL as a first argument";
}
async function run () {
    const browser = await puppeteer.launch();
    const page = await browser.newPage();
    await page.goto(url);
    await page.screenshot({path: 'screenshot.png'});
    browser.close();
}
run();
You can run it by executing the following command in the root directory of your project:
node screenshot.js https://github.com
Wait a second, and boom! Our headless browser just created a file named screenshot.png and you can see the GitHub homepage rendered in it. Great, we have a working Chrome web scraper!
Let’s stop for a minute and explore what happens in our run() function above.
First, we launch a new headless browser instance, then we open a new page (tab) and navigate to the URL provided in the command-line argument. Lastly, we use Puppeteer’s built-in method for taking a screenshot, and we only need to provide the path where it should be saved. We also need to make sure to close the headless browser after we are done with our automation.
Now that we’ve covered the basics, let’s move on to something a bit more complex.
A Second Puppeteer Scraping Example
For the next part of our Puppeteer tutorial, let’s say we want to scrape down the newest articles from Hacker News.
Create a new file named ycombinator-scraper.js and paste in the following code snippet:
const puppeteer = require('puppeteer');
function run () {
    return new Promise(async (resolve, reject) => {
        try {
            const browser = await puppeteer.launch();
            const page = await browser.newPage();
            await page.goto("https://news.ycombinator.com/");
            let urls = await page.evaluate(() => {
                let results = [];
                let items = document.querySelectorAll('a.storylink');
                items.forEach((item) => {
                    results.push({
                        url:  item.getAttribute('href'),
                        text: item.innerText,
                    });
                });
                return results;
            })
            browser.close();
            return resolve(urls);
        } catch (e) {
            return reject(e);
        }
    })
}
run().then(console.log).catch(console.error);
Okay, there’s a bit more going on here compared with the previous example.
The first thing you might notice is that the run() function now returns a promise so the async prefix has moved to the promise function’s definition.
We’ve also wrapped all of our code in a try-catch block so that we can handle any errors that cause our promise to be rejected.
And finally, we’re using Puppeteer’s built-in method called evaluate(). This method lets us run custom JavaScript code as if we were executing it in the DevTools console. Anything returned from that function gets resolved by the promise. This method is very handy when it comes to scraping information or performing custom actions.
The code passed to the evaluate() method is pretty basic JavaScript that builds an array of objects, each having url and text fields that represent the story URLs we see on https://news.ycombinator.com/.
The output of the script looks something like this (but with 30 entries, originally):
[ { url: 'https://www.nature.com/articles/d41586-018-05469-3',
    text: 'Bias detectives: the researchers striving to make algorithms fair' },
  { url: 'https://mino-games.workable.com/jobs/415887',
    text: 'Mino Games Is Hiring Programmers in Montreal' },
  { url: 'http://srobb.net/pf.html',
    text: 'A Beginner\'s Guide to Firewalling with pf' },
  // ...
  { url: 'https://tools.ietf.org/html/rfc8439',
    text: 'ChaCha20 and Poly1305 for IETF Protocols' } ]
Pretty neat, I’d say!
Okay, let’s move forward. We only had 30 items returned, while there are many more available—they are just on other pages. We need to click on the “More” button to load the next page of results.
Let’s modify our script a bit to add a support for pagination:
const puppeteer = require('puppeteer');
function run (pagesToScrape) {
    return new Promise(async (resolve, reject) => {
        try {
            if (!pagesToScrape) {
                pagesToScrape = 1;
            }
            const browser = await puppeteer.launch();
            const page = await browser.newPage();
            await page.goto("https://news.ycombinator.com/");
            let currentPage = 1;
            let urls = [];
            while (currentPage <= pagesToScrape) {
                let newUrls = await page.evaluate(() => {
                    let results = [];
                    let items = document.querySelectorAll('a.storylink');
                    items.forEach((item) => {
                        results.push({
                            url:  item.getAttribute('href'),
                            text: item.innerText,
                        });
                    });
                    return results;
                });
                urls = urls.concat(newUrls);
                if (currentPage < pagesToScrape) {
                    await Promise.all([
                        await page.click('a.morelink'),
                        await page.waitForSelector('a.storylink')
                    ])
                }
                currentPage++;
            }
            browser.close();
            return resolve(urls);
        } catch (e) {
            return reject(e);
        }
    })
}
run(5).then(console.log).catch(console.error);
Let’s review what we did here:
- We added a single argument called
pagesToScrapeto our mainrun()function. We’ll use this to limit how many pages our script will scrape. - There is one more new variable named
currentPagewhich represents the number of the page of results are we looking at currently. It’s set to1initially. We also wrapped ourevaluate()function in awhileloop, so that it keeps running as long ascurrentPageis less than or equal topagesToScrape. - We added the block for moving to a new page and waiting for the page to load before restarting the
whileloop.
You’ll notice that we used the page.click() method to have the headless browser click on the “More” button. We also used the waitForSelector() method to make sure our logic is paused until the page contents are loaded.
Both of those are high-level Puppeteer API methods ready to use out-of-the-box.
One of the problems you’ll probably encounter during scraping with Puppeteer is waiting for a page to load. Hacker News has a relatively simple structure and it was fairly easy to wait for its page load completion. For more complex use cases, Puppeteer offers a wide range of built-in functionality, which you can explore in the API documentation on GitHub.
This is all pretty cool, but our Puppeteer tutorial hasn’t covered optimization yet. Let’s see how can we make Puppeteer run faster.
Optimizing Our Puppeteer Script
The general idea is to not let the headless browser do any extra work. This might include loading images, applying CSS rules, firing XHR requests, etc.
As with other tools, optimization of Puppeteer depends on the exact use case, so keep in mind that some of these ideas might not be suitable for your project. For instance, if we had avoided loading images in our first example, our screenshot might not have looked how we wanted.
Anyway, these optimizations can be accomplished either by caching the assets on the first request, or canceling the HTTP requests outright as they are initiated by the website.
Let’s see how caching works first.
You should be aware that when you launch a new headless browser instance, Puppeteer creates a temporary directory for its profile. It is removed when the browser is closed and is not available for use when you fire up a new instance—thus all the images, CSS, cookies, and other objects stored will not be accessible anymore.
We can force Puppeteer to use a custom path for storing data like cookies and cache, which will be reused every time we run it again—until they expire or are manually deleted.
const browser = await puppeteer.launch({
    userDataDir: './data',
});
This should give us a nice bump in performance, as lots of CSS and images will be cached in the data directory upon the first request, and Chrome won’t need to download them again and again.
However, those assets will still be used when rendering the page. In our scraping needs of Y Combinator news articles, we don’t really need to worry about any visuals, including the images. We only care about bare HTML output, so let’s try to block every request.
Luckily, Puppeteer is pretty cool to work with, in this case, because it comes with support for custom hooks. We can provide an interceptor on every request and cancel the ones we don’t really need.
The interceptor can be defined in the following way:
await page.setRequestInterception(true);
page.on('request', (request) => {
    if (request.resourceType() === 'document') {
        request.continue();
    } else {
        request.abort();
    }
});
As you can see, we have full control over the requests that get initiated. We can write custom logic to allow or abort specific requests based on their resourceType. We also have access to lots of other data like request.url so we can block only specific URLs if we want.
In the above example, we only allow requests with the resource type of "document" to get through our filter, meaning that we will block all images, CSS, and everything else besides the original HTML response.
Here’s our final code:
const puppeteer = require('puppeteer');
function run (pagesToScrape) {
    return new Promise(async (resolve, reject) => {
        try {
            if (!pagesToScrape) {
                pagesToScrape = 1;
            }
            const browser = await puppeteer.launch();
            const page = await browser.newPage();
            await page.setRequestInterception(true);
            page.on('request', (request) => {
                if (request.resourceType() === 'document') {
                    request.continue();
                } else {
                    request.abort();
                }
            });
            await page.goto("https://news.ycombinator.com/");
            let currentPage = 1;
            let urls = [];
            while (currentPage <= pagesToScrape) {
                await page.waitForSelector('a.storylink');
                let newUrls = await page.evaluate(() => {
                    let results = [];
                    let items = document.querySelectorAll('a.storylink');
                    items.forEach((item) => {
                        results.push({
                            url:  item.getAttribute('href'),
                            text: item.innerText,
                        });
                    });
                    return results;
                });
                urls = urls.concat(newUrls);
                if (currentPage < pagesToScrape) {
                    await Promise.all([
                        await page.waitForSelector('a.morelink'),
                        await page.click('a.morelink'),
                        await page.waitForSelector('a.storylink')
                    ])
                }
                currentPage++;
            }
            browser.close();
            return resolve(urls);
        } catch (e) {
            return reject(e);
        }
    })
}
run(5).then(console.log).catch(console.error);
Stay Safe with Rate Limits
Headless browsers are very powerful tools. They’re able to perform almost any kind of web automation task, and Puppeteer makes this even easier. Despite all the possibilities, we must comply with a website’s terms of service to make sure we don’t abuse the system.
Since this aspect is more architecture-related, I won’t cover this in depth in this Puppeteer tutorial. That said, the most basic way to slow down a Puppeteer script is to add a sleep command to it:
js
await page.waitFor(5000);
This statement will force your script to sleep for five seconds (5000 ms). You can put this anywhere before browser.close().
Just like limiting your use of third-party services, there are lots of other more robust ways to control your usage of Puppeteer. One example would be building a queue system with a limited number of workers. Every time you want to use Puppeteer, you’d push a new task into the queue, but there would only be a limited number of workers able to work on the tasks in it. This is a fairly common practice when dealing with third-party API rate limits and can be applied to Puppeteer web data scraping as well.
Puppeteer’s Place in the Fast-moving Web
In this Puppeteer tutorial, I’ve demonstrated its basic functionality as a web-scraping tool. However, it has much wider use cases, including headless browser testing, PDF generation, and performance monitoring, among many others.
Web technologies are moving forward fast. Some websites are so dependent on JavaScript rendering that it’s become nearly impossible to execute simple HTTP requests to scrape them or perform some sort of automation. Luckily, headless browsers are becoming more and more accessible to handle all of our automation needs, thanks to projects like Puppeteer and the awesome teams behind them!
Further Reading on the Toptal Blog:
Understanding the basics
A headless browser is a web browser with no user interface (UI) whatsoever. Instead, it follows instructions defined by software developers in different programming languages. Headless browsers are mostly used for running automated quality assurance tests, or to scrape websites.
Websites often allow other software to scrape their content. Please refer to the robots exclusion standard (robots.txt file) of the website that you intend to scrape, as it usually describes which pages you are allowed to scrape. You should also check the terms of service to see if you are allowed to scrape.
Headless means that the given device or software has no user interface or input mechanism such as a keyboard or mouse. The term “headless environment” is more often used to describe computer software designed to provide services to other computers or servers.
Headless Chrome is essentially the Google Chrome web browser without its graphical user interface (GUI), based on the same underlying technology. Headless Chrome is instead controlled by scripts written by software developers.
Puppeteer is a Node.js library maintained by Chrome’s development team from Google. Puppeteer provides a high-level API to control headless Chrome or Chromium or interact with the DevTools protocol.
Yes, but not a front-end web framework like Angular or React; Selenium is a software testing framework for web applications. Its primary use-case is to automating quality assurance tests on headless browsers, but it’s often used to automate administration tasks on websites too.
Tbilisi, Georgia
Member since June 7, 2018
About the author
With more than six years of experience working as a developer and team lead, Nick has a passion for robust, scalable and clean code design.