Ultimate Guide to the Processing Language Part II: Building a Simple Game
Processing makes prototyping visual apps a breeze. With its easy to use programming constructs and some mathematics, building a simple game is a lot easier than one may think.
In this article, Toptal engineer Oguz Gelal provides a step-by-step tutorial to building a game using Processing and porting it to the web.
Oguz is a software engineer and full-stack web developer. He has worked with a number of frameworks and tools, fron- and back-end.
PREVIOUSLY AT

This is the second part of the ultimate guide to the Processing language. In the first part, I gave a basic Processing language walkthrough. The next step for you to learn Processing is simply more hands-on programming.
In this article, I will show you how to use Processing to implement your own game, step by step. Each step will be explained in detail. Then, we will port the game to the web.

Before we begin the Processing tutorial, here is the code of the DVD logo exercise from the previous part. If you have any questions, be sure to leave a comment.
Processing Tutorial: A Simple Game
The game we will build in this Processing tutorial is sort of a combination of Flappy Bird, Pong and Brick Breaker. The reason I picked a game like this is that it has most of the concepts that beginners struggle with when learning game development. This is based on my experience from when I was a teaching assistant, helping new programmers learn how to use Processing. These concepts include gravity, collisions, keeping scores, handling different screens and keyboard/mouse interactions. Flappy Pong has all of them in it.
Without using object-oriented programming (OOP) concepts, it is not easy to build complex games, such as platform games with multiple levels, players, entities etc. As we move along, you’ll see how the code gets complicated really fast. I did my best to keep this Processing tutorial organised and simple.
I advise you to follow the article, grab the full code, play with it on your own, start thinking about your own game as quickly as possible, and start implementing it.
So let’s begin.
Building Flappy Pong
Processing Tutorial Step #1: Initialize & Handle Different Screens
The first step is to initialize our project. For starters, we will write our setup and draw blocks as usual, nothing fancy or new. Then, we will handle different screens (initial screen, game screen, game over screen etc.). So the question arises, how do we make Processing show the correct page at the correct time?
Accomplishing this task is fairly simple. We will have a global variable that stores the information of the currently active screen. We then draw the contents of the correct screen depending on the variable. In the draw block, we will have an if statement that checks the variable and displays the contents of the screen accordingly. Whenever we want to change the screen, we will change that variable to the identifier of screen we want it to display. With that said, here is what our skeleton code looks like:
/********* VARIABLES *********/

// We control which screen is active by settings / updating
// gameScreen variable. We display the correct screen according
// to the value of this variable.
//
// 0: Initial Screen
// 1: Game Screen
// 2: Game-over Screen

int gameScreen = 0;

/********* SETUP BLOCK *********/

void setup() {
  size(500, 500);
}


/********* DRAW BLOCK *********/

void draw() {
  // Display the contents of the current screen
  if (gameScreen == 0) {
    initScreen();
  } else if (gameScreen == 1) {
    gameScreen();
  } else if (gameScreen == 2) {
    gameOverScreen();
  }
}


/********* SCREEN CONTENTS *********/

void initScreen() {
  // codes of initial screen
}
void gameScreen() {
  // codes of game screen
}
void gameOverScreen() {
  // codes for game over screen
}


/********* INPUTS *********/

public void mousePressed() {
  // if we are on the initial screen when clicked, start the game
  if (gameScreen==0) {
    startGame();
  }
}


/********* OTHER FUNCTIONS *********/

// This method sets the necessary variables to start the game
void startGame() {
  gameScreen=1;
}
This may look scary at first, but all we did is build the basic structure and separate different parts with comment blocks.
As you can see, we define a different method for each screen to display. In our draw block, we simply check the value of our gameScreen variable, and call the corresponding method.
In the void mousePressed(){...} part, we are listening to mouse clicks and if the active screen is 0, the initial screen, we call the startGame() method which starts the game as you’d expect. The first line of this method changes gameScreen variable to 1, the game screen.
If this is understood, the next step is to implement our initial screen. To do that, we will be editing the initScreen() method. Here it goes:
void initScreen() {
  background(0);
  textAlign(CENTER);
  text("Click to start", height/2, width/2);
}
Now our initial screen has a black background and a simple text, “Click to start”, located in the middle and aligned to the center. But when we click, nothing happens. We haven’t yet specified any content for our game screen. The method gameScreen() doesn’t have anything in it, so we aren’t covering the previous contents drawn from the last screen (the text) by having background() as the first line of draw. That’s why the text is still there, even though the text() line is not being called anymore (just like the moving ball example from the last part which was leaving a trace behind). The background is still black for the same reason. So let’s go ahead and begin implementing the game screen.
void gameScreen() {
  background(255);
}
After this change, you will notice that the background turns white & the text disappears.
Processing Tutorial Step #2: Creating the Ball & Implementing Gravity
Now, we will start working on the game screen. We will first create our ball. We should define variables for its coordinates, color and size because we might want to change those values later on. For instance, if we want to increase the size of the ball as the player scores higher so that the game will be harder. We will need to change its size, so it should be a variable. We will define speed of the ball as well, after we implement gravity.
First, let’s add the following:
...
int ballX, ballY;
int ballSize = 20;
int ballColor = color(0);
...
void setup() {
  ...
  ballX=width/4;
  ballY=height/5;
}
...
void gameScreen() {
  ...
  drawBall();
}
...
void drawBall() {
  fill(ballColor);
  ellipse(ballX, ballY, ballSize, ballSize);
}
We defined the coordinates as global variables, created a method that draw the ball, called from gameScreen method. Only thing to pay attention to here is that we initialized coordinates, but we defined them in setup(). The reason we did that is we wanted the ball to start at one fourth from left and one fifth from top. There is no particular reason we want that, but that is a good point for the ball to start. So we needed to get the width and height of the sketch dynamically. The sketch size is defined in setup(), after the first line. width and height are not set before setup() runs, that’s why we couldn’t achieve this if we defined the variables on top.
Gravity
Now implementing gravity is actually the easy part. There are only a few tricks. Here is the implementation first:
...
float gravity = 1;
float ballSpeedVert = 0;
...
void gameScreen() {
  ...
  applyGravity();
  keepInScreen();
}
...
void applyGravity() {
  ballSpeedVert += gravity;
  ballY += ballSpeedVert;
}
void makeBounceBottom(float surface) {
  ballY = surface-(ballSize/2);
  ballSpeedVert*=-1;
}
void makeBounceTop(float surface) {
  ballY = surface+(ballSize/2);
  ballSpeedVert*=-1;
}
// keep ball in the screen
void keepInScreen() {
  // ball hits floor
  if (ballY+(ballSize/2) > height) {
    makeBounceBottom(height);
  }
  // ball hits ceiling
  if (ballY-(ballSize/2) < 0) {
    makeBounceTop(0);
  }
}
And the result is:
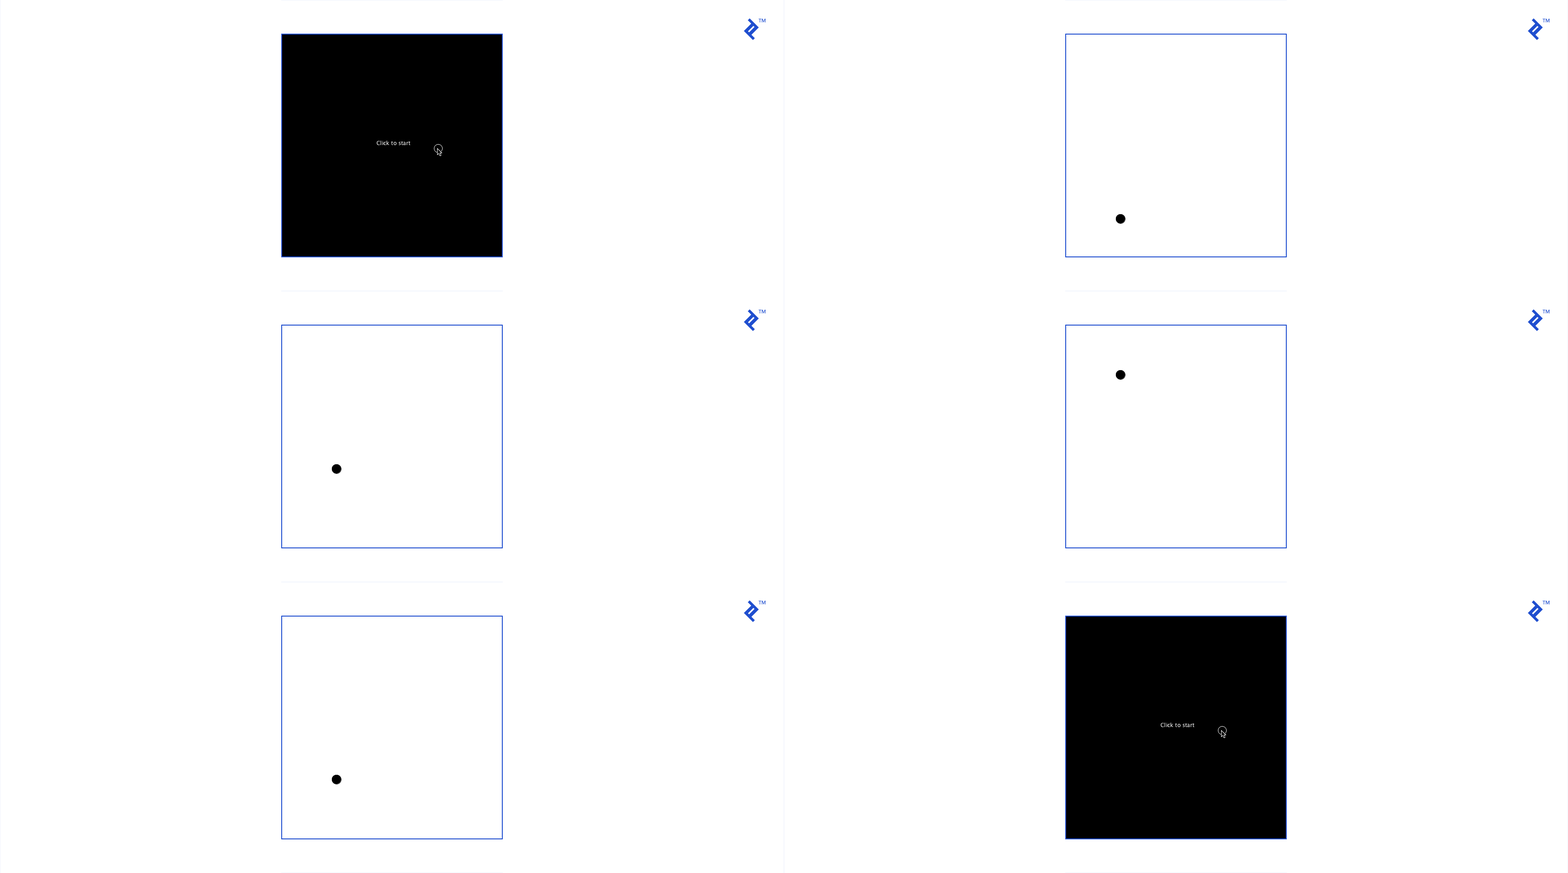
Hold your horses, physicist. I know that’s not how gravity works in real life. Instead, this is more of an animation process than anything. The variable we defined as gravity is just a numeric value—a float so that we can use decimal values, not just integers—that we add to ballSpeedVert on every loop. And ballSpeedVert is the vertical speed of the ball, which is added to the Y coordinate of the ball (ballY) on each loop. We watch the coordinates of the ball and make sure it stays in the screen. If we didn’t, the ball would fall to infinity. For now, our ball only moves vertically. So we watch the floor and ceiling boundries of the screen. With keepInScreen() method, we check if ballY (+ the radius) is less than height, and similarly ballY (- the radius) is more than 0. If the conditions don’t meet, we make the ball bounce (from the bottom or the top) with makeBounceBottom() and makeBounceTop() methods. To make the ball bounce, we simply move the ball to the exact location where it had to bounce and multiply the vertical speed (ballSpeedVert) with -1 (multiplying with -1 changes the sign). When the speed value has a minus sign, adding Y coordinate the speed becomes ballY + (-ballSpeedVert), which is ballY - ballSpeedVert. So the ball immediately changes its direction with the same speed. Then, as we add gravity to ballSpeedVert and ballSpeedVert has a negative value, it starts to get close to 0, eventually becomes 0, and starts increasing again. That makes the ball rise, rise slower, stop and start falling.
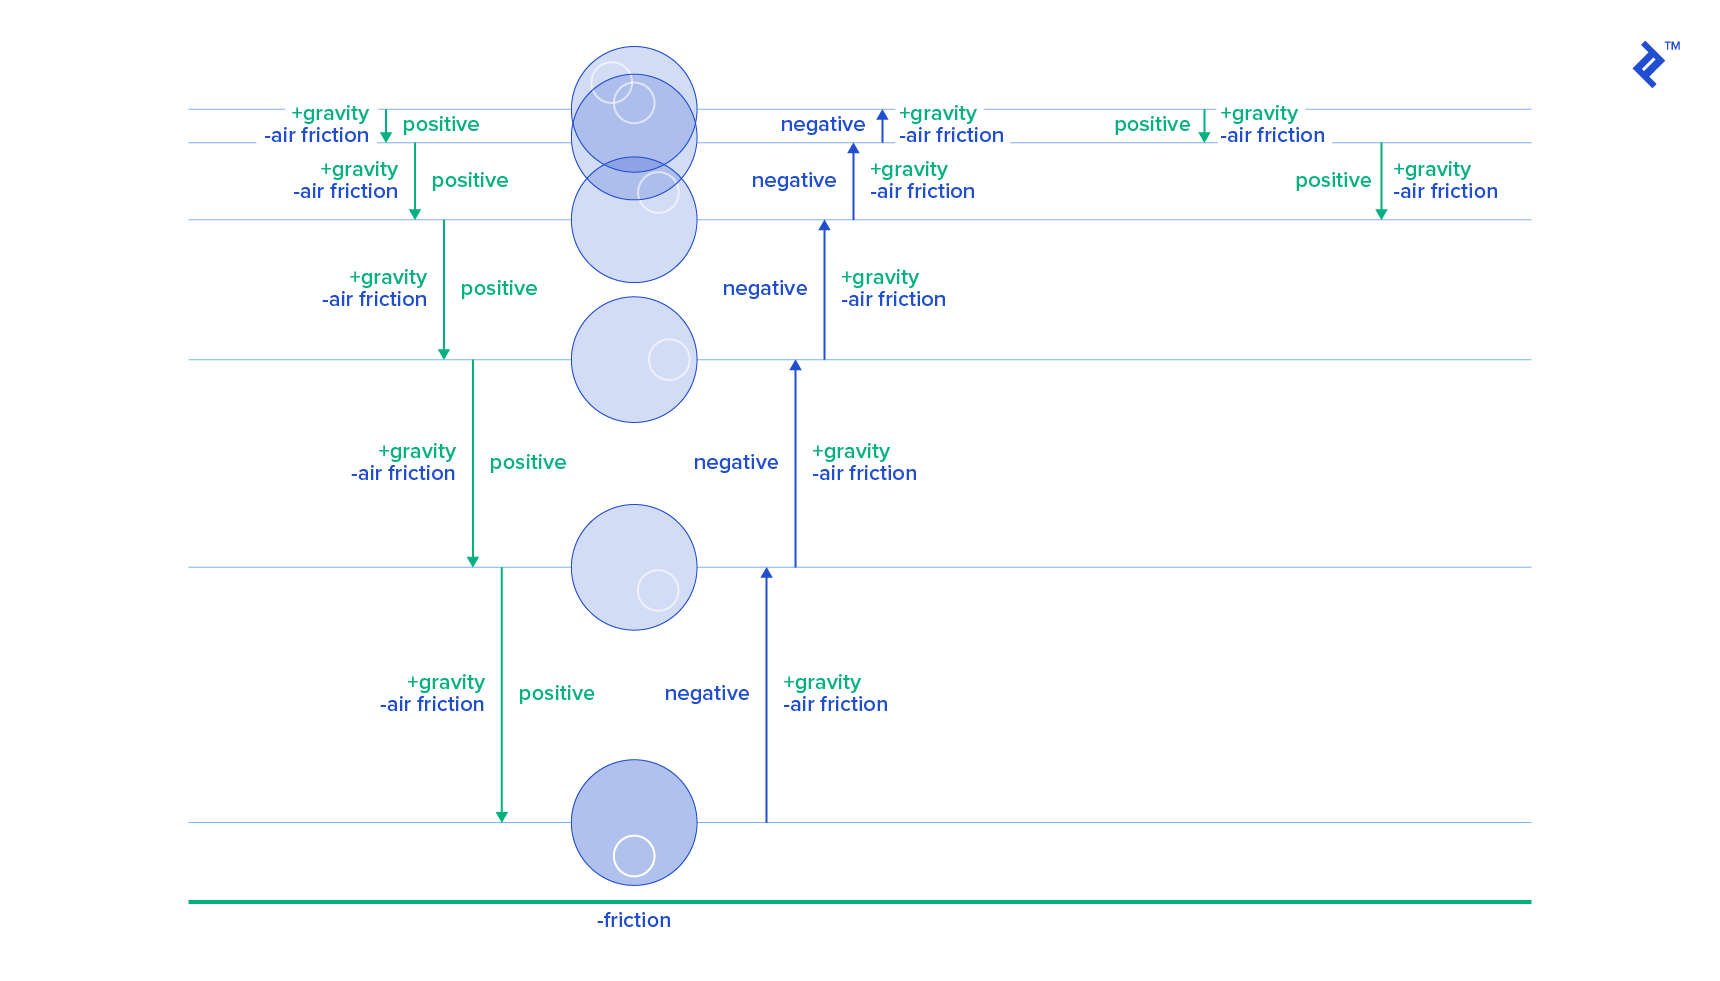
There is a problem with our animation process, though—the ball keeps bouncing. If this were a real-world scenario, the ball would have faced air resistance and friction every time it touched a surface. That’s the behaviour we want for our game’s animation process, so implementing this is easy. We add the following:
...
float airfriction = 0.0001;
float friction = 0.1;
...
void applyGravity() {
  ...
  ballSpeedVert -= (ballSpeedVert * airfriction);
}
void makeBounceBottom(int surface) {
  ...
  ballSpeedVert -= (ballSpeedVert * friction);
}
void makeBounceTop(int surface) {
  ...
  ballSpeedVert -= (ballSpeedVert * friction);
}
And now our animation process produces this:

As the name suggests, friction is the surface friction and airfriction is the friction of air. So obviously, friction has to apply each time the ball touches any surface. airfriction however has to apply constantly. So that’s what we did. applyGravity() method runs on each loop, so we take away 0.0001 percent of its current value from ballSpeedVert on every loop. makeBounceBottom() and makeBounceTop() methods run when the ball touches any surface. So in those methods, we did the same thing, only this time with friction .
Processing Tutorial Step #3: Creating the Racket
Now we need a racket for the ball to bounce on. We should be controlling the racket. Let’s make it controllable with the mouse. Here is the code:
...
color racketColor = color(0);
float racketWidth = 100;
float racketHeight = 10;
...
void gameScreen() {
  ...
  drawRacket();
  ...
}
...
void drawRacket(){
  fill(racketColor);
  rectMode(CENTER);
  rect(mouseX, mouseY, racketWidth, racketHeight);
}
We defined the color, width and height of the racket as a global variable, we might want them to change during gameplay. We implemented a method drawRacket() which does what its name suggests. We set the rectMode to center, so our racket is aligned to the center of our cursor.
Now that we created the racket, we have to make the ball bounce on it.
...
int racketBounceRate = 20;
...
void gameScreen() {
  ...
  watchRacketBounce();
  ...
}
...
void watchRacketBounce() {
  float overhead = mouseY - pmouseY;
  if ((ballX+(ballSize/2) > mouseX-(racketWidth/2)) && (ballX-(ballSize/2) < mouseX+(racketWidth/2))) {
    if (dist(ballX, ballY, ballX, mouseY)<=(ballSize/2)+abs(overhead)) {
      makeBounceBottom(mouseY);
      // racket moving up
      if (overhead<0) {
        ballY+=overhead;
        ballSpeedVert+=overhead;
      }
    }
  }
}
And here is the result:

So what watchRacketBounce() does is it makes sure that the racket and the ball collides. There are two things to check here, which is if the ball and racket lined up both vertically and horizontally. The first if statement checks if the X coordinate of the right side of the ball is greater than the X coordinate of the left side of the racket (and the other way around). If it is, second statement checks if the distance between the ball and the racket is smaller than or equal to the radius of the ball (which means they are colliding). So if these conditions meet, makeBounceBottom() method gets called and the ball bounces on our racket (at mouseY, where the racket is).
Have you noticed the variable overhead which is calculated by mouseY - pmouseY? pmouseX and pmouseY variables store the coordinates of the mouse at the previous frame. As the mouse can move very fast, there is a good chance we might not detect the distance between the ball and the racket correctly in between frames if the mouse is moving towards the ball fast enough. So, we take the difference of the mouse coordinates in between frames and take that into account while detecting distance. The the faster mouse is moving, the greater distance is acceptable.
We also use overhead for another reason. We detect which way the mouse is moving by checking the sign of overhead. If overhead is negative, the mouse was somewhere below in the previous frame so our mouse (racket) is moving up. In that case, we want to add an extra speed to the ball and move it a little further than regular bounce to simulate the effect of hitting the ball with the racket. If overhead is less than 0, we add it to ballY and ballSpeedVert to make the ball go higher and faster. So the faster the racket hits the ball, the higher and faster it will move up.
Processing Tutorial Step #4: Horizontal Movement & Controlling the Ball
In this section, we will add horizontal movement to the ball. Then, we will make it possible to control the ball horizontally with our racket. Here we go:
...
// we will start with 0, but for we give 10 just for testing
float ballSpeedHorizon = 10;
...
void gameScreen() {
  ...
  applyHorizontalSpeed();
  ...
}
...
void applyHorizontalSpeed(){
  ballX += ballSpeedHorizon;
  ballSpeedHorizon -= (ballSpeedHorizon * airfriction);
}
void makeBounceLeft(float surface){
  ballX = surface+(ballSize/2);
  ballSpeedHorizon*=-1;
  ballSpeedHorizon -= (ballSpeedHorizon * friction);
}
void makeBounceRight(float surface){
  ballX = surface-(ballSize/2);
  ballSpeedHorizon*=-1;
  ballSpeedHorizon -= (ballSpeedHorizon * friction);
}
...
void keepInScreen() {
  ...
  if (ballX-(ballSize/2) < 0){
    makeBounceLeft(0);
  }
  if (ballX+(ballSize/2) > width){
    makeBounceRight(width);
  }
}
And the result is:

The idea here is the same as what we did for vertical movement. We created a horizontal speed variable, ballSpeedHorizon. We created a method to apply horizontal speed to ballX and take away the air friction. We added two more if statements to the keepInScreen() method which will watch the ball for hitting the left and right edges of the screen. Finally we created makeBounceLeft() and makeBounceRight() methods to handle the bounces from left and right.
Now that we added horizontal speed to the game, we want to control the ball with the racket. As in the famous Atari game Breakout and in all other brick breaking games, the ball should go left or right according to the point on the racket it hits. The edges of the racket should give the ball more horizontal speed whereas the middle shouldn’t have any effect. Code first:
void watchRacketBounce() {
  ...
  if ((ballX+(ballSize/2) > mouseX-(racketWidth/2)) && (ballX-(ballSize/2) < mouseX+(racketWidth/2))) {
    if (dist(ballX, ballY, ballX, mouseY)<=(ballSize/2)+abs(overhead)) {
      ...
      ballSpeedHorizon = (ballX - mouseX)/5;
      ...
    }
  }
}
The result is:
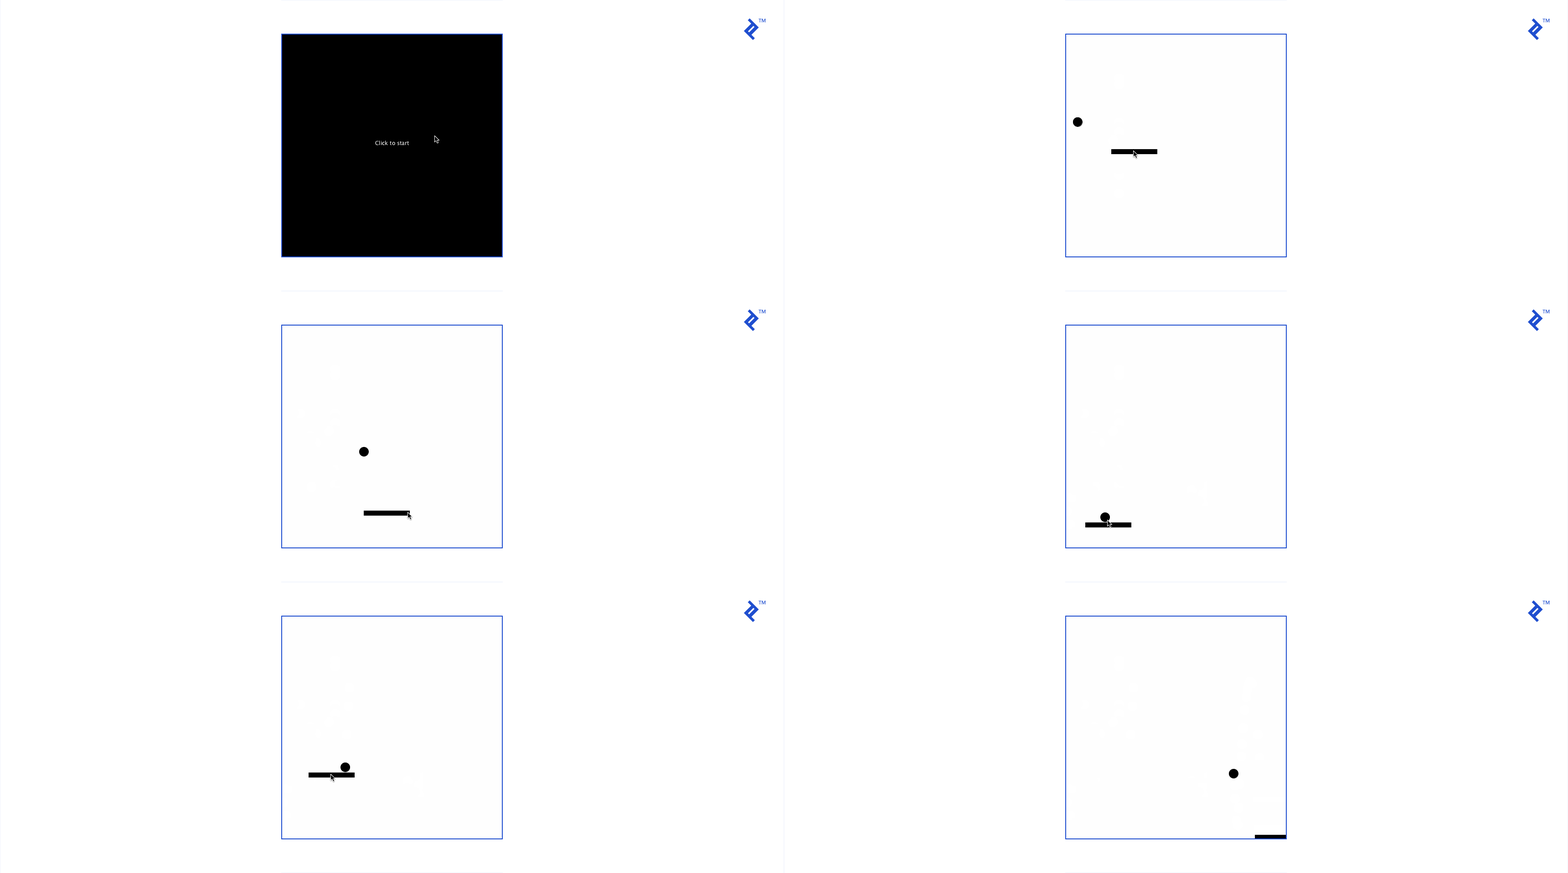
Adding that simple line to the watchRacketBounce() did the job. What we did is we determined the distance of the point that the ball hits from the center of the racket with ballX - mouseX. Then, we make it the horizontal speed. The actual difference was too much, so I gave it a few tries and figured that one-tenth of the value feels the most natural.
Processing Tutorial Step #5: Creating the Walls
Our sketch is starting to look more like a game with each step. In this step, we will add walls moving towards the left, just like in Flappy Bird:
...
int wallSpeed = 5;
int wallInterval = 1000;
float lastAddTime = 0;
int minGapHeight = 200;
int maxGapHeight = 300;
int wallWidth = 80;
color wallColors = color(0);
// This arraylist stores data of the gaps between the walls. Actuals walls are drawn accordingly.
// [gapWallX, gapWallY, gapWallWidth, gapWallHeight]
ArrayList<int[]> walls = new ArrayList<int[]>();
...
void gameScreen() {
  ...
  wallAdder();
  wallHandler();
}
...
void wallAdder() {
  if (millis()-lastAddTime > wallInterval) {
    int randHeight = round(random(minGapHeight, maxGapHeight));
    int randY = round(random(0, height-randHeight));
    // {gapWallX, gapWallY, gapWallWidth, gapWallHeight}
    int[] randWall = {width, randY, wallWidth, randHeight};
    walls.add(randWall);
    lastAddTime = millis();
  }
}
void wallHandler() {
  for (int i = 0; i < walls.size(); i++) {
    wallRemover(i);
    wallMover(i);
    wallDrawer(i);
  }
}
void wallDrawer(int index) {
  int[] wall = walls.get(index);
  // get gap wall settings
  int gapWallX = wall[0];
  int gapWallY = wall[1];
  int gapWallWidth = wall[2];
  int gapWallHeight = wall[3];
  // draw actual walls
  rectMode(CORNER);
  fill(wallColors);
  rect(gapWallX, 0, gapWallWidth, gapWallY);
  rect(gapWallX, gapWallY+gapWallHeight, gapWallWidth, height-(gapWallY+gapWallHeight));
}
void wallMover(int index) {
  int[] wall = walls.get(index);
  wall[0] -= wallSpeed;
}
void wallRemover(int index) {
  int[] wall = walls.get(index);
  if (wall[0]+wall[2] <= 0) {
    walls.remove(index);
  }
}
And this resulted in:

Even though the code looks long and intimidating, I promise there is nothing hard to understand. First thing to notice is ArrayList. For those of you who don’t know what an ArrayList is, it is just an implementation of list that acts like an Array, but it has some advantages over it. It is resizeable, it has useful methods like list.add(index), list.get(index) and list.remove(index). We keep the wall data as integer arrays within the arraylist. The data we keep in the arrays are for the gap between two walls. The arrays contain the following values:
[gap wall X, gap wall Y, gap wall width, gap wall height]
The actual walls are drawn based on the gap wall values. Note that all these could be handled better and cleaner using classes, but since the use of Object Oriented Programming (OOP) is not in the scope of this Processing tutorial, this is how we’ll handle it. We have two base methods to manage the walls, wallAdder() and wallHandler.
wallAdder() method simply adds new walls in every wallInterval millisecond to the arraylist. We have a global variable lastAddTime which stores the time when the last wall was added (in milliseconds). If the current millisecond millis() minus the last added millisecond lastAddTime is larger than our interval value wallInterval, it means it is now time to add a new wall. Random gap variables are then generated based on the global variables defined at the very top. Then a new wall (integer array that stores the gap wall data) is added into the arraylist and the lastAddTime is set to the current millisecond millis().
wallHandler() loops through the current walls that is in the arraylist. And for each item at each loop, it calls wallRemover(i), wallMover(i) and wallDrawer(i) by the index value of the arraylist. These methods do what their name suggests. wallDrawer() draws the actual walls based on the gap wall data. It grabs the wall data array from the arraylist, and calls rect() method to draw the walls to where they should actually be. wallMover() method grabs the element from the arraylist, changes its X location based on the wallSpeed global variable. Finally, wallRemover() removes the walls from the arraylist which are out of the screen. If we didn’t do that, Processing would have treated them as they are still in the screen. And that would have been a huge loss in performance. So when a wall is removed from the arraylist, it doesn’t get drawn on subsequent loops.
The final challenging thing left to do is to detect collisions between the ball and the walls.
void wallHandler() {
  for (int i = 0; i < walls.size(); i++) {
    ...
    watchWallCollision(i);
  }
}
...
void watchWallCollision(int index) {
  int[] wall = walls.get(index);
  // get gap wall settings
  int gapWallX = wall[0];
  int gapWallY = wall[1];
  int gapWallWidth = wall[2];
  int gapWallHeight = wall[3];
  int wallTopX = gapWallX;
  int wallTopY = 0;
  int wallTopWidth = gapWallWidth;
  int wallTopHeight = gapWallY;
  int wallBottomX = gapWallX;
  int wallBottomY = gapWallY+gapWallHeight;
  int wallBottomWidth = gapWallWidth;
  int wallBottomHeight = height-(gapWallY+gapWallHeight);

  if (
    (ballX+(ballSize/2)>wallTopX) &&
    (ballX-(ballSize/2)<wallTopX+wallTopWidth) &&
    (ballY+(ballSize/2)>wallTopY) &&
    (ballY-(ballSize/2)<wallTopY+wallTopHeight)
    ) {
    // collides with upper wall
  }

  if (
    (ballX+(ballSize/2)>wallBottomX) &&
    (ballX-(ballSize/2)<wallBottomX+wallBottomWidth) &&
    (ballY+(ballSize/2)>wallBottomY) &&
    (ballY-(ballSize/2)<wallBottomY+wallBottomHeight)
    ) {
    // collides with lower wall
  }
}
watchWallCollision() method gets called for each wall on each loop. We grab the coordinates of the gap wall, calculate the coordinates of the actual walls (top and bottom) and we check if the coordinates of the ball collides with the walls.
Processing Tutorial Step #6: Health and Score
Now that we can detect the collisions of the ball and the walls, we can decide on the game mechanics. After some tuning to the game, I managed to make the game somewhat playable. But still, it was very hard. My first thought on the game was to make it like Flappy Bird, when the ball touches the walls, game ends. But then I realised it would be impossible to play. So here is what I thought:
There should be a health bar on top of the ball. The ball should lose health while it is touching the walls. With this logic, it doesn’t make sense to make the ball bounce back from the walls. So when the health is 0, the game should end and we should switch to the game over screen. So here we go:
int maxHealth = 100;
float health = 100;
float healthDecrease = 1;
int healthBarWidth = 60;
...
void gameScreen() {
  ...
  drawHealthBar();
  ...
}
...
void drawHealthBar() {
  // Make it borderless:
  noStroke();
  fill(236, 240, 241);
  rectMode(CORNER);
  rect(ballX-(healthBarWidth/2), ballY - 30, healthBarWidth, 5);
  if (health > 60) {
    fill(46, 204, 113);
  } else if (health > 30) {
    fill(230, 126, 34);
  } else {
    fill(231, 76, 60);
  }
  rectMode(CORNER);
  rect(ballX-(healthBarWidth/2), ballY - 30, healthBarWidth*(health/maxHealth), 5);
}
void decreaseHealth(){
  health -= healthDecrease;
  if (health <= 0){
    gameOver();
  }
}
And here is a simple run:

We created a global variable health to keep the health of the ball. And then created a method drawHealthBar() which draws two rectangles on top of the ball. First one is the base health bar, other is the active one that shows the current health. The width of the second one is dynamic, and is calculated with healthBarWidth*(health/maxHealth), the ratio of our current health with respect to the width of the health bar. Finally, the fill colors are set according to the value of health.
Last but not the least, scores:
...
void gameOverScreen() {
  background(0);
  textAlign(CENTER);
  fill(255);
  textSize(30);
  text("Game Over", height/2, width/2 - 20);
  textSize(15);
  text("Click to Restart", height/2, width/2 + 10);
}
...
void wallAdder() {
  if (millis()-lastAddTime > wallInterval) {
    ...
    // added another value at the end of the array
    int[] randWall = {width, randY, wallWidth, randHeight, 0};
    ...
  }
}
void watchWallCollision(int index) {
  ...
  int wallScored = wall[4];
  ...
  if (ballX > gapWallX+(gapWallWidth/2) && wallScored==0) {
    wallScored=1;
    wall[4]=1;
    score();
  }
}
void score() {
  score++;
}
void printScore(){
  textAlign(CENTER);
  fill(0);
  textSize(30);
  text(score, height/2, 50);
}
We needed to score when the ball passes a wall. But we need to add maximum 1 score per wall. Meaning, if the ball passes a wall than goes back and passes it again, another score shouldn’t be added. To achieve this, we added another variable to the gap wall array within the arraylist. The new variable stores 0 if the ball didn’t yet pass that wall and 1 if it did. Then, we modified the watchWallCollision() method. We added a condition that fires score() method and marks the wall as passed when the ball passes a wall which it has not passed before.
We are now very close to the end. The last thing to do is implement click to restart on the game over screen. We need to set all the variables we used to their initial value, and restart the game. Here it is:
...
public void mousePressed() {
  ...
  if (gameScreen==2){
    restart();
  }
}
...
void restart() {
  score = 0;
  health = maxHealth;
  ballX=width/4;
  ballY=height/5;
  lastAddTime = 0;
  walls.clear();
  gameScreen = 0;
}
Let’s add some more colors.

Voila! We have Flappy Pong!
The full Processing game code can be found here.
Porting the Processing Game Code to the Web Using p5.js
p5.js is a JavaScript library with a very similar syntax to that of the Processing programming language. It is not a library that is capable of simply running existing Processing code; instead, p5.js requires writing actual JavaScript code—similar to the JavaScript port of Processing known as Processing.js. Our task is to convert Processing code into JavaScript using the p5.js API. The library has a set of functions and a syntax similar to Processing, and we have to do certain changes to our code to make them work in JavaScript—but since both Processing and JavaScript share similarities with Java, it’s less of a leap than it sounds. Even if you are not a JavaScript developer, the changes are very trivial and you should be able to follow along just fine.
First of all, we need to create a simple index.html and add p5.min.js to our header. We also need to create another file called flappy_pong.js which will house our converted code.
<html>
	<head>
		<title>Flappy Pong</title>
		<script tyle="text/javascript" src="https://cdnjs.cloudflare.com/ajax/libs/p5.js/0.4.19/p5.min.js"></script>
		<script tyle="text/javascript" src="flappy_pong.js"></script>
		<style>
			canvas {
				box-shadow: 0 0 20px lightgray;
			}
		</style>
	</head>
	<body>
	</body>
</html>
Our strategy while converting the code should be copying and pasting all our code into flappy_pong.js and then making all the changes. And that’s what I did. And here are the steps I took to update the code:
-
Javascript is an untyped languages (there are no type declarations like
intandfloat). So we need to change all the type declarations tovar. -
There is no
voidin Javascript. We should change all tofunction. -
We need to remove the type declarations of arguments from function signatures. (ie.
void wallMover(var index) {tofunction wallMover(index) {) -
There is no
ArrayListin JavaScript. But we can achieve the same thing using JavaScript arrays. We make the following changes:-
ArrayList<int[]> walls = new ArrayList<int[]>();tovar walls = []; -
walls.clear();towalls = []; -
walls.add(randWall);towalls.push(randWall); -
walls.remove(index);towalls.splice(index,1); -
walls.get(index);towalls[index] -
walls.size()towalls.length
-
-
Change the declaration of the array
var randWall = {width, randY, wallWidth, randHeight, 0};tovar randWall = [width, randY, wallWidth, randHeight, 0]; -
Remove all
publickeywords. -
Move all
color(0)declarations intofunction setup()becausecolor()will not be defined beforesetup()call. -
Change
size(500, 500);tocreateCanvas(500, 500); -
Rename
function gameScreen(){to something else likefunction gamePlayScreen(){because we already have a global variable namedgameScreen. When we were working with Processing, one was a function and the other was anintvariable. But JavaScript confuses these since they are untyped. -
Same thing goes for
score(). I renamed it toaddScore().
The full JavaScript code covering everything in this Processing tutorial can be found here.
Processing Game Code: You Can Do It Too
In this Processing tutorial, I tried to explain how to build a very simple game. However, what we did in this article is just the tip of the iceberg. With the Processing programming language, just about anything can be achieved. In my opinion, it’s the best tool to program what you’re imagining. My actual intention with this Processing tutorial was rather than teaching Processing and building a game, to prove that programming isn’t that hard. Building your own game isn’t just a dream. I wanted to show you that with a little effort and enthusiasm, you can do it. I really hope these two articles inspire everyone to give programming a shot.
Further Reading on the Toptal Blog:
Understanding the basics
What is the Processing language based on?
Processing is based on Java.
Since JavaScript also resembles Java on the surface, porting Processing code to the web is fairly straightforward using the p5.js JavaScript library.
What is "stroke" in Processing?
Stroke refers to the border drawn around a shape.
What does a float do in Processing?
A float holds a decimal value. In contrast, an int can only hold integer values (positive or negative whole numbers.)
Oguz Gelal
Brussels, Belgium
Member since October 18, 2015
About the author
Oguz is a software engineer and full-stack web developer. He has worked with a number of frameworks and tools, fron- and back-end.
PREVIOUSLY AT

