The Front End: Using Gatsby.js and Node.js for Static Site Updates
With a static site generator back end in place from Part 1, now it’s time to implement a Gatsby.js-based front end, host it on Netlify, and get AWS to activate the whole pipeline.
With a static site generator back end in place from Part 1, now it’s time to implement a Gatsby.js-based front end, host it on Netlify, and get AWS to activate the whole pipeline.
Furkan is an experienced full-stack developer who has worked remotely since 2016. His main expertise includes Java, Angular, and Heroku.
Expertise
PREVIOUSLY AT

For some project requirements, static page generation is not only sufficient, it’s also the most efficient in terms of speed and scalability.
In the first half of this series, we combined Node.js, Express, MongoDB, cron, and Heroku to deliver a CI-ready back end that consumes GitHub’s API according to a daily schedule. Now we’re ready to add Gatsby to the mix to complete our static page generation project.
Developing the Front End: Make It a Gatsby Website
Because Gatsby websites are based on React, it’s helpful if you’re already familiar with how to build a website with React.
For styling, I prefered Bootstrap, reactstrap, and react-markdown. You may know that release notes in GitHub are stored in Markdown format, hence our need for a converter.
Static Website Project Structure
Our file/folder structure will be as follows:
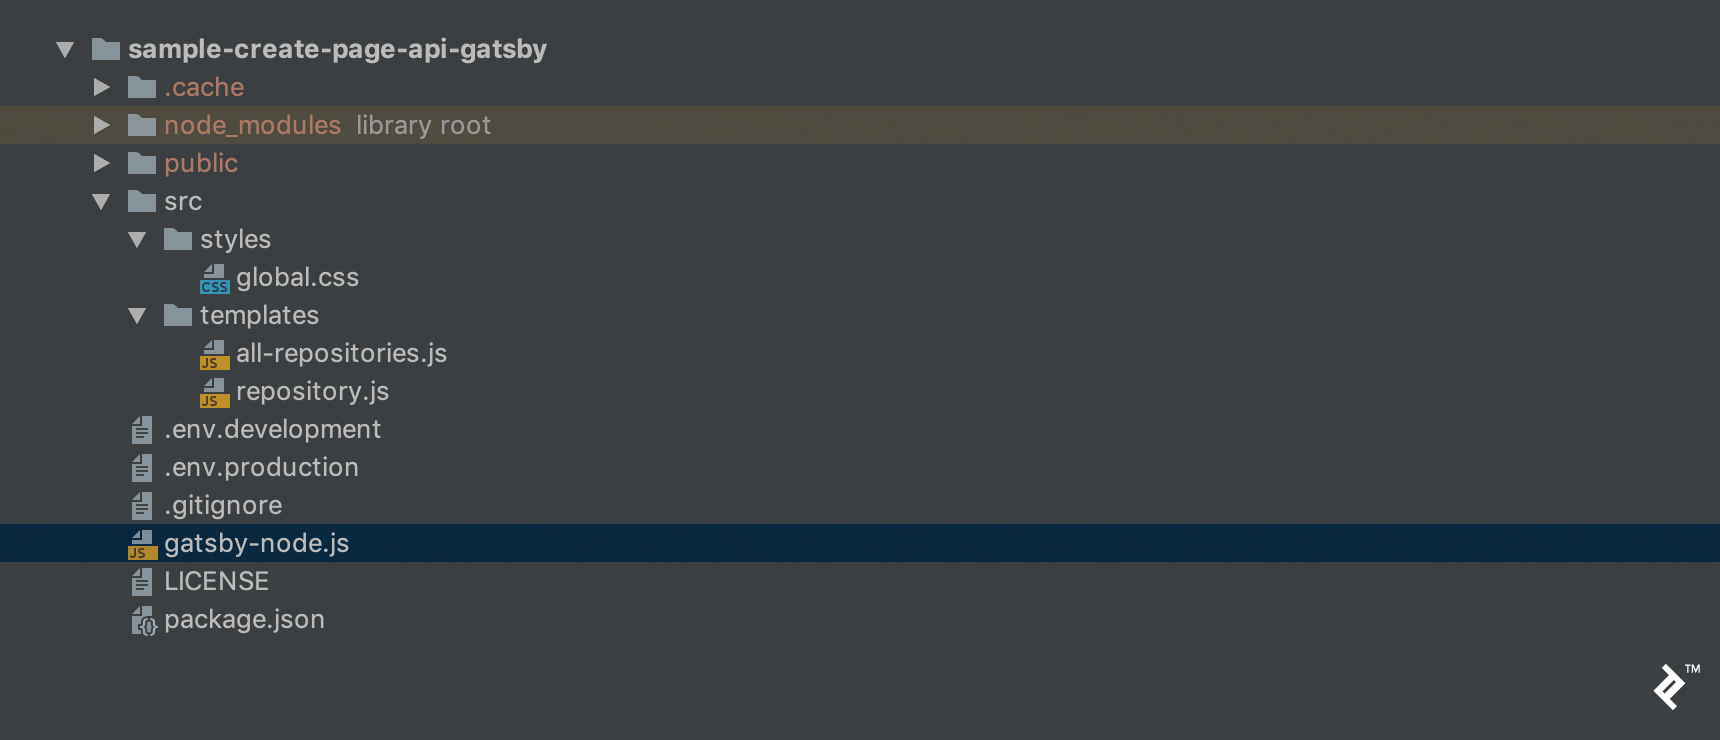
What are these files for? Let’s see:
-
env.developmentandenv.productionare environment variable configuration files. - The
all-repositories.jstemplate will be used for our homepage, containing a list of repositories. - The
repository.jstemplate will be used to show details for a given repository. -
gatsby-node.jsis where we consume our back-end endpoint and run ourcreatePagemethods. -
package.json, as always, contains dependencies and project properties. -
global.cssis our main style sheet file.
Gatsby Website Implementation
As with our back end, run npm install (or yarn, if you have Yarn installed) after adding the required dependencies to the front end’s package.json:
{
  // ...
  "dependencies": {
    "axios": "^0.18.0",
    "bootstrap": "^4.3.1",
    "gatsby": "^2.0.0",
    "react": "^16.5.1",
    "react-dom": "^16.5.1",
    "react-markdown": "^4.0.6",
    "reactstrap": "^7.1.0"
  }
  // ...
}
The env.development and env.production files only have the back-end URL for their corresponding environments. The former has:
API_URL=http://localhost:3000
…while production has:
API_URL=https://[YOUR_UNIQUE_APP_NAME].herokuapp.com
gatsby-node.js will be run only once while you are building your code. So we have to gather all the necessary information from our back end here. Then, the response will be used with our templates to generate the appropriate static pages.
In our case, all-repositories.js needs all repositories, and repository.js needs the corresponding repository for each iteration. Finally we can generate page paths dynamically, passing the repository owner and name parameters as part of the path field:
const axios = require('axios');

require("dotenv").config({
  path: `.env.${process.env.NODE_ENV}`
});

const getRepositoryData = async () => {
  console.log(process.env.API_URL);
  return axios.get(`${process.env.API_URL}/repositories`);
};

exports.createPages = async ({
  actions: {
    createPage
  }
}) => {
  let repositories = await getRepositoryData();
  repositories = repositories.data;

  // Create a page that lists all repositories.
  createPage({
    path: `/`,
    component: require.resolve('./src/templates/all-repositories.js'),
    context: {
      repositories
    }
  });

  // Create a page for each repository.
  repositories.forEach(repository => {
    createPage({
      path: `/repository/${repository.owner}/${repository.name}`,
      component: require.resolve('./src/templates/repository.js'),
      context: {
        repository
      }
    });
  });
};
For all-repositories.js and repository.js, if we omit styling, we are simply gathering data from pageContext and using it as we use parameters in React.
In all-repositories.js, we will use the repositories field of pageContext like this:
export default ({pageContext: {repositories}}) => (
// ...
    <ListGroup>
      {/* Because the repositories parameter is a list, we are iterating over all items and using their fields */}
      {repositories.map(repository => (repository.tagName &&
        <ListGroupItem className="repository-list-item">
// ...
              <Row>
                {`${repository.repositoryDescription}`}
              </Row>
// ...
        </ListGroupItem>
      ))}
    </ListGroup>
// ...
);
As for repository.js, we will instead use the repository field of pageContext:
export default ({pageContext: {repository}}) => (
  <div className="layout">
    {repository.tagName &&
    <ListGroupItem className="repository-list-item">
// ...
          <h1 className="release-notes">{`Release notes`}</h1>
          <hr/>
          {/* This the place where we will use Markdown-formatted release notes */}
          <ReactMarkdown source={`${repository.releaseDescription}`}/>
    </ListGroupItem>
    }
// ...
  </div>
);
Now, make sure your back end is up and running. You’ll recall for this project we set it as http://localhost:3000.
Next, run gatsby develop from the root of your front-end project and open http://localhost:8000.
If you did add some repositories (owner/name) to your back end and run the update-via-GitHub-API feature at least once, you should see something like this:
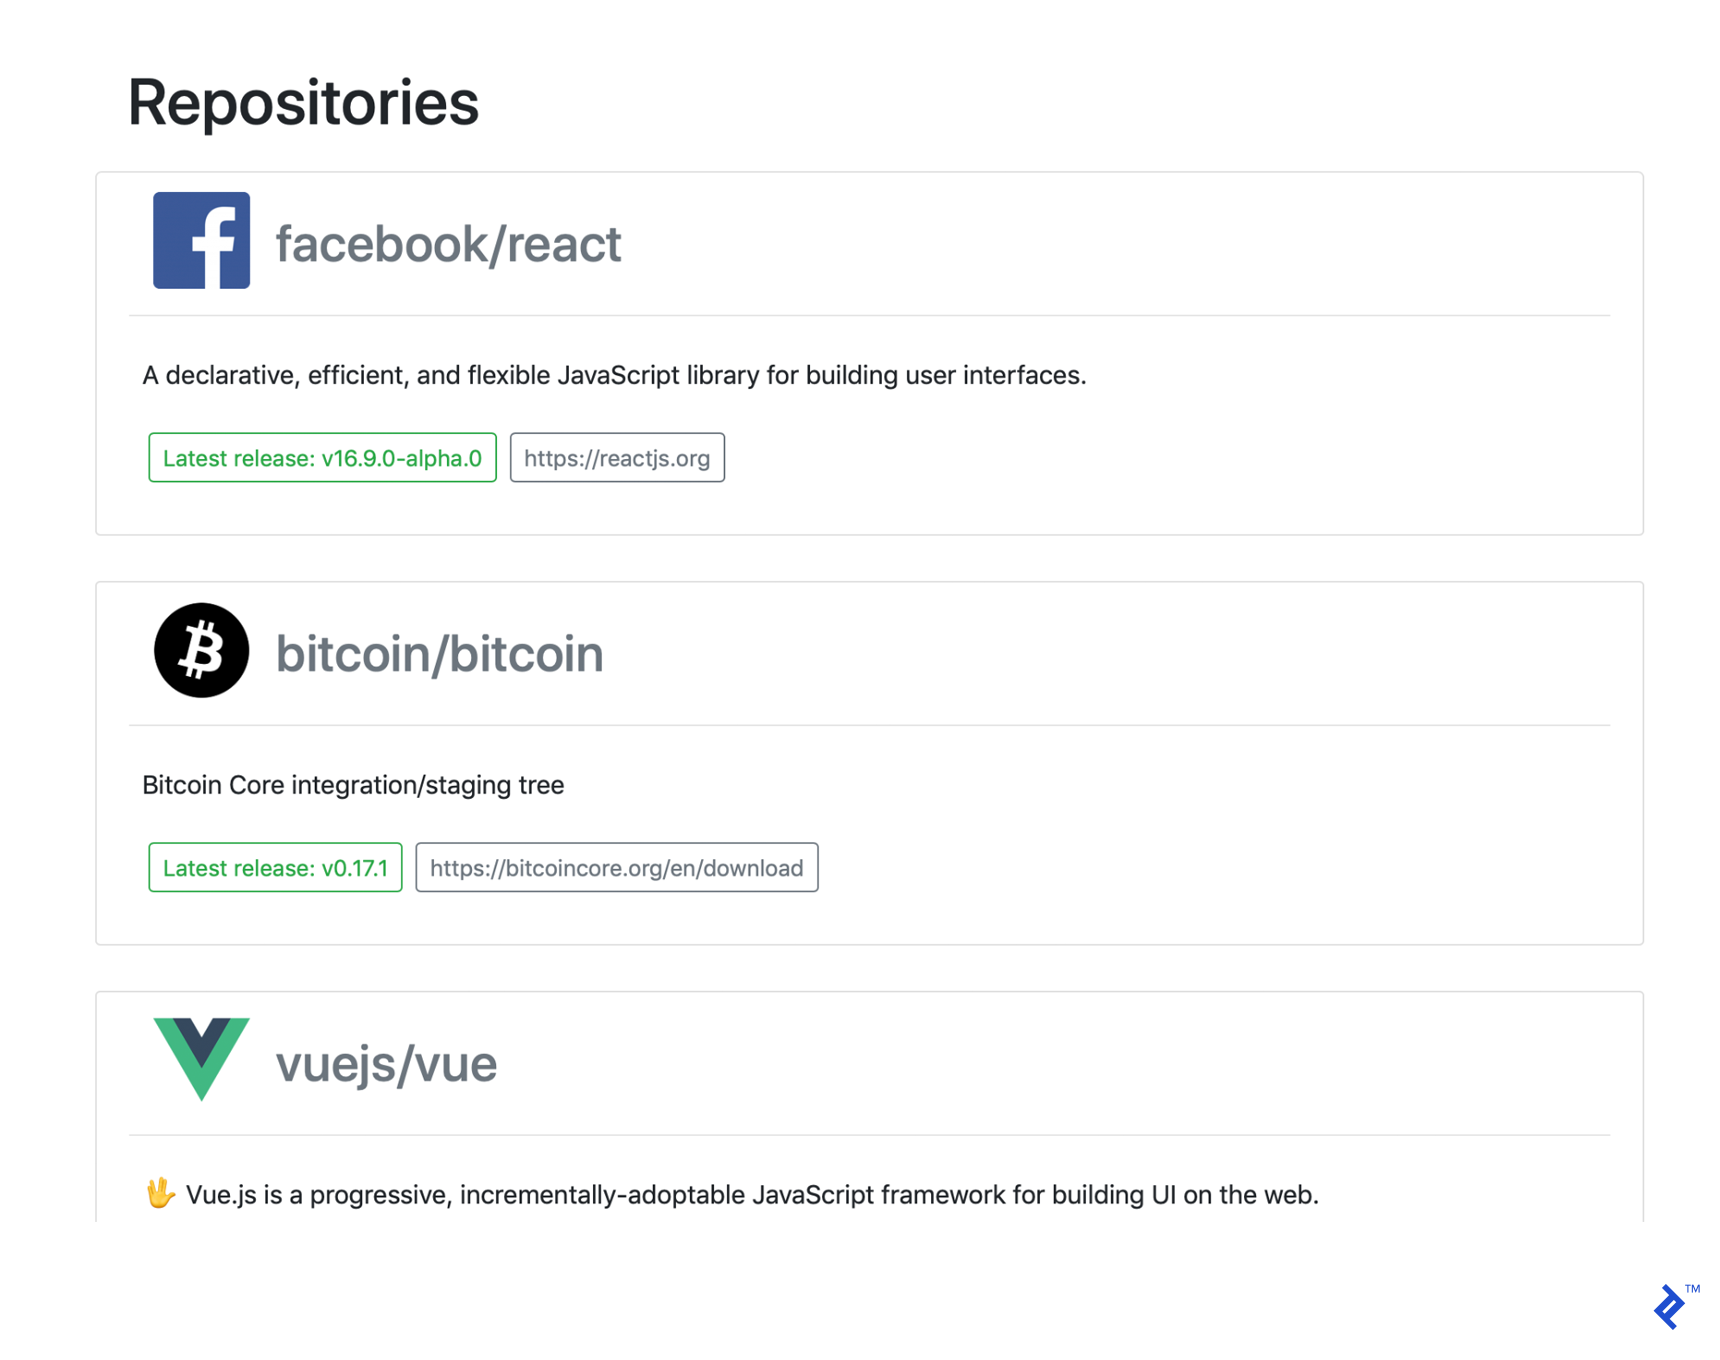
And after clicking one of the repositories, you should see something like this:
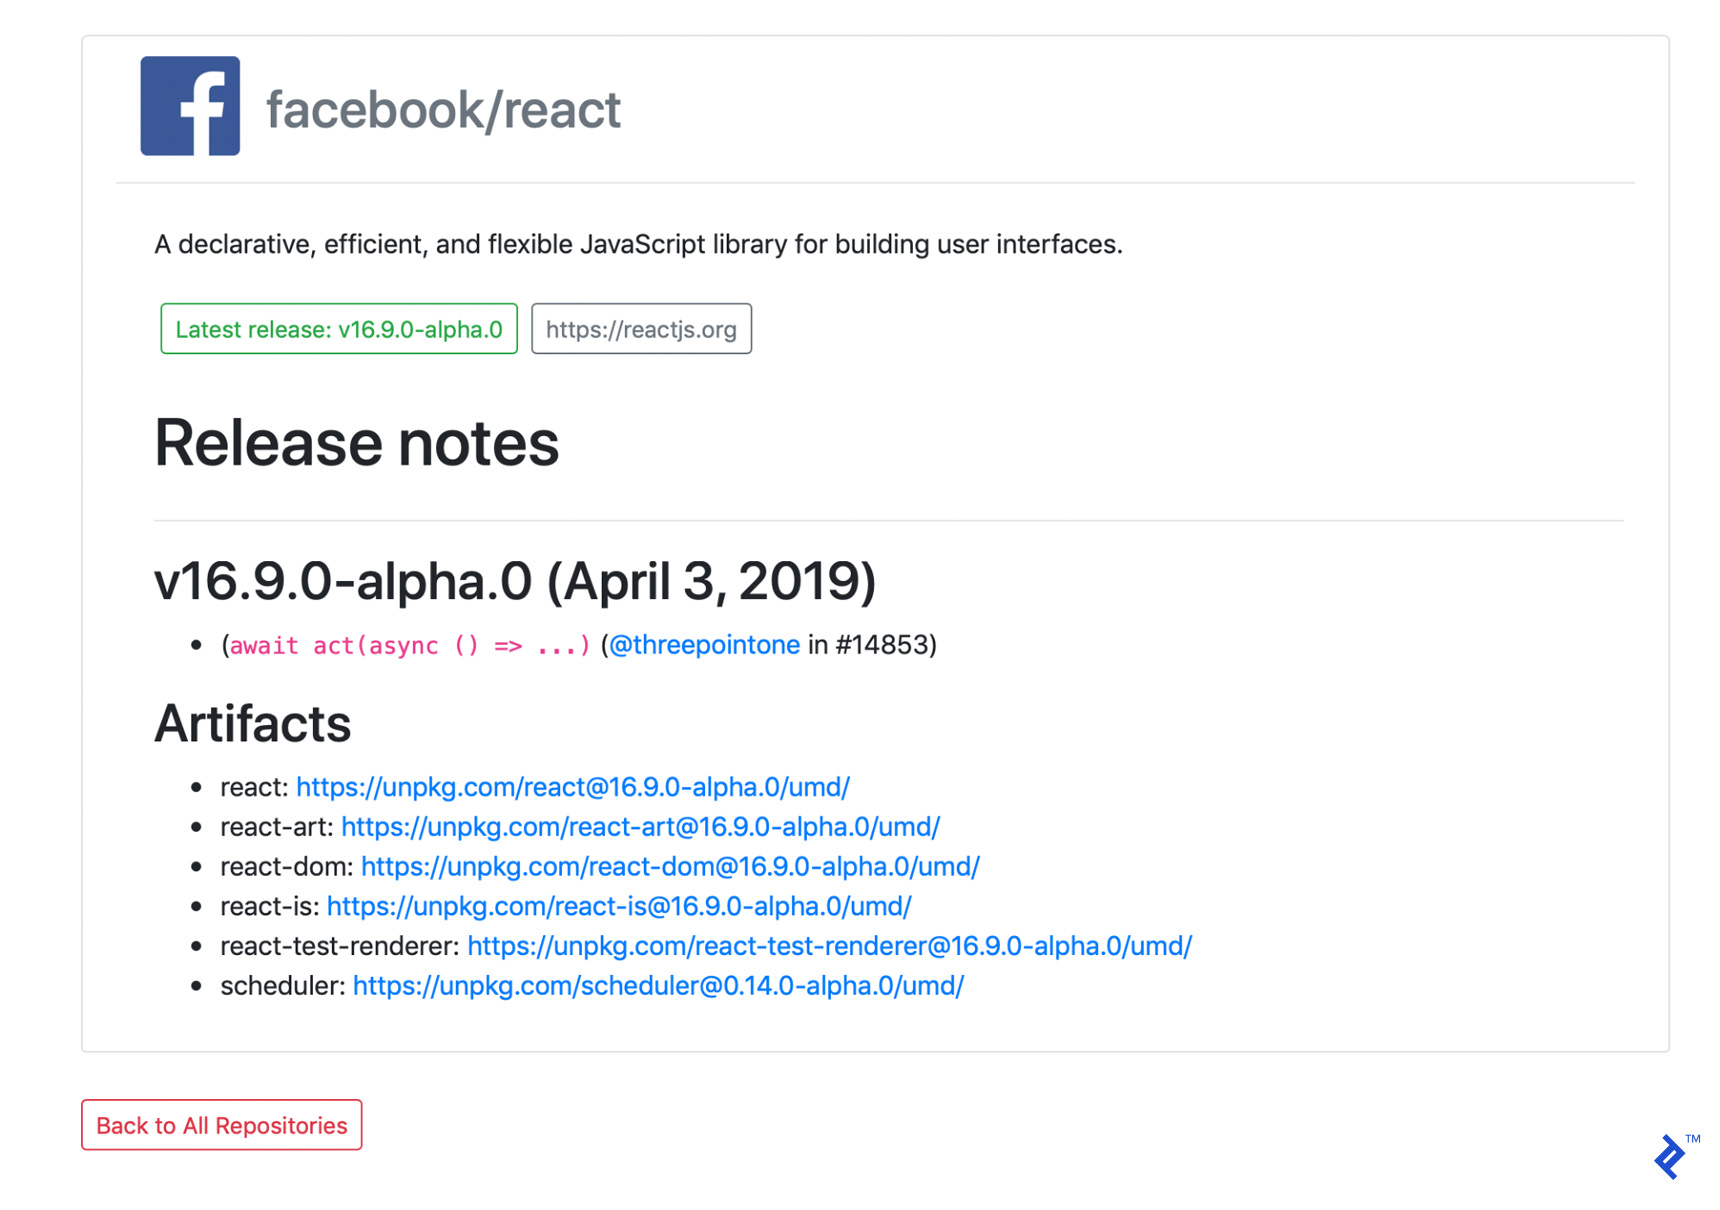
After our changes above, our front-end implementation is done.
Great! Now we just have to deploy.
Deploying the Front End
We don’t need to make any changes in our front-end application in this part. We will simply deploy it to Netlify—you’ll need an account there.
But first, we have to deploy our code to GitHub, GitLab, or Bitbucket. As with the back end, I deployed my code to GitHub.
Then, log into Netlify and click the “New site from Git” button on your dashboard. Follow the on-screen steps to select your Git provider and find your repository.
For the final step, if you structured your code correctly, Netlify will automatically set the build command and publish directory correctly as follows:
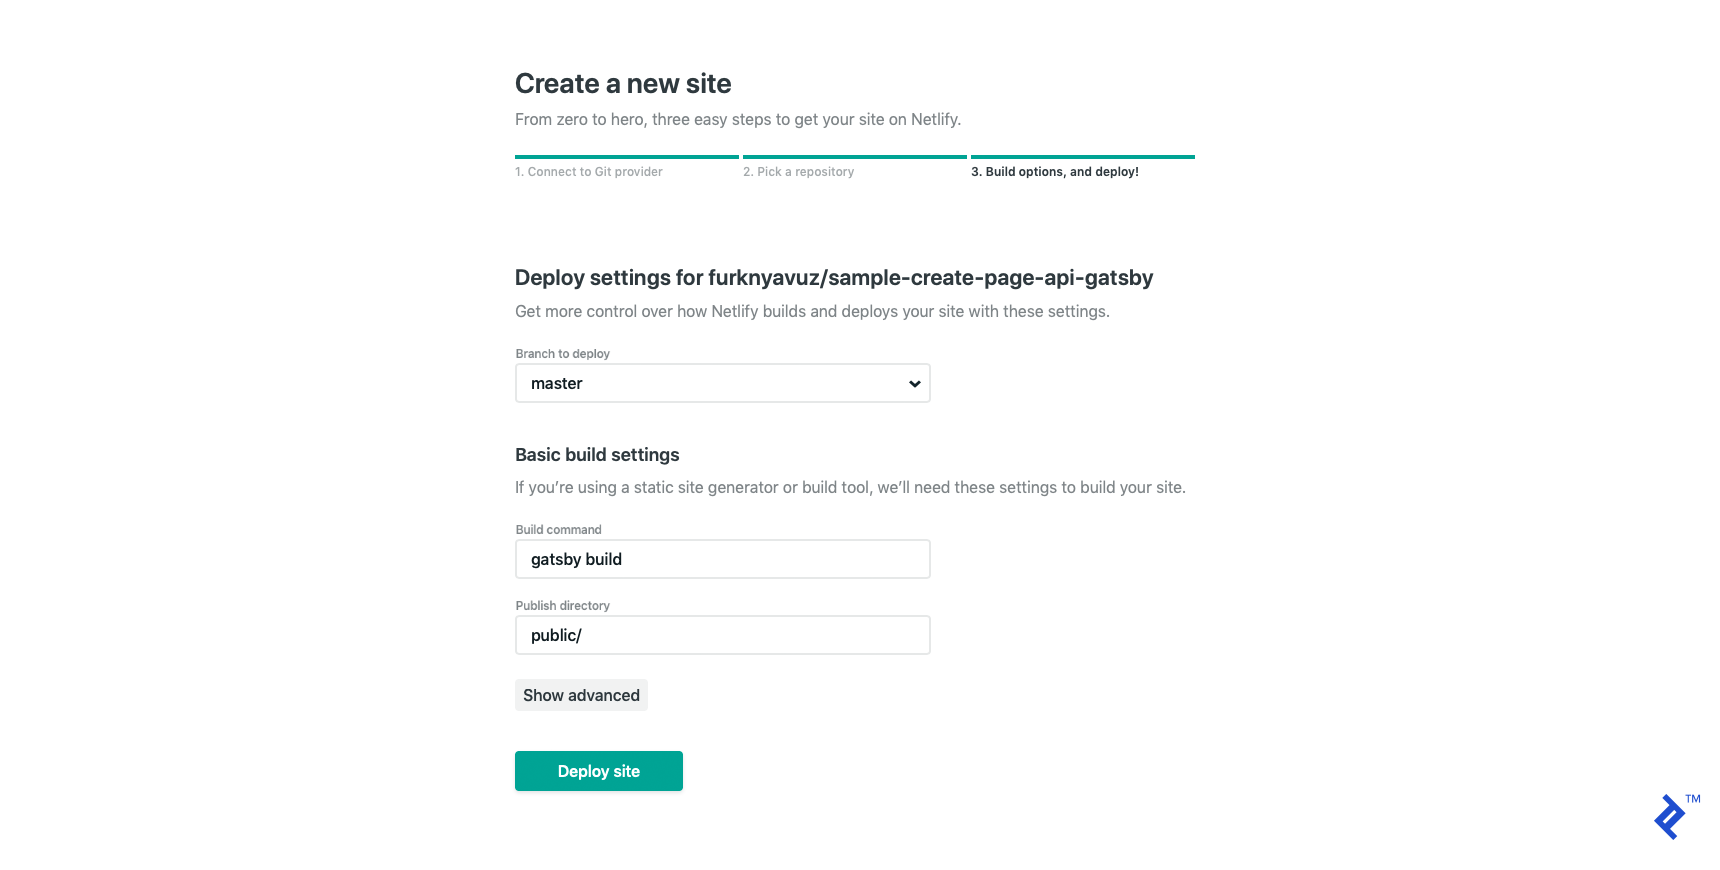
Then click “Deploy site.” It will deploy your site to a randomly generated Netlify subdomain, but you can change it any time—I changed my deployment to https://sample-create-page-api-gatsby.netlify.com, where you can find a live demo of the completed app.
So far, so good. But because it’s a static page application, we have to rebuild it daily to keep it up to date.
Daily Update Using a Build Hook
Build hooks in Netlify work as build triggers, so you can trigger them from your back end after the cron job finishes. In order to do that, first create a build hook in Netlify.
Under the “Build & deploy → Continuous Deployment” section, you can find “Build hooks.” Click “Add build hook.”
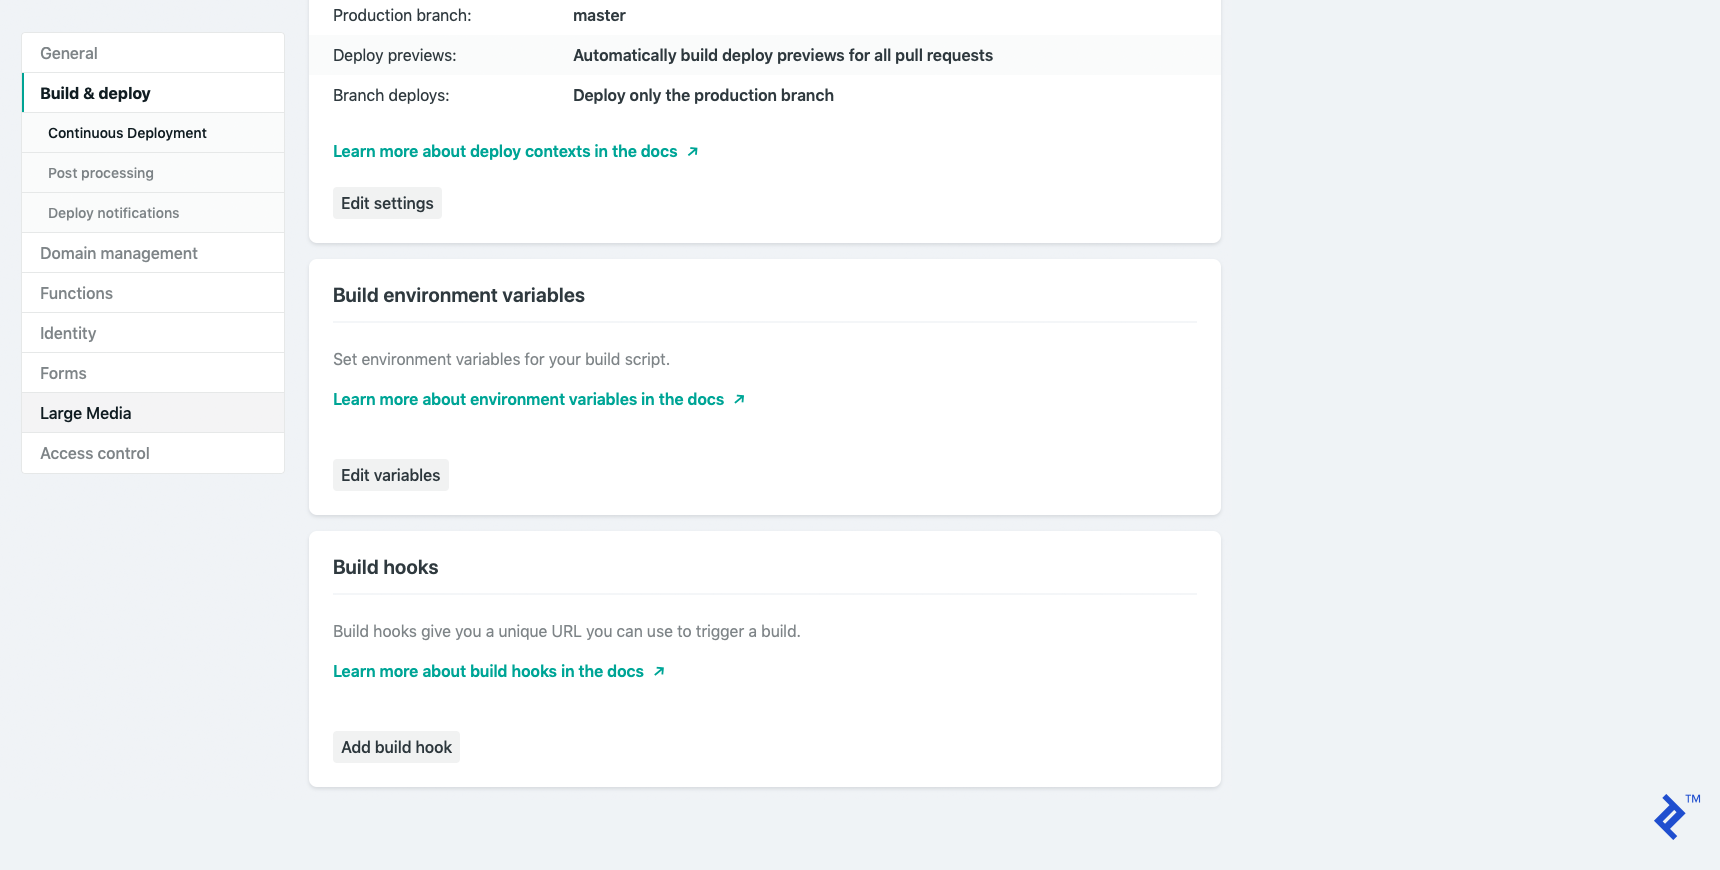
Give it a name and save it. (I called mine build-from-backend.) Then copy the link it generates.
Now let’s open our back-end project and add these few lines to the cron.controller.js file. We are simply sending a POST request to Netlify’s build-hook URL.
const Axios = require('axios');
const Config = require('../config/env.config');

const NETLIFY_BUILD_HOOK_URI = Config.netlifyEndpoint;

function updateGatsby() {

  if (NETLIFY_BUILD_HOOK_URI) {
    console.log('Gatsby build request will be send');

    Axios.post(NETLIFY_BUILD_HOOK_URI).then(() => {
      console.log('Gatsby build request was successful');
    });
  }
}
Then update our updateDaily function:
function updateDaily() {
  RepositoryController.updateRepositories().then(() => {
    updateGatsby();
  });
}
Finally, update our env.config.js file to set the netlifyEndpoint property to be gathered from environment variables:
"netlifyEndpoint": process.env.NETLIFY_BUILD_HOOK || ""
Now, you’ll need to set the NETLIFY_BUILD_HOOK environment variable you copied from Netlify a moment ago. In Heroku, you can set environment variables from the “settings” section of your application.
After pushing your commit, the back-end application will send a build request to Netlify and your pages will be updated daily, at the end of your cron job. Here’s what the repo should look like after adding the build hook functionality, along with the final versions of the back-end repo and the front-end repo.
As the finishing touch on the project, we’ll show how to use an AWS Lambda function triggered by AWS CloudWatch that will wake up your back end in time for each daily update.
AWS Lambda and AWS CloudWatch Simple Request
AWS Lambda is a serverless computing platform. We only need the very basics of this platform for our purposes here. You’ll need an AWS account.
First, log in to AWS with your account and find the Lambda Management Console. For example, for us-east-2, it can be found at https://us-east-2.console.aws.amazon.com/lambda/home.
If it’s not already selected, go to the “Functions” section:

Here, we will create our function from scratch by clicking “Create function.” Let’s give it an explanatory name. We will use Node.js as a runtime language. Then click the next “Create function” to finalize it.
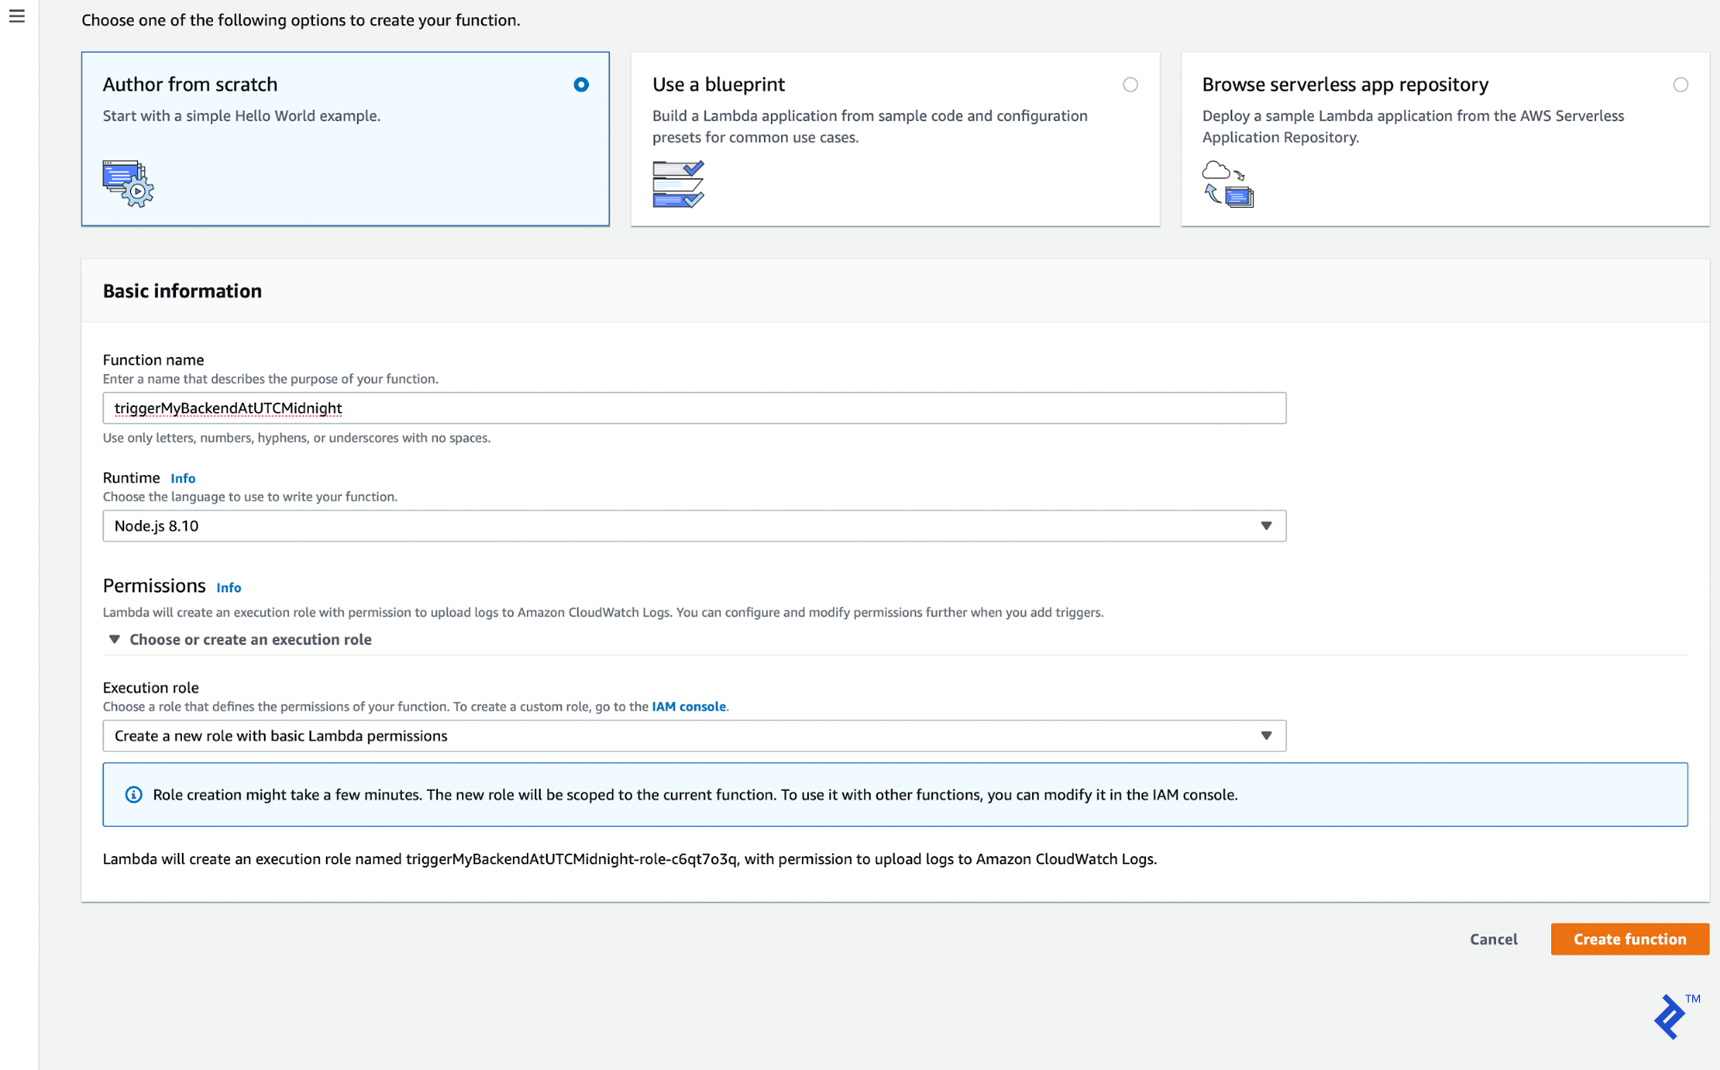
It will redirect us to the new function’s page where we can write our code in index.js.
Let’s implement our first lambda function. Because we don’t have any third-party dependencies, we have to use the core modules of Node.js. (If you want to enable third-party dependencies instead, please follow this guide from AWS.)
Make sure the exported method name (handler in this case) matches the “Handler” parameter in the page:

The rest of it is a simple GET request to your back end:
const https = require('https');

exports.handler = async (event) => {
  return new Promise((resolve, reject) => {
    https.get(process.env.HEROKU_APP_URL, (resp) => {
      let data = '';
      resp.on('data', (chunk) => {
        data += chunk;
      });

      resp.on('end', () => {
        resolve(JSON.parse(data));
      });
    }).on("error", (err) => {
      reject("Error: " + err.message);
    });
  });
};
Make sure you set the HEROKU_APP_URL environment variable in the page, and save your configuration:

One last step is adding a CloudWatch trigger rule to run this function ten minutes before each daily update—in this article series, that works out to 23:50:
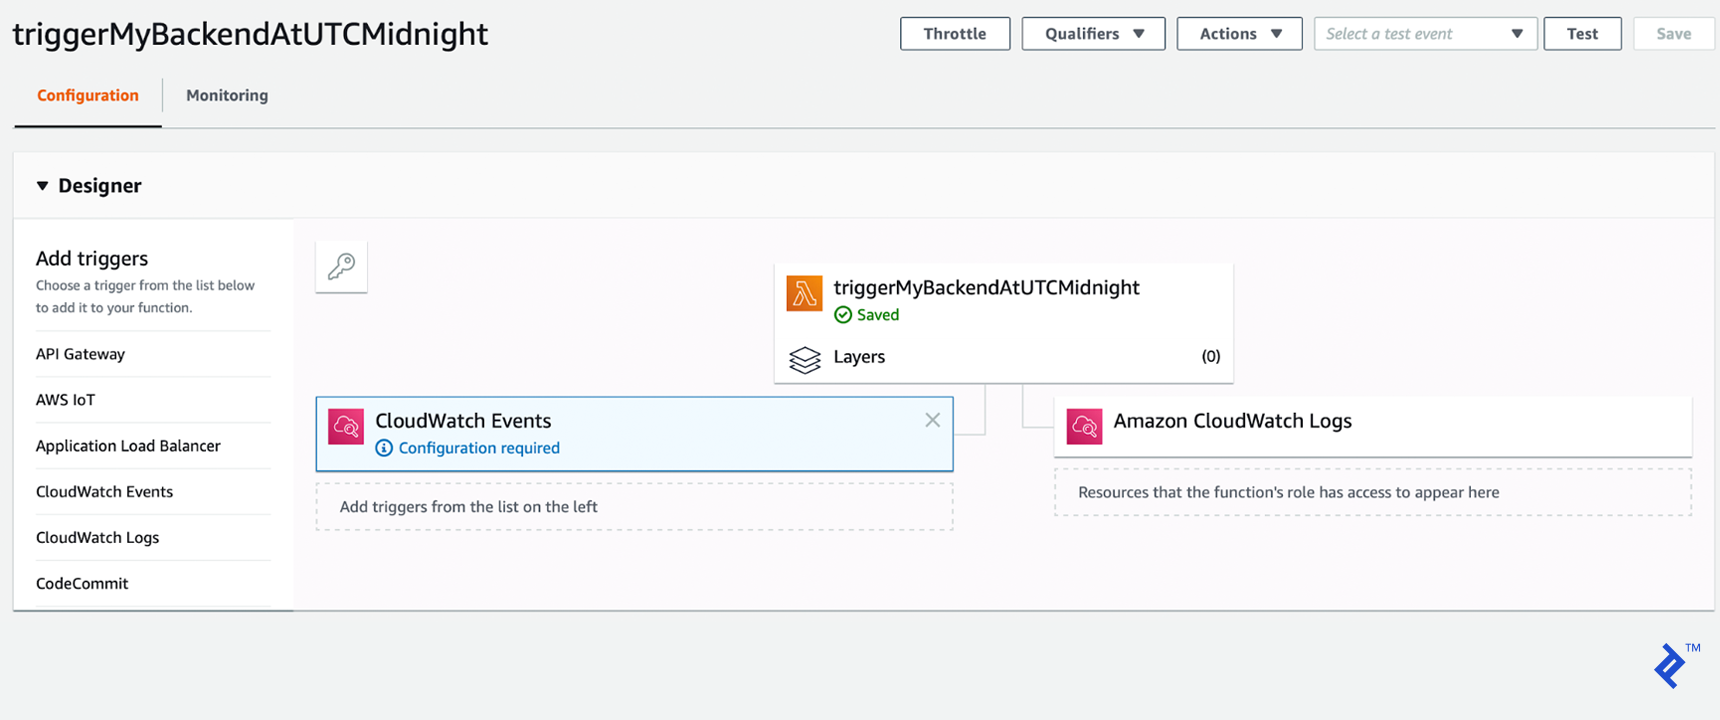
Our CloudWatch trigger rule type will be a “Schedule expression” and, according to the accepted format, our cron expression will be cron(50 23 * * ? *).
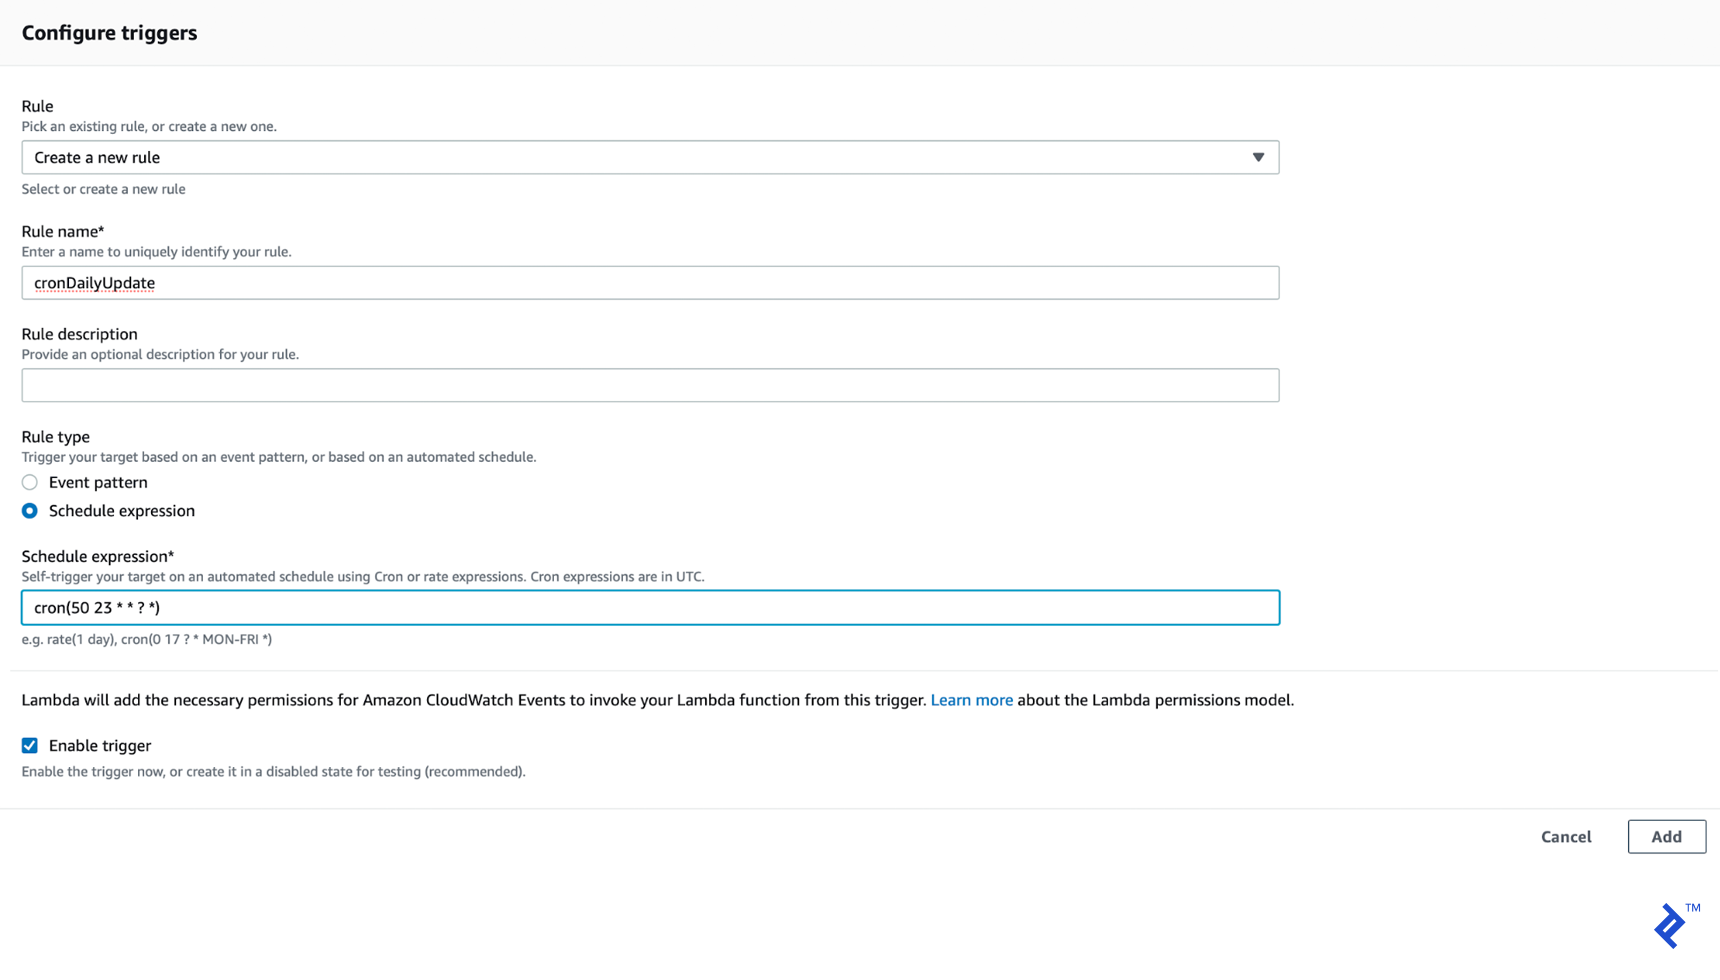
We’ve now configured our AWS Lambda function to be triggered by our CloudWatch rule.
Now Powering Our Static Web Pages: Gatsby/React and Netlify
With a dash of AWS Lambda/CloudWatch added to our Node.js/MongoDB/Heroku back end, and Gatsby and Netlify generating and hosting our front end, our app is complete!
I shared a live demo link earlier, but feel free to also check out an enhanced version of my prototype—it has some extra changes I know you’ll love.
You can use this as a blueprint for similar projects—I hope these articles will help you to prototype your apps in a faster and more cost-effective way. Thanks for reading!
Understanding the basics
What is Gatsby?
Gatsby.js (or simply “Gatsby”) is an open-source, React-based static site generation framework.
What is Netlify?
Netlify is a static site host, similar to GitHub Pages, but with some additional features.
What is a static site generator?
A static site generator creates a static website from a template using current data. The resulting site is very fast, but being able to generate it periodically means it can automatically stay up-to-date.
Furkan Yavuz
Istanbul, Turkey
Member since March 15, 2019
About the author
Furkan is an experienced full-stack developer who has worked remotely since 2016. His main expertise includes Java, Angular, and Heroku.
Expertise
PREVIOUSLY AT


