
Cabin Fever Coding: A Node.js Back-end Tutorial
Missing the luxury of a good, old-fashioned remote control when the laptop is beyond easy reach? Transform your old smartphone into a remote and learn some basic Node.js/Express/Pug along the way.
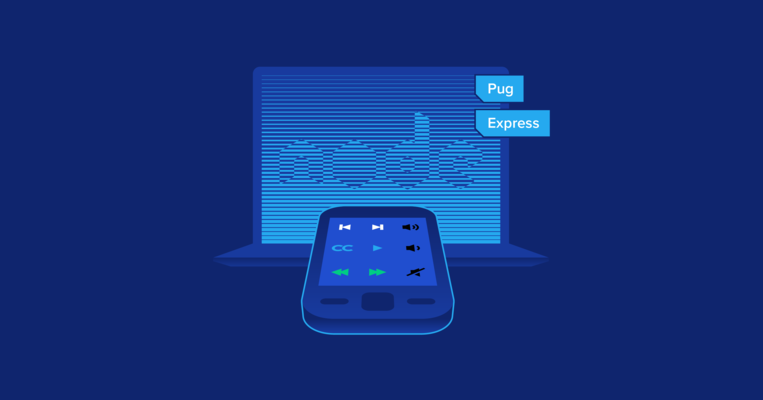
Missing the luxury of a good, old-fashioned remote control when the laptop is beyond easy reach? Transform your old smartphone into a remote and learn some basic Node.js/Express/Pug along the way.

Kevin has 20+ years among full-stack, desktop, and indie game development. He lately specializes in PostgreSQL, JavaScript, Perl, and Haxe.
Expertise
The COVID-19 lockdown has many of us stuck at home, perhaps hoping that mere cabin fever is the worst kind of fever we’ll experience. Many of us are consuming more video content than ever before. While exercise is especially important right now, sometimes, there’s nostalgia for the luxury of a good, old-fashioned remote control when the laptop is beyond easy reach.
That’s where this project comes in: The opportunity to transform any smartphone—even an old one that’s otherwise useless for lack of updates—into a handy remote for the next Netflix/YouTube/Amazon Prime Video/etc. binge-watch. It’s also a Node.js back-end tutorial: a chance to learn the basics of back-end JavaScript using the Express framework and the Pug (formerly Jade) template engine.
If that sounds daunting, the complete Node.js project will be presented at the end; readers need only learn as much as they’re interested in learning, and there will be a fair number of gentler explanations of some basics along the way that more experienced readers can skip.
Why Not Just...?
Readers may wonder, "Why get into coding a Node.js back end?" (Aside from the learning opportunity, of course.) "Isn't there already an app for that?"
Sure—plenty of them. But there are two major reasons this may not be desirable:
- For those trying to repurpose an older phone, this might simply not be an option anymore, as is the case with the Windows Phone 8.1 device I wanted to use. (The app store was officially shut down in late 2019.)
- Trust (or lack thereof). Like so many apps to be found on any mobile platform, they often come with the requirement of users granting far more permissions than the app needs for what it purports to do. But even if this aspect is appropriately limited, the nature of a remote control app means that users still have to trust that app developers aren't abusing their privileges on the desktop end of the solution by including spyware or other malware.
These issues have been around a long time and were even the motivation for a similar project from 2014 found on GitHub. nvm makes it easy to install older versions of Node.js, and even if a few dependencies needed upgrading, Node.js had a great reputation for being backward-compatible.
Unfortunately, bitrot won. An obstinate approach and Node.js back-end compatibility were no match for endless deprecations and impossible dependency loops among old versions of Grunt, Bower, and dozens of other components. Hours later, it was beyond clear that it would be much easier to start from scratch—this author's own advice against reinventing the wheel notwithstanding.
New Gizmos from Old: Repurposing Phones as Remote Controls Using a Node.js Back End
First off, note that this Node.js project is currently specific to Linux—developed and tested on Linux Mint 19 and Linux Mint 19.3, in particular—but support for other platforms could certainly be added. It may already work on a Mac.
Assuming a modern version of Node.js is installed, and a command prompt is open in a new directory that will serve as the project root, we’re ready to get started with Express:
npx express-generator --view=pug
Note: Here, npx is a handy tool that comes with npm, the Node.js package manager that ships with Node.js. We’re using it to run Express’ application skeleton generator. As of this writing, the generator makes an Express/Node.js project that, by default, still pulls in a template engine called Jade, even though the Jade project renamed itself to “Pug” from version 2.0 onward. So to be current and use Pug straightaway—plus, avoid deprecation warnings—we tack on --view=pug, a command-line option for the express-generator script being run by npx.
Once that’s done, we need to install some packages from our Node.js project’s newly populated dependency list in package.json. The traditional way to do this is to run npm i (i for “install”). But some still prefer the speed of Yarn, so if you have that installed, simply run yarn with no parameters.
In this case, it should be safe to ignore the (hopefully soon-to-be-fixed) deprecation warning from one of Pug’s sub-dependencies, so long as access is kept to an as-needed basis on the local network.
A quick yarn start or npm start, followed by navigating to localhost:3000 in a browser, shows that our basic Express-based Node.js back end works. We can kill it with Ctrl+C.
Node.js Back-end Tutorial, Step 2: How to Send Keystrokes on the Host Machine
With the remote part halfway done already, let’s turn our attention to the control part. We need something that can programmatically control the machine we’ll run our Node.js back end on, pretending it’s pressing keys on the keyboard.
For that, we’ll install xdotool using its official instructions. A quick test of their example command in a terminal:
xdotool search "Mozilla Firefox" windowactivate --sync key --clearmodifiers ctrl+l
…should do exactly what it says, assuming Mozilla Firefox is open at the time. That’s good! It’s easy to get our Node.js project to call command-line tools like xdotool, as we’ll soon see.
Node.js Back-end Tutorial, Step 3: Feature Design
This may not be true for everyone, but personally, I find that many modern physical remote controls have about five times as many buttons as I will ever use. So for this project, we’re looking at a full-screen layout with a three-by-three grid of nice, big, easy-to-target buttons. It’s up to personal preference what those nine buttons may be.
It turns out that the keyboard shortcuts for even the simplest functions are not identical across Netflix, YouTube, and Amazon Prime Video. Nor do these services work with generic media keys like a native music player app is likely to. Also, certain functions may not be available with all services.
So what we’ll need to do is define a different remote control layout for each service and provide a way to switch between them.
Defining Remote Control Layouts and Mapping Them to Keyboard Shortcuts
Let’s get a quick prototype working with a handful of presets. We’ll put them in common/preset_commands.js—“common” because we’ll include this data from more than one file:
module.exports = {
  // We could use ⏯️ but some older phones (e.g., Android 5.1.1) won't show it, hence ▶️ instead
  'Netflix': {
    commands: {
      '-': 'Escape',        '+': 'f',             '🔊': 'Up',
      '⇤': 'XF86Back',      '▶️': 'Return',        '🔉': 'Down',
      '⏪': 'Left',         '⏩': 'Right',        '🔇': 'm',
    },
  },
  'YouTube': {
    commands: {
      '⇤': 'shift+p',       '⇥': 'shift+n',       '🔊': 'Up',
      'CC': 'c',            '▶️': 'k',             '🔉': 'Down',
      '⏪': 'j',            '⏩': 'l',            '🔇': 'm',
    },
  },
  'Amazon Prime Video': {
    window_name_override: 'Prime Video',
    commands: {
      '⇤': 'Escape',        '+': 'f',              '🔊': 'Up',
      'CC': 'c',            '▶️': 'space',          '🔉': 'Down',
      '⏪': 'Left',         '⏩': 'Right',         '🔇': 'm',
    },
  },
  'Generic / Music Player': {
    window_name_override: '',
    commands: {
      '⇤': 'XF86AudioPrev', '⇥': 'XF86AudioNext',  '🔊': 'XF86AudioRaiseVolume',
      '🔀': 'r',            '▶️': 'XF86AudioPlay',  '🔉': 'XF86AudioLowerVolume',
      '⏪': 'Left',         '⏩': 'Right',         '🔇': 'XF86AudioMute',
    },
  },
};
The keycode values can be found using xev. (For me, the “audio mute” and “audio play” ones weren’t discoverable using this method, so I also consulted a list of media keys.)
Readers may notice the difference in case between space and Return—regardless of the reason for this, this detail must be honored for xdotool to work correctly. Related to this, we have a couple of definitions written explicitly—e.g., shift+p even though P would also work—just to keep our intentions clear.
Node.js Back-end Tutorial, Step 4: Our API’s “Key” Endpoint (Pardon the Pun)
We’ll need an endpoint to POST to, which in turn will simulate keystrokes using xdotool. Since we’ll have different groups of keys we can send (one for each service), we’ll call the endpoint for a particular one group. We’ll repurpose the generated users endpoint by renaming routes/users.js to routes/group.js, and making the corresponding changes in app.js:
// ...

var indexRouter = require('./routes/index');
var groupRouter = require('./routes/group');

// ...

app.use('/', indexRouter);
app.use('/group', groupRouter);

// ...
The key functionality is using xdotool via a system shell call in routes/group.js. We’ll hard-code YouTube as the menu of choice for the moment, just for testing purposes.
const express = require('express');
const router = express.Router();
const debug = require('debug')('app');
const cp = require('child_process');
const preset_commands = require('../common/preset_commands');

/* POST keystroke to simulate */
router.post('/', function(req, res, next) {

  const keystroke_name = req.body.keystroke_name;
  const keystroke_code = preset_commands['YouTube'].commands[keystroke_name];
  const final_command = `xdotool \
  search "YouTube" \
  windowactivate --sync \
  key --clearmodifiers ${keystroke_code}`;

  debug(`Executing ${final_command}`);
  cp.exec(final_command, (err, stdout, stderr) => {
    debug(`Executed ${keystroke_name}`);
    return res.redirect(req.originalUrl);
  });
});

module.exports = router;
Here, we grab the requested key “name” from the POST request’s body (req.body) under the parameter named keystroke_name. That’ll be something like ▶️. We then use that to look up the corresponding code from preset_commands['YouTube']’s commands object.
The final command is on more than one line, so the \s at the end of each line joins all the pieces into a single command:
-
search "YouTube"fetches the first window with “YouTube” in the title. -
windowactivate --syncactivates the fetched window and waits until it’s ready to receive a keystroke. -
key --clearmodifiers ${keystroke_code}sends the keystroke, making sure to temporarily clear modifier keys like Caps Lock that may interfere with what we’re sending.
At this point, the code assumes that we’re feeding it valid input—something we’ll be more careful about later.
For simplicity, the code will also assume that there’s only one application window open with “YouTube” in its title—if there’s more than one match, there’s no guarantee we’ll send keystrokes to the intended window. If that’s a problem, it may help that window titles can be changed simply by switching browser tabs on all windows besides the one to be remote-controlled.
With that ready, we can start our server again, but this time with debugging enabled so we can see the output of our debug calls. To do that, simply run DEBUG=old-fashioned-remote:* yarn start or DEBUG=old-fashioned-remote:* npm start. Once it’s running, play a video on YouTube, open another terminal window, and try a cURL call:
curl --data "keystroke_name=▶️" http://localhost:3000/group
That sends a POST request with the requested keystroke name in its body to our local machine on port 3000, the port our back end is listening on. Running that command should output notes about Executing and Executed in the npm window, and more importantly, bring up the browser and pause its video. Executing that command again should give the same output and unpause it.
Node.js Back-end Tutorial, Step 5: Multiple Remote-control Layouts
Our back end isn’t quite done. We’ll also need it to be able to:
- Produce a list of remote control layouts from
preset_commands. - Produce a list of keystroke “names” from once we’ve chosen a particular remote control layout. (We could also have chosen to use
common/preset_commands.jsdirectly on the front end, since it’s JavaScript already, and filtered there. That’s one of the potential advantages of a Node.js back end, we just don’t use it here.)
Both of these features are where our Node.js back-end tutorial intersects with the Pug-based front end we’ll be building.
Using Pug Templating to Present a List of Remote Controls
The back-end part of the equation means modifying routes/index.js to look like this:
const express = require('express');
const router = express.Router();
const preset_commands = require('../common/preset_commands');

/* GET home page. */
router.get('/', function(req, res, next) {
  const group_names = Object.keys(preset_commands);
  res.render('index', {
    title: 'Which Remote?',
    group_names,
    portrait_css: `.group_bar {
      height: calc(100%/${Math.min(4, group_names.length)});
      line-height: calc(100vh/${Math.min(4, group_names.length)});
    }`,
    landscape_css: `.group_bar {
      height: calc(100%/${Math.min(2, group_names.length)});
      line-height: calc(100vh/${Math.min(2, group_names.length)});
    }`,
  });
});

module.exports = router;
Here, we grab our remote control layout names (group_names) by calling Object.keys on our preset_commands file. We then send them and some other data we’ll need to the Pug template engine that’s automatically called via res.render().
Careful not to confuse the meaning of keys here with the keystrokes we’re sending: Object.keys gives us an array (an ordered list) containing all the keys of the key-value pairs that make up an object in JavaScript:
const my_object = {
  'a key': 'its corresponding value',
  'another key': 'its separate corresponding value',
};
If we look at common/preset_commands.js, we’ll see the above pattern, and our keys (in the object sense) are the names of our groups: 'Netflix', 'YouTube', etc. Their corresponding values aren’t simple strings as my_object has above—they’re entire objects themselves, with their own keys, i.e., commands and possibly window_name_override.
The custom CSS being passed here is, admittedly, a bit of a hack. The reason we need it at all instead of using a modern, flexbox-based solution is for better compatibility with the wonderful world of mobile browsers in their even more wonderful older incarnations. In this case, the main thing to note is that in landscape mode, we’re keeping buttons big by showing no more than two options per screenful; in portrait mode, four.
But where does that actually get turned into HTML to be sent to the browser? That’s where views/index.pug comes in, which we’ll want to look like this:
extends layout

block header_injection
  style(media='(orientation: portrait)') #{portrait_css}
  style(media='(orientation: landscape)') #{landscape_css}

block content
  each group_name in group_names
    span(class="group_bar")
      a(href='/group/?group_name=' + group_name) #{group_name}
The very first line is important: extends layout means that Pug will be taking this file in the context of views/layout.pug, which is sort of a parent template we’ll reuse here and also in another view. We’ll need to add a couple of lines after the link line so that the final file looks like this:
doctype html
html
  head
    title= title
    link(rel='stylesheet', href='/stylesheets/style.css')
    block header_injection
    meta(name='viewport', content='user-scalable=no')

  body
    block content
We won’t get into the basics of HTML here, but for readers unfamiliar with them, this Pug code mirrors standard-fare HTML code found just about everywhere. The templating aspect of it starts with title= title, which sets the HTML title to whatever value corresponding to the title key of the object we pass Pug via res.render.
We can see a different aspect of templating two lines later with a block we’re naming header_injection. Blocks like these are placeholders that can be replaced by templates that extend the current one. (Unrelated, the meta line is simply a quick workaround to mobile browsers, so when users tap the volume controls a bunch of times in a row, the phone refrains from zooming in or out.)
Back to our blocks: This is why views/index.pug defines its own blocks with the same names found in views/layout.pug. In this case of header_injection, this lets us use CSS specific to portrait or landscape orientations the phone will be in.
content is where we put the main visible part of the web page, which in this case:
- Loops through the
group_namesarray we pass it, - creates a
<span>element for each one with the CSS classgroup_barapplied to it, and - creates a link within each
<span>based on thegroup_name.
The CSS class group_bar we can define in the file pulled in via views/layout.pug, namely, public/stylesheets/style.css:
html, body, form {
  padding: 0;
  margin: 0;
  height: 100%;
  font: 14px "Lucida Grande", Helvetica, Arial, sans-serif;
}

.group_bar, .group_bar a, .remote_button {
  box-sizing: border-box;
  border: 1px solid white;
  color: greenyellow;
  background-color: black;
}

.group_bar {
  width: 100%;
  font-size: 6vh;
  text-align: center;
  display: inline-block;
}

.group_bar a {
  text-decoration: none;
  display: block;
}
At this point, if npm start is still running, going to http://localhost:3000/ in a desktop browser should show two very large buttons for Netflix and YouTube, with the rest available by scrolling down.

But if we click them at this point, they won’t work, because we haven’t yet defined the route they link to (the GETting of /group.)
Showing the Chosen Remote Control Layout
To do so, we’ll add this to routes/group.js just before the final module.exports line:
router.get('/', function(req, res, next) {
  const group_name = req.query.group_name || '';
  const group = preset_commands[group_name];

  return res.render('group', {
    keystroke_names: Object.keys(group.commands),
    group_name,
    title: `${group_name.match(/([A-Z])/g).join('')}-Remote`
  });
});
This will get the group name sent to the endpoint (e.g., by putting ?group_name=Netflix on the end of /group/), and use that to get the value of the commands from the corresponding group. That value (group.commands) is an object, and the keys of that object are the names (keystroke_names) we’ll display on our remote control layout.
Note: Inexperienced developers won’t need to get into the details of how it works, but the value for title uses a bit of regular expressions to turn our group/layout names into acronyms—for example, our YouTube remote will have the browser title YT-Remote. That way, if we’re debugging on our host machine before trying things out on a phone, we won’t have xdotool grabbing the remote control browser window itself, instead of the one we’re trying to control. Meanwhile, on our phones, the title will be nice and short, should we want to bookmark the remote control.
As with our previous encounter with res.render, this one is sending its data to mingle with the template views/group.pug. We’ll create that file and fill it with this:
extends layout

block header_injection
  script(type='text/javascript', src='/javascript/group-client.js')

block content
  form(action="/group?group_name=" + group_name, method="post")
    each keystroke_name in keystroke_names
      input(type="submit", name="keystroke_name", value=keystroke_name, class="remote_button")
As with views/index.pug, we’re overriding the two blogs from views/layout.pug. This time, it’s not CSS we’re putting in the header, but some client-side JavaScript, which we’ll get to shortly. (And yes, in a moment of persnicketiness, I renamed the incorrectly pluralized javascripts…)
The main content here is an HTML form made of a bunch of different submit buttons, one for each keystroke_name. Each button submits the form (making a POST request) using the keystroke name it’s displaying as the value it’s sending with the form.
We’ll also need a bit more CSS in our main stylesheet file:
.remote_button {
  float: left;
  width: calc(100%/3);
  height: calc(100%/3);
  font-size: 12vh;
}
Earlier, when we set up the endpoint, we finished handling the request with:
return res.redirect(req.originalUrl);
This effectively means that when the browser submits the form, the Node.js back end responds by telling the browser to go back to the page the form was submitted from—i.e., the main remote control layout. It would be more elegant without switching pages; however, we want maximum compatibility with the weird and wonderful world of decrepit mobile browsers. This way, even without any front-end JavaScript working at all, our Node.js back-end project should still function.
A Dash of Front-end JavaScript
The downside to using a form to submit keystrokes is that the browser has to wait, and then execute an extra round-trip: The page and its dependencies have to then be requested from our Node.js back end and delivered. Then, they need to be rendered again by the browser.
Readers might wonder how much of an effect this might have. After all, the page is tiny, its dependencies are extremely minimal, and our final Node.js project will be running over a local wifi connection. Should be a low-latency setup, right?
As it turns out—at least when testing on older smartphones running Windows Phone 8.1 and Android 4.4.2—the effect is unfortunately quite noticeable in the common case of rapidly tapping to raise or lower playback volume by a few notches. Here’s where JavaScript can help, without taking away from our graceful fallback of manual POSTs via HTML forms.
At this point, our final client JavaScript (to be put in public/javascript/group-client.js) needs to be compatible with old, no-longer-supported mobile browsers. But we don’t need much of it:
(function () {
  function form_submit(event) {
    var request = new XMLHttpRequest();
    request.open('POST', window.location.pathname + window.location.search, true);
    request.setRequestHeader("Content-Type", "application/x-www-form-urlencoded");
    request.send('keystroke_name=' + encodeURIComponent(event.target.value));
    event.preventDefault();
  }
  window.addEventListener("DOMContentLoaded", function() {
    var inputs = document.querySelectorAll("input");
    for (var i = 0; i < inputs.length; i++) {
      inputs[i].addEventListener("click", form_submit);
    }
  });
})();
Here, the form_submit function just sends the data via an asynchronous call, and the last line prevents the normal send behavior of browsers, whereby a new page loads based on the server response. The latter half of this snippet simply waits until the page loads and then hooks up every submit button to use form_submit. The whole thing is wrapped in an IIFE.
Final Touches
There are a number of changes to the above snippets in the final version of our Node.js back-end tutorial code, mostly for the purposes of better error handling:
- The Node.js back end now checks the names of groups and keystrokes sent to it to make sure they exist. This code is in a function that’s reused for both the
GETandPOSTfunctions ofroutes/group.js. - We make use of the Pug
errortemplate if they don’t. - The front-end JavaScript and CSS now make buttons temporarily outline in grey while waiting for a response from the server, green as soon as the signal went all the way through
xdotooland back without trouble, and red if anything didn’t work as expected. - The Node.js back end will print a stack trace if it dies, which will be less likely given the above.
Readers are welcome to peruse (and/or clone) the complete Node.js project on GitHub.
Node.js Back-end Tutorial, Step 5: A Real-world Test
It’s time to try it out on an actual phone attached to the same wifi network as the host that’s running npm start and a movie or music player. It’s just a matter of pointing a smartphone’s web browser to the host’s local IP address (with :3000 suffixed to it), which is probably easiest found by running hostname -I | awk '{print $1}' in a terminal on the host.
One problem Windows Phone 8.1 users might notice is that attempting to navigate to something like 192.168.2.5:3000 will give an error popup:

Thankfully, there’s no need to be discouraged: Simply prefixing with http:// or adding a trailing / gets it to fetch the address without further complaint.

Picking an option there should bring us to a working remote control.

For added convenience, users may want to adjust their router’s DHCP settings to always assign the same IP address to the host, and bookmark the layout selection screen and/or any favorite layouts.
Pull Requests Welcome
It’s likely that not everyone will like this project exactly as it is. Here are some ideas for improvements, for those wanting to dig further into the code:
- It should be straightforward to tweak the layouts or add new ones for other services, like Disney Plus.
- Maybe some would prefer a “light mode” layout and the option to switch between.
- Backing out of Netflix, since it’s non-reversible, could really use an “are you sure?” confirmation of some sort.
- The project would surely benefit from Windows support.
-
xdotool’s documentation does mention OSX—does this (or could this) project work on a modern Mac? - For advanced lounging, a way to search and browse through movies, instead of having to pick a single Netflix/Amazon Prime Video movie or create a YouTube playlist at the computer.
- An automated test suite, in case any of the suggested changes break the original functionality.
I hope you enjoyed this Node.js back-end tutorial and an improved media experience as a result. Happy streaming—and coding!
Further Reading on the Toptal Blog:
Understanding the basics
Yes. Node.js is a command-line program that runs JavaScript code and it’s typically used on a web host to serve up web pages, connect to databases, and so on.
Absolutely. Correctly architected, a Node.js back end can scale as well as any technology can. That said, it’s often integrated with other important components, like accessing an app’s database layer.
Express is a module for Node.js that reduces the amount of boilerplate code required to write common web server functionality. It has a mature sub-ecosystem of its own. Most Node.js web servers use Express.
Pug (formerly Jade) is a templating engine that integrates with Express. In fact, for years, it’s been the default template engine that the Express project generator includes in fresh projects.
The command-line program xdotool simulates keystrokes on the computer it’s running on. This project lets a phone perform such actions on a computer via a web page, turning it into a remote control.
Bergerac, France
Member since January 31, 2017
About the author
Kevin has 20+ years among full-stack, desktop, and indie game development. He lately specializes in PostgreSQL, JavaScript, Perl, and Haxe.