
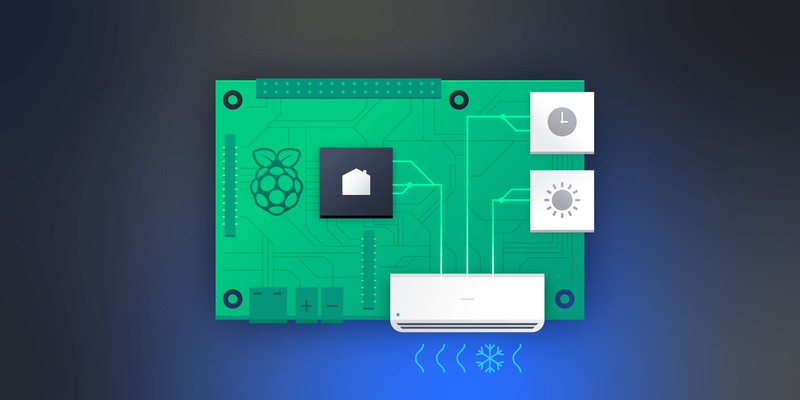
Control Your Climate With This Raspberry Pi Thermostat Tutorial
Smart homes are the future, but what do you do if you have an old air conditioner or heater in your home? Replacing old devices isn’t always feasible, but you can automate them with a Raspberry Pi.
Smart homes are the future, but what do you do if you have an old air conditioner or heater in your home? Replacing old devices isn’t always feasible, but you can automate them with a Raspberry Pi.

Ovidiu-Nicu is a full-stack developer with extensive experience in PHP, JavaScript, and Linux administration. He has developed a number of WordPress plug-ins, large-scale apps, and performance-optimized MySQL procedures.
Expertise
The air conditioning in many homes lacks modern niceties like central automation, programmable thermostats, multiple sensors, or Wi-Fi control. But older air-conditioning tech is still reliable, so in many cases, it’s unlikely to be upgraded soon.
That, however, requires users to frequently interrupt work or sleep to turn an air conditioner on or off. This is particularly true in houses with tight layouts, like mine:

US homes commonly have central air conditioning, but this isn’t the case globally. Not having central AC limits automation options, making it more difficult to achieve the same temperature throughout the whole home. In particular, it makes it hard to avoid temperature fluctuations that may require manual intervention to address.
As an engineer and Internet of Things (IoT) enthusiast, I saw an opportunity to do a few useful things at once:
- Help conserve energy by improving the efficiency of my stand-alone air-conditioning unit
- Make my home more comfortable through automation and Google Home integration
- Customize my solution exactly the way I wanted it, instead of being limited to commercially available options
- Brush up on some of my professional skills, using tried and tested hardware
My air conditioner is a basic device with a simple infrared remote control. I was aware of devices that enable air-conditioning units to be used with smart home systems, such as Sensibo or Tado. Instead, I took a DIY approach and created a Raspberry Pi thermostat, allowing for more sophisticated control based on sensor input from various rooms.
Raspberry Pi Thermostat Hardware
I was already using several Raspberry Pi Zero Ws, coupled with DHT22 sensor modules, to monitor the temperature and humidity in different rooms. Because of the segmented floor plan, I installed the sensors to monitor how warm it was in different parts of my house.
I also have a home surveillance system (not required for this project) on a Windows 10 PC with WSL 2. I wanted to integrate the sensor readings into the surveillance videos, as a text overlay on the video feed.
Wiring the Sensor
The sensors were straightforward to wire, having only three connections:

I used Raspberry Pi OS Lite, installing Python 3 with PiP and the Adafruit_DHT library for Python to read the sensor data. It’s technically deprecated but simpler to install and use. Plus, it requires fewer resources for our use case.
I also wanted to have a log of all the readings so I used a third-party server, ThingSpeak, to host my data and serve it via API calls. It’s relatively straightforward, and since I did not need real-time readings, I opted to send data every five minutes.
import requests
import time
import random
import Adafruit_DHT
KEY = 'api key'
def pushData(temp:float, hum:float):
        '''Takes temp and humidity and pushes to ThingsSpeak'''
        url = 'https://api.thingspeak.com/update'
        params = {'api_key': KEY, 'field5': temp, 'field6': hum}
        res = requests.get(url, params=params)
def getData(sensor:int, pin:int):
    '''
    Input DHT sensor type and RPi GPIO pin to collect a sample of data

    Parameters:
    sensor: Either 11 or 22, depending on sensor used (DHT11 or DHT22)
    pin: GPIO pin used (e.g. 4)
    '''
    try:
        humidity, temperature = Adafruit_DHT.read_retry(sensor, pin)
        return humidity, temperature
    except:
        Exception("Error reading sensor data")
        return False
if __name__ == "__main__":
    sensor = 22    # Change to 11 if using DHT11
    pin = 4 # I used GPIO pin 4
    while True:
        h, t = getData(sensor, pin)
        pushData(t, h)
        time.sleep(300)
On my dedicated surveillance PC, running WSL 2, I set up a PHP script that fetches the data from ThingSpeak, formats it, and writes it in a simple .txt file. This .txt file is needed for my surveillance software to overlay it on top of the video stream.
Because I had some automation in the house already, including smart light bulbs and several routines in Google Home, it followed that I would use the sensor data as a smart thermostat in Google Home. My plan was to create a Google Home routine that would turn the air conditioning on or off automatically based on room temperature, without the need for user input.

Pricier all-in-one solutions like those from Sensibo and Tado require less technical setup, but for a fraction of the cost, the PNI SafeHome PT11IR enabled me to use my phone to control any number of infrared devices within its range. The control app, Tuya, integrates with Google Home.
Overcoming Google Home Integration Issues
With a smart-enabled air conditioner and sensor data available, I tried to get the Raspberry recognized as a thermostat in Google Home but to no avail. I was able to send the sensor data to Google IoT Cloud and its Pub/Sub service, but there was no way to send it to Google Home to create a routine based on that data.
After pondering this for a few days, I thought of a new approach. What if I didn’t need to send the data to Google Home? What if I could check the data locally and send a command to Google Home to turn the air conditioner on or off? I tested voice commands with success, so this approach seemed promising.
A quick search turned up Assistant Relay, a Node.js-powered system that enables a user to send commands to Google Assistant, allowing the user to tie anything to Google Assistant as long as it knows what to do with the input it receives.
Even better, with Assistant Relay, I could end commands to my Google Assistant by simply sending POST requests to the device running the Node.js server (in this case, my Raspberry Pi Zero W) with some required parameters. That’s it. The script is well documented so I won’t get into much detail here.
Since the sensor data was already being read on the surveillance PC, I figured I could integrate the request into the PHP script to keep things in one place.
Since you likely don’t have the .txt file requirement, you can simplify the process by directly reading the sensor data and issuing commands based on that data to the Google Assistant Service, via Assistant Relay. All of this can be done from a single Raspberry Pi device, without the need for additional hardware. However, as I already had completed half of the work, it made sense to use what I had. Both scripts in this article can be used on a single machine; furthermore, the PHP script can be rewritten in Python, if needed.
Setting Conditions and Automating Operation
I wanted the automatic power cycling to happen only during nighttime, so I defined the hours for which I wanted to automate operation—10 PM to 7 AM—and set the preferred temperature. Identifying the correct temperature intervals—to achieve a comfortable range without shortening the life span of the air-conditioning unit by cycling its power too often—required a few tries to get it right.
The PHP script that created the sensor data overlay was set up to run every five minutes via a cron job, so the only things I added to it were the conditions and the POST request.
However, this created an issue. If the conditions were met, the script would send a “turn on” command every five minutes, even if the air conditioning was already on. This caused the unit to beep annoyingly, even on the “turn off” command. To fix this, I needed a way to read the current status of the unit.
Elegance wasn’t a priority, so I made a JSON file containing an array. Whenever the “turn on” or “turn off” commands would complete successfully, the script would then append the last status to this array. This solved redundancy; however, particularly hot days or excessive heating during the winter could cause the conditions to be met again. I decided a manual override would suffice in these situations. I’ll leave adding a return before the switch snippet to this end as an exercise for the reader:
<?php

switch(true)
{
    case $temperature > 27:
        turnAc('on');
        break;
    case $temperature < 24:
        turnAc('off');
        break;
}

function turnAc($status)
{
    $command = 'turn on hallway ac'; // hallway ac is the Google Home device name for my AC
    if ($status == 'off')
    {
        $command = 'turn off hallway ac';
    }

    if ($status == 'on' && checkAc() == 'on')
    {
        return;
    }

    if ($status == 'off' && checkAc() == 'off')
    {
        return;
    }

    $curl = curl_init();
    curl_setopt_array($curl, array(
      CURLOPT_URL => 'local assistant server ip',
      CURLOPT_RETURNTRANSFER => true,
      CURLOPT_ENCODING => '',
      CURLOPT_MAXREDIRS => 10,
      CURLOPT_TIMEOUT => 0,
      CURLOPT_FOLLOWLOCATION => true,
      CURLOPT_HTTP_VERSION => CURL_HTTP_VERSION_1_1,
      CURLOPT_CUSTOMREQUEST => 'POST',
      CURLOPT_POSTFIELDS =>'{
        "command": '.$command.',
        "converse": false,
        "user": "designated user"
        }',
      CURLOPT_HTTPHEADER => array(
        'Content-Type: application/json'
      ),
    ));

    $response = curl_exec($curl);
    curl_close($curl);
    $obj = null;

    try {
        $obj = json_decode($response);
    } catch (Exception $e) {
    }

    if (!$obj || $obj->success != true)
    {
        markAc($status == 'on' ? 'off' : 'on'); // if error, mark it as opposite status
        return;
    }

    markAc($status);
}

function markAc($status)
{
    $file = __DIR__ . "/markAc.json";
    $json = json_decode(file_get_contents($file), true);
    $json[] = array(date('F j, Y H:i:s'), $status);

    $handler = fopen($file, "w") or die("Unable to open file!");
    $txt = json_encode($json);
    fwrite($handler, $txt);
    fclose($handler);
}

function checkAc()
{
    $file = __DIR__ . "/markAc.json";
    $json = json_decode(file_get_contents($file), true);
    $end = array_pop($json);
    return $end[1];
}
This worked but not on the first attempt. I had to figure out things along the way and tweak them as needed. Hopefully, with the benefit of my experience, you won’t need to do as much to get it right the first time.
The Value of a Raspberry Pi Thermostat Controller
I was motivated to automate my air conditioning because the unconventional layout of my home sometimes resulted in vastly different temperatures in different rooms. But automating heating and cooling has benefits even for those who don’t face this particular issue.
People across the world live in various climates and pay different prices for energy (and different rates at different times of the day), so even modest improvements in energy efficiency can make automation worthwhile in certain regions.
Furthermore, as more and more homes become automated, there is reason to explore the potential of automating older power-hungry devices and appliances such as air conditioners, electric heaters, and water heaters. Because these devices are typically bulky, difficult to install, and expensive to upgrade, many people will be stuck with them for years to come. Making these “dumb” devices a bit smarter can not only improve comfort and energy efficiency but also extend their life spans.
- How to repurpose your old smartphone as a remote control
Further Reading on the Toptal Blog:
Understanding the basics
Smart thermostats are better than regular thermostats in terms of flexibility. They can take into account the time of day, season, and sensor data, particularly humidity. Smart thermostats also integrate with mobile devices and Google Home or Amazon Alexa.
You can use a Raspberry Pi in many ways, from a fully working PC (in a workshop, for instance) to a gaming console (retroPi). You can also create systems for monitoring your home, plants, hand-held devices, and more. The only limit—besides the power supply—is your imagination.
Those that are equipped with Wi-Fi suffer from signal degradation. The hungry power adapter also causes batteries to run out quickly if you go portable, but you can always use a high-capacity power bank.
It all depends what other version you compare it to. A Pi Zero is smaller but has less RAM and the CPU is a bit slower. The 3B+ is quite powerful for its size, having a 1.4 GHz CPU and 1GB of RAM, gigabit Ethernet, Wi-Fi, four USB 2.0 ports, full HD HDMI, PINOUT for expansion, and camera ports.
The Raspberry Pi 3B+ is an upgraded version of the 3B, offering gigabit Ethernet speeds, newer Wi-Fi bands, a step up in processor speed from 1.2 GHz to 1.4 GHz, a Bluetooth upgrade, and the ability to be powered over an Ethernet connection via a PoE hat (available as a separate module).
Târgoviște, Dâmbovița County, Romania
Member since May 30, 2018
About the author
Ovidiu-Nicu is a full-stack developer with extensive experience in PHP, JavaScript, and Linux administration. He has developed a number of WordPress plug-ins, large-scale apps, and performance-optimized MySQL procedures.